Charting your next safar...
Travel journal & planning service

Your Safar,
Our
Blueprint.

Your journey, architected.

We document every trip we take — day by day, dollar by dollar. And when you're ready to plan yours, we engineer the route. Real itineraries. Zero guesswork.

Road Trip · USA
California 🌉
12 days
Planning
Yellowstone 🌲
Planning stage
Coming Soon
Custom Itinerary 🗺️
Planning service · In the works
Resource Hub
Visa + Permits 📋
Free guides
Custom ItinerariesVisa Tips for IndiansVisa Travel TipsBudget PlanningNational Park PermitsVegetarian-Friendly RoutesUSA Road TripsIndia DomesticCredit Card Strategy Custom ItinerariesVisa Tips for IndiansVisa Travel TipsBudget PlanningNational Park PermitsVegetarian-Friendly RoutesUSA Road TripsIndia DomesticCredit Card Strategy
What we do

Two things.
Done really well.

01
📓

We Log Our Journeys

Every trip Tushar & Ketaki take gets documented here in full — day by day, with real costs, real mistakes, permit logistics, the best food spots for Indian taste buds, and the stuff no travel blog covers.

02
🗺️

We Plan Yours

Tell us your destination, budget, dates, dietary needs, and visa situation. We build a complete day-by-day itinerary — tailored, practical, and ready to execute. No generic Google results.

Latest from the journal

Live Itinerary

California Road Trip
Road Trip · USA

California: SF → Yosemite → Tahoe → Sequoia

12 days through Northern California. Day-by-day with real costs, park permit strategy, food spots that actually satisfy, and remote work logistics built in.

🗓 12 Days👫 Couple💰 ~$3,500
Stops
🌉 San Francisco
🌊 Lake Tahoe
🏔️ Yosemite NP
🌲 Sequoia NP
🏞️ Kings Canyon NP
Also logged
🏜️
Utah's Big Five + Vegas
6 Days · Road Trip
View Trip →
♨️
Glenwood Springs
6 Days · Winter Escape
View Trip →
💦
Niagara Falls
1–2 Days · Day Trip
View Trip →
🇨🇦
Quebec City + Montreal
5 Days · Birthday Trip
View Trip →
🌆
Dubai
4 Days · Surprise Trip
View Trip →
🌴
Orlando → Miami → Key West
7 Days · Birthday Trip
View Trip →
🌌
Acadia National Park
3 Days · Tent Camping
View Trip →
🏔️
Seattle + Olympic + Cascades
4 Days · PNW
View Trip →
🎰
Atlantic City
2 Days · Couple Escape
View Trip →
🏙️
Chicago
2 Days · City Trip
View Trip →
⛷️
Colorado — Valentine's
6 Days · Couple
View Trip →
🏔️
Glacier National Park
4 Days · Family Group
View Trip →
🌌
Alaska
4 Days · Birthday Trip
View Trip →
🌉
California — Family Trip
9 Days · 7 People
View Trip →
🏜️
Breaks Interstate Park
3 Days · Canyon Camping
View Trip →
💧
Devil's Bathtub, VA
3 Days · Couple
View Trip →
🏕️
Poconos — July 4th
3 Days · Camping
View Trip →
🌊
Blackwater Falls, WV
2 Days · Easy Drive
View Trip →
🚀
Houston
2 Days · Bros Trip
View Trip →
🦬
Wyoming → Mt Rushmore
6–7 Days · Bros Trip
View Trip →
🌲
Yellowstone & Grand Teton
Campervan
Planning
🏔️
California Road Trip
SF → Yosemite → Sequoia
Coming Soon
Dreaming about
⛷️
Austria — Innsbruck
Alps · Ski Trip
Dreaming About
🗾
Japan
Tokyo · Kyoto · Osaka
Dreaming About

"Every great journey starts with a blueprint —
and ends with a story worth logging."

— The Safar Blueprint, somewhere at 35,000 ft

For curious travellers

The Safar Guide

The practical stuff no generic travel blog covers — visa and travel logistics, finding food that actually satisfies when you're far from home, credit card strategy, national park permits, and how to build a trip around your actual life constraints.

01
🛂
Visa Strategy

Visa-free countries, Schengen stacking, and the exact documents that work at US consulates.

Read →
02
🍽️
Food for Indian Palates

Where to find food that actually satisfies abroad — we eat everything, and we always track down the best local spots. Veg options listed too.

Read →
03
✈️
Visa Travel Tips

Exactly what to carry, visa stamp situations, and how to plan trips without re-entry anxiety.

Read →
04
💳
Budget & Points Hacks

Chase Sapphire strategy, travel credits, and how we cover $6K+ of travel annually through rewards.

Read →
05
🏕️
National Park Permits

Recreation.gov timed-entry permits, lottery systems, and the booking timeline for every major park.

Read →
06
🗺️
Planning Like Engineers

The spreadsheet system, booking timelines, and the itinerary template we use every single time.

Read →
SAFAR

He plans.
She captures.
You explore.

Tushar obsessively engineers every detail — permits booked the moment they drop, spreadsheets 8 tabs deep, backup restaurants sorted by walking distance. Ketaki shows up, finds the angles nobody else sees, and makes every moment worth photographing. Together they've built a travel system sharp enough to turn into a service.

The The Safar Blueprint started as their personal journal. Now it's a place for anyone who travels seriously — whether you're navigating a visa situation, trying to find food that actually satisfies when you're thousands of miles from home, or figuring out which parks need lottery permits.

0+Countries
0+Trips Logged
Spreadsheet tabs
Logged Trips

Our
Itineraries

Every trip, fully documented. One live now — more dropping soon.

Dubai
International · UAE
Dubai — The Layover That Became Everything
🗓 4 days💑 CoupleView Trip →
Atlantis on points, Kashkan by Ranveer Brar, Museum of the Future, desert safari, overnight camp.
Quebec City
Canada
Quebec City + Montreal
🗓 5 days👥 Squad of 4View Trip →
Old Montreal cobblestones, Notre-Dame, Mount Royal hike, Fairmount bagels, French café culture.
Florida Keys
Road Trip · USA
Orlando → Miami → Key West
🗓 7 days👥 Squad of 4View Trip →
Disney, Universal Harry Potter, Overseas Highway, Key West golf cart, Mallory Square birthday sunset.
Acadia
Camping · USA
Acadia National Park — Tents, Stars & Lobster
🗓 3 days🏕️ Tent campingView Trip →
Blackwoods Campground, Milky Way stargazing, lobster rolls in Bar Harbor, Jordan Pond hike.
Seattle
Road Trip · USA
Seattle + Olympic + North Cascades
🗓 4 days💑 CoupleView Trip →
Ferry across Puget Sound, Mount Storm King hike, Ruby Beach sunset, Diablo Lake noodles.
Atlantic City
Weekend Escape · USA
Atlantic City — Low Effort, High Vibe
🗓 2 days💑 CoupleView Trip →
Boardwalk, Hard Rock, White House Sub, sunset on the ocean. Easy drive from NJ/NY.
Chicago
City Trip · USA
Chicago — Thanksgiving Weekend
🗓 2 days👬 BrosView Trip →
Cloud Gate, Au Cheval, Architecture cruise, Green Mill jazz. The best 2-day city trip in the US.
Wyoming
Road Trip · USA
Wyoming → Yellowstone → Beartooth → Mt Rushmore → MN
🗓 6–7 days💰 $$View Trip →
Bros relocation road trip. Lamar Valley, Beartooth Highway, Devils Tower, Mount Rushmore.
Niagara Falls
Day Trip · USA
Niagara Falls — USA Side Guide
🗓 1–2 days💰 $View Trip →
Maid of the Mist, Cave of the Winds, Goat Island, night illumination. No passport needed.
Glenwood Springs
Weekend Escape · USA
Glenwood Springs Valentine's Trip
🗓 6 days💑 CoupleView Trip →
Hot springs, Amtrak through the Rockies, ski day, Hanging Lake. Perfect winter couple trip.
Utah
Road Trip · USA
Utah's Big Five + Las Vegas
🗓 6 days💰 $$View Trip →
Arches, Canyonlands, Capitol Reef, Bryce Canyon, then Vegas. Full day-by-day with permits & food stops.
California
Coming Soon · Road Trip · USA
California: SF → Yosemite → Tahoe → Sequoia
🗓 12 days💰 $$
Full itinerary dropping soon — permits, hotels, food stops all mapped out.
⛷️
Valentine's Trip · USA
Colorado Winter — Dogs, Hot Springs & Slopes
🗓 6 days💑 CoupleView Trip →
Dog sledding in Breckenridge, Hot Sulphur Springs on Valentine's Day, Echo Mountain night skiing, Red Rocks at dusk.
🏔️
National Park · USA
Glacier National Park — Crown of the Continent
🗓 4 days👥 5 peopleView Trip →
Going-to-the-Sun Road, Highline Trail, Grinnell Glacier, Many Glacier, Avalanche Lake. Turo rental tip.
🌌
Birthday Trip · USA
Alaska — Ice, Aurora & Sled Dog Puppies
🗓 4 days👥 5 peopleView Trip →
Glacier landing, Northern Lights until 4am, sled dog kennel, Chena Hot Springs. September birthday trip.
🌉
Family Trip · USA
California with Family — SF, PCH, LA & Grand Canyon
🗓 9 days👨‍👩‍👧‍👦 7 peopleView Trip →
SF → Lake Tahoe → Pacific Coast Highway → Hollywood → Venice Beach → Grand Canyon. The full circuit.
🏜️
Camping · USA
Breaks Interstate Park — Grand Canyon of the East
🗓 3 days💑 CoupleView Trip →
1,600ft gorge, zipline through the canyon, tent camping, July 4th from the rim. Nobody knows this place.
💧
Weekend Escape · USA
Devil's Bathtub — SW Virginia
🗓 3 days💑 CoupleView Trip →
Natural rock swimming pool, treehouse Airbnb, Devil's Fork Loop hike. Hidden gem 5 hrs from DC.
🏕️
Camping · USA
Poconos — Rafting, Campfire & July 4th
🗓 3 days👥 Two couplesView Trip →
Lehigh River Class II-III rafting, lamb chops over fire, July 4th fireworks from camp.
🌊
Weekend Escape · USA
Blackwater Falls — West Virginia
🗓 2 days🚗 3.5 hrs from VAView Trip →
Winter ice formations or spring trails. Easiest best-value escape from DC/Virginia.
🚀
Road Trip · USA
Houston — NASA, Brisket & Galveston
🗓 2 days👬 BrosView Trip →
8 hours at NASA Johnson Space Center, Galveston beach, legendary Texas brisket.
🌲
Planning
Yellowstone & Grand Teton
🗓 10 days🚐 Campervan
Campervan rental, campground strategy & wildlife guide.
⛷️
Dreaming About
Austria — Innsbruck Ski
🎿 AlpsWinter
12 ski resorts, Austrian Alps. On the dream list.
🗾
Dreaming About
Japan
🍜 CultureCherry Blossoms
Tokyo, Kyoto, Osaka. Food, temples, bullet trains. High on the list.
Golden Gate Bridge San Francisco

California Dream:
SF → Yosemite → Tahoe → Sequoia

This is a 12-day road trip through the best of Northern California. Fly into Fresno (FAT — significantly cheaper than SFO), pick up the rental, and loop through San Francisco, Lake Tahoe, Yosemite, and Sequoia/Kings Canyon before flying back out the same way.

I do all the planning. Ketaki shows up, finds the best light, and documents it beautifully. This is the living document of how it all gets built.

📋 Good to Know

Written from our experience as travellers based in the US navigating visa logistics. Food stops along the route are noted. All national park permits are pre-booked — do NOT wing Yosemite.

Trip Overview

The routing was designed around two constraints: (1) Fresno flights from IAD/DCA are ~40% cheaper than SFO, and (2) Yosemite timed-entry permits drop at 8am PT exactly 2 days before your visit. Everything else is engineered around those two anchors.

Full rental car throughout. Budget estimate: ~$3,500 for two including flights, hotels, Airbnb, car, food, and all park fees. Mix of Airbnb (Tahoe cabin) and hotels (SF, Fresno).

Day-by-Day

Day 1

Arrival: Fresno + Drive to SF

Fresno FAT ✈→ I-99 N→ San Francisco (3 hrs)

Fly into Fresno, grab the rental, drive straight to SF. Check in, drop bags, and head to the Mission District. Gracias Madre — plant-based Mexican but genuinely incredible food, bold flavours that genuinely satisfy. No compromise on dinner after a travel day.

✅ Book This Now

SF hotel 6–8 weeks out. Union Square for walkability. Budget $180–220/night. Grab it on Chase Travel portal for 3x points.
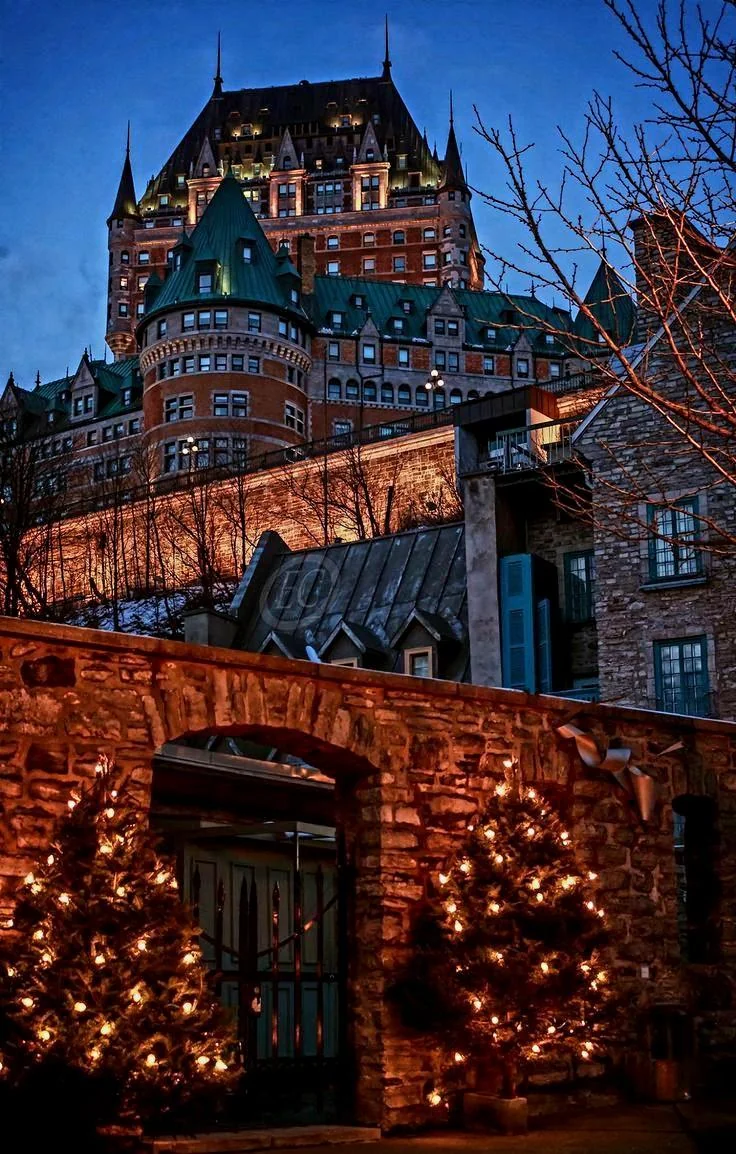
Days 2–3

San Francisco

Golden GateSausalito FerryFerry BuildingAlcatrazTwin Peaks

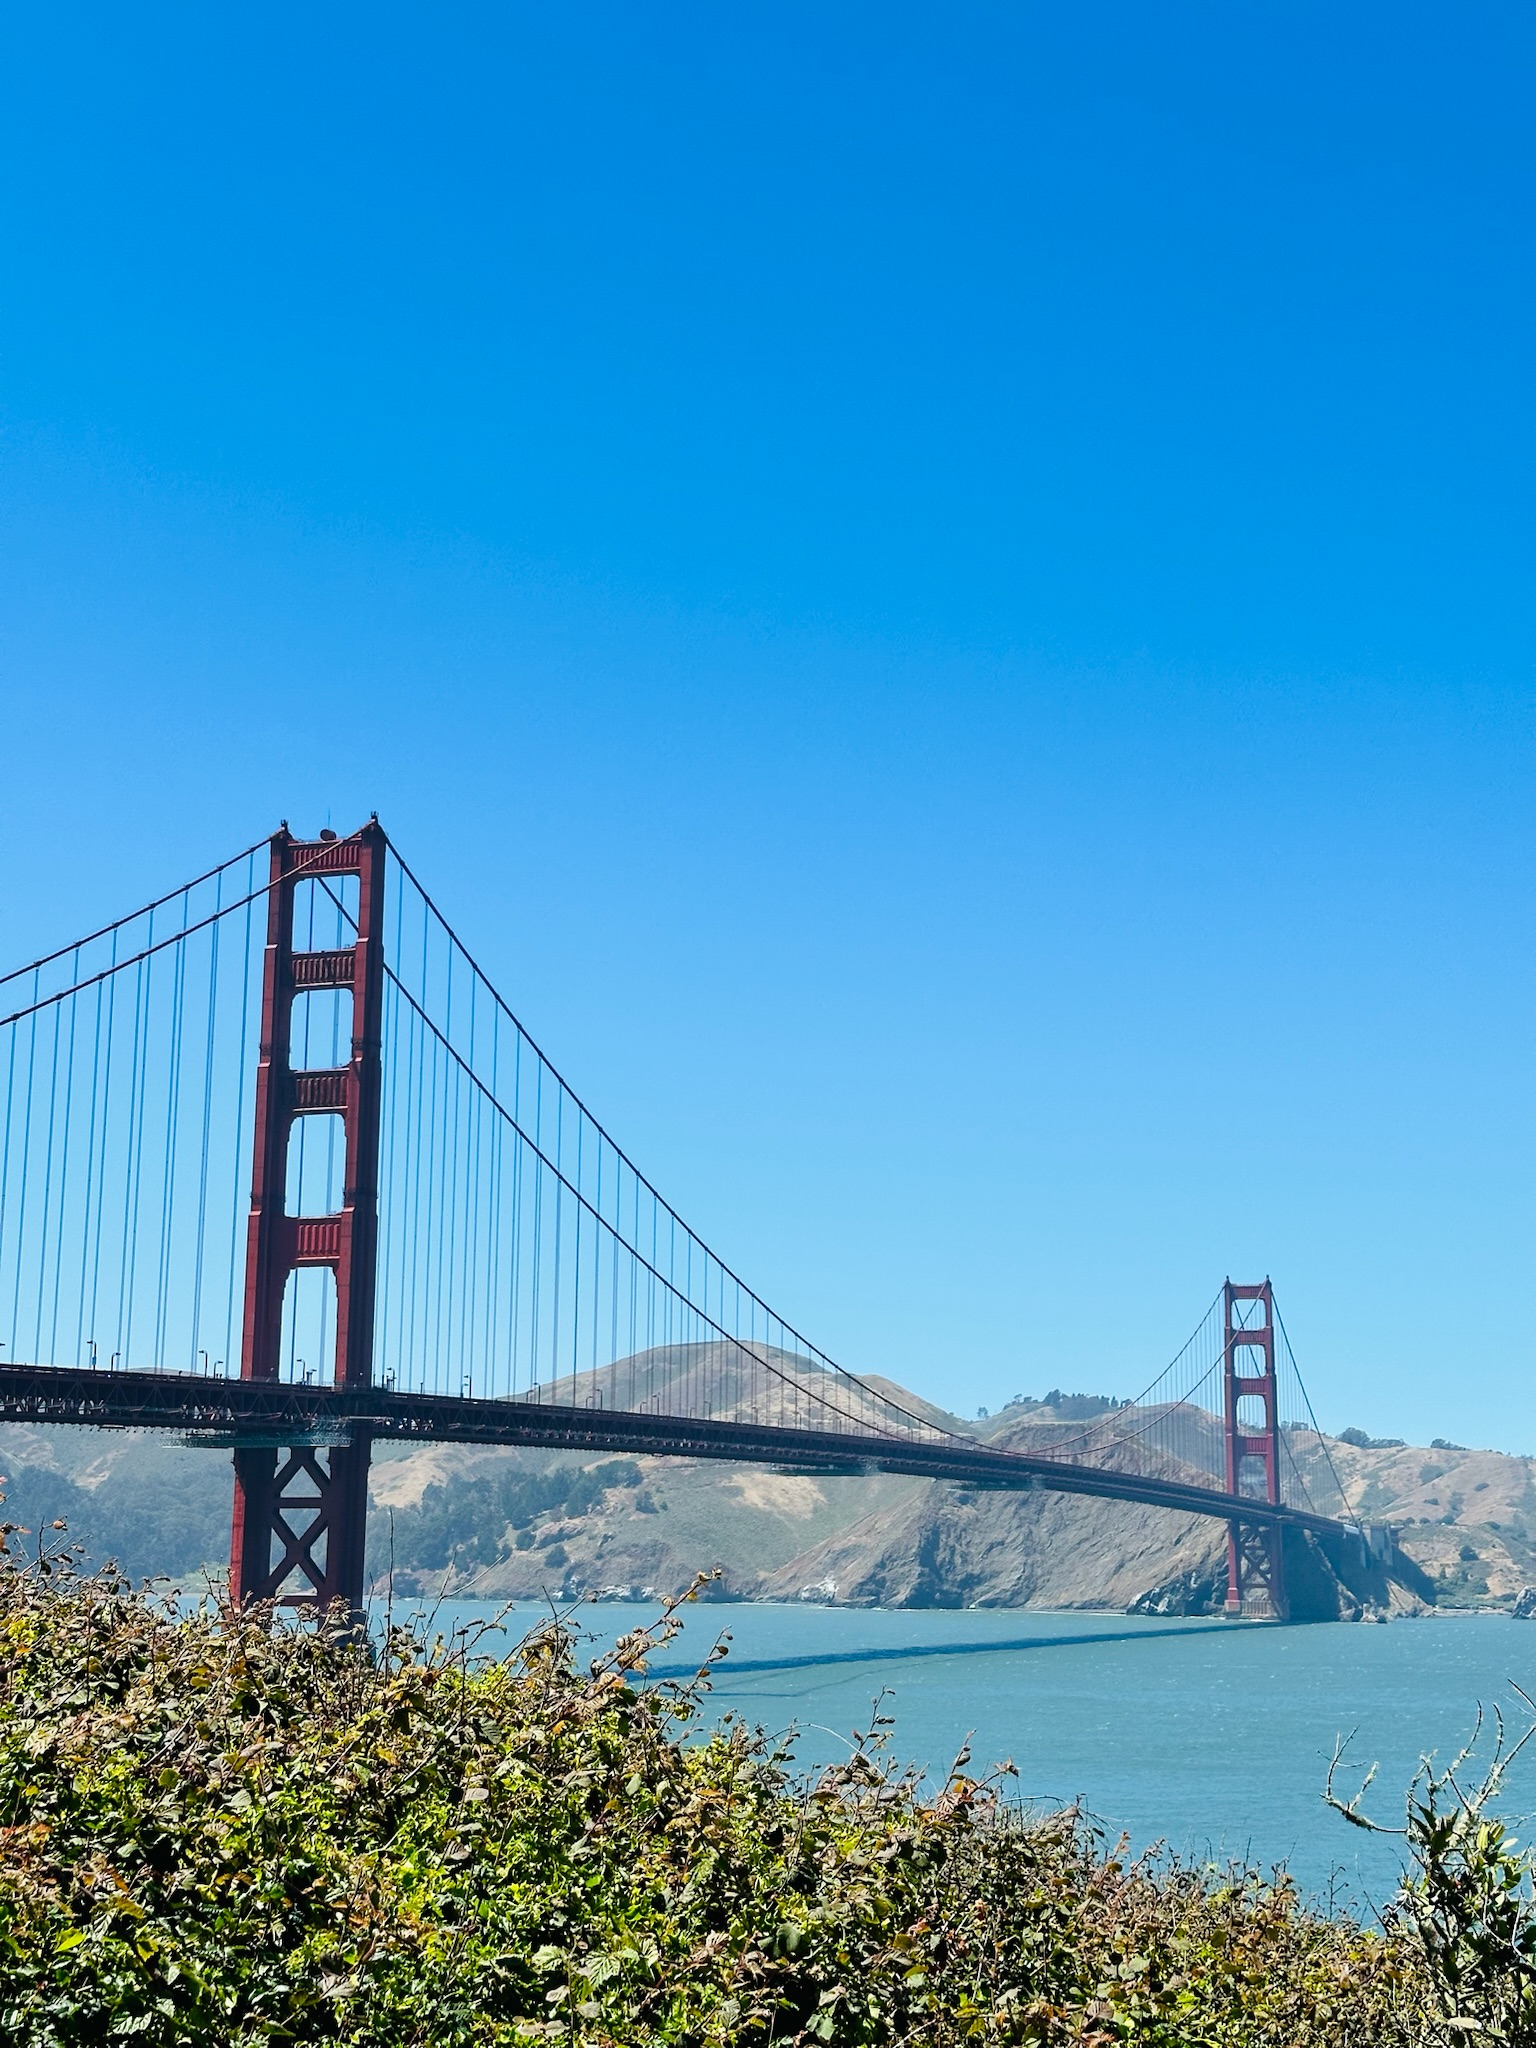
Day 2: Golden Gate Bridge walk early (fog burns off by 10am), ferry to Sausalito for lunch, back by evening to catch sunset from Twin Peaks. Dinner at Udupi Palace in the Richmond District — South Indian, legitimately excellent, not a tourist trap. One of the best Indian meals outside India.

Day 3: Ferry Building Farmers Market if it's a Saturday morning. Alcatraz island tour (book 3–4 weeks out at alcatrazcruises.com — sold out constantly). Afternoon: Castro district, Mission murals. Dinner at Cha-Ya — Japanese vegan, hidden gem on Valencia St.

💡 SF Transport

Get a Clipper card for Muni + BART. Don't rent bikes for the Golden Gate — the headwind is brutal and e-scooters are banned on the bridge path. Walk it.

Days 4–6

Lake Tahoe

SF → I-80 E→ South Lake Tahoe3.5 hrs

Tahoe is the remote work base for 3 nights — Airbnb cabin on the South Lake side. I'm on EST hours (9am–6pm ET = 6am–3pm PT), so mornings are work, afternoons and evenings are ours.

Day 4 afternoon: Emerald Bay State Park — the drive alone is worth the detour. Vikingsholm castle tour if the timing aligns.

Day 5: Heavenly Gondola for views from above. Stateline area for a walk. Dinner at Sprouts Cafe — good food, solid options in South Lake Tahoe.

Day 6 morning (pre-work): Sand Harbor on the Nevada side at sunrise — 5:30am alarm, clearest freshwater beach in North America. Set the alarm. Do it.

🏠 Airbnb Strategy

Book 2+ months out. South Lake cabin-style. Budget $220–280/night. May fills fast — this is ski season shoulder, but Tahoe is packed year-round.

Days 7–9

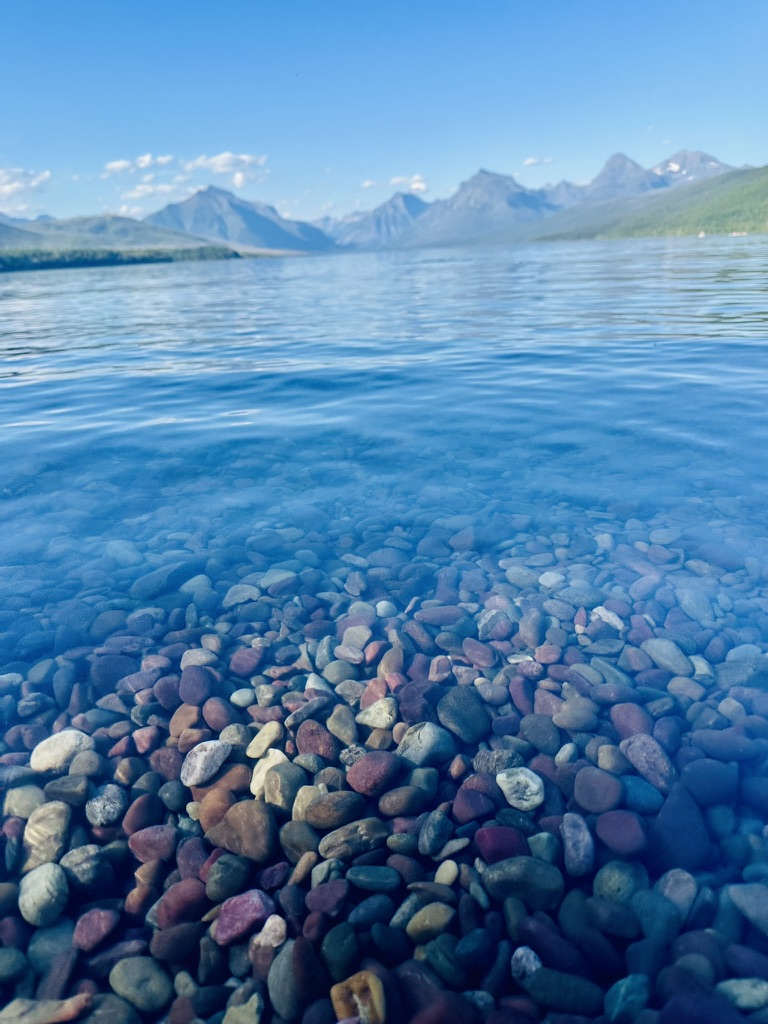
Yosemite National Park

Tahoe → Hwy 120→ Tioga Pass (if open)→ Yosemite Valley

Critical: Yosemite Valley requires a timed-entry permit May–September. Drops at 8am PT, 2 days before your visit, on recreation.gov. Set a phone alarm at 7:58am PT. Also pre-book a parking reservation or take YARTS bus from Merced.

Day 7: Enter via Tioga Pass (Hwy 120) — typically opens mid-to-late May. Check NPS.gov for dates. The high-country drive is the best possible approach to the Valley. Settle near Curry Village. Valley floor walk, Half Dome reflection at Mirror Lake.

Day 8: Full hike day. Mist Trail to Vernal Falls (5.4 miles, moderate) — start at 7am before it gets crowded. Pack your own lunch — food inside the park is expensive and forgettable. Ketaki gets the waterfall shots, I track the pace.

Day 9: Glacier Point for sunrise — the Half Dome view from above is what every photo is trying to recreate. Then Valley View, Yosemite Village Museum, drive toward Fresno by afternoon.

🍱 Food Hack

Pack instant Indian meals for park days — the camp store has a microwave. MTR Upma, instant dal, backup Maggi. Saves ~$40/day and you eat infinitely better than the Valley cafeteria. Tushar's rule: always two backup pouches in the bag regardless.

Days 10–11

Sequoia & Kings Canyon

Fresno base→ Kings Canyon Scenic Byway→ Giant Forest

Two nights in Fresno, day tripping to both parks. One entry fee covers both — get the America the Beautiful pass ($80) at this point since it covers Yosemite too and pays for itself immediately.

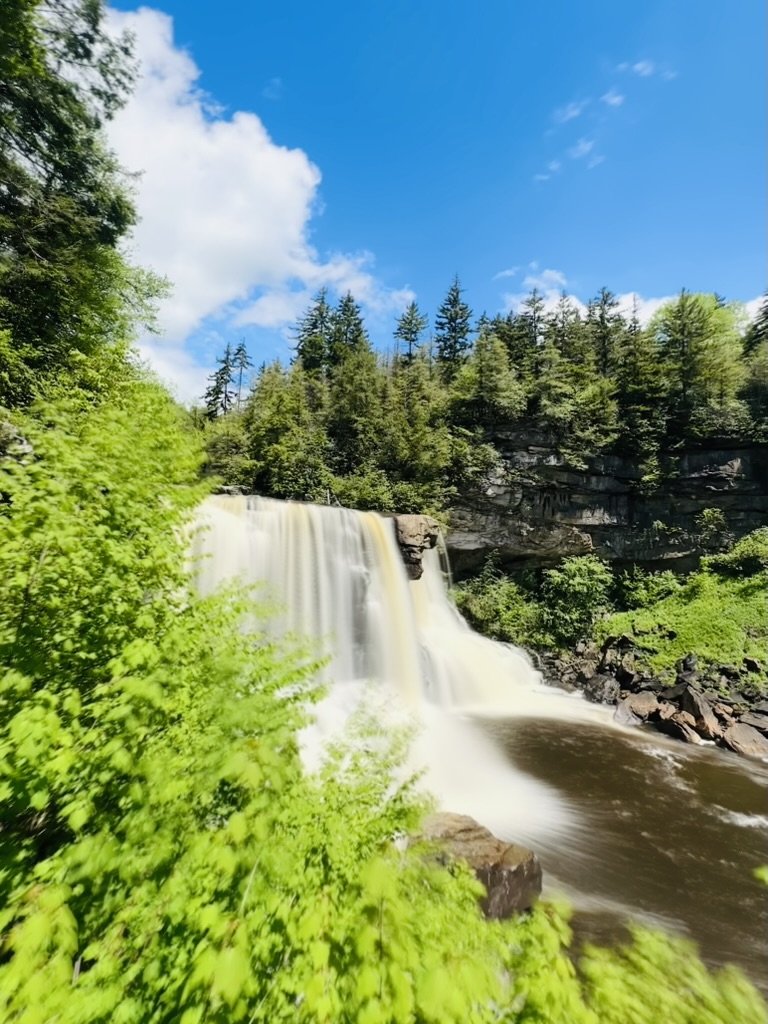
Day 10: Kings Canyon Scenic Byway into the canyon — 2nd deepest in North America. The drive is the main event. Roaring River Falls (0.4 miles, easy) for a quick waterfall stop.

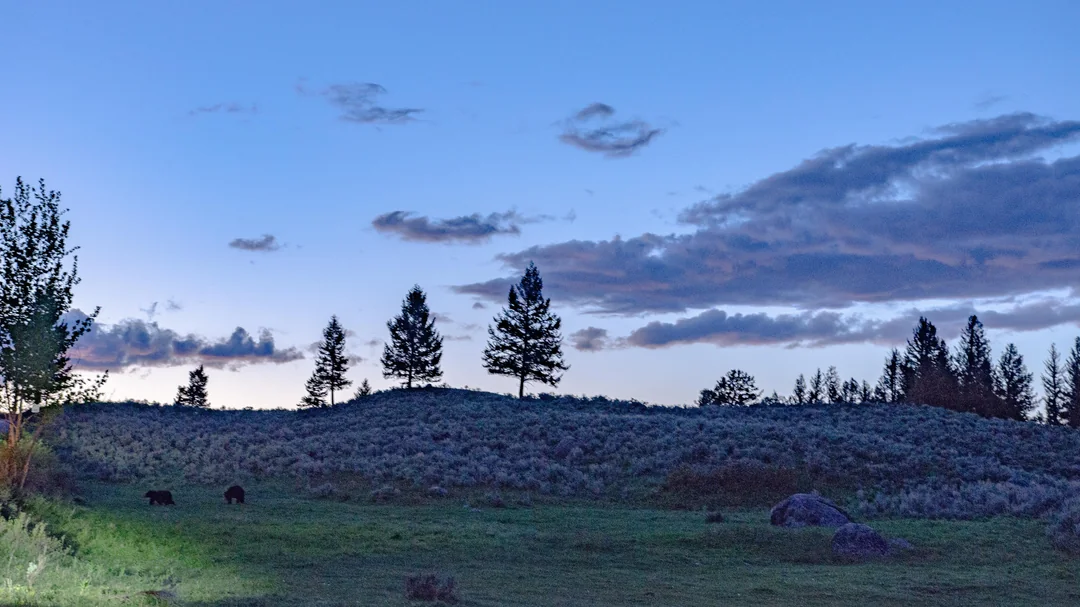
Day 11: Sequoia's Giant Forest. General Sherman Tree — largest living organism on Earth by volume. Big Trees Trail is a 2-mile loop through the grove. Nothing prepares you for the actual scale. Photos fail completely. Get low, shoot up, put a person in frame.

📷 Photography Note (Ketaki's)

Wide angle is essential for the sequoias. iPhone ultra-wide handles it better than expected — set it to .5x and back up as far as the trail allows. The late afternoon light between 4–6pm turns the bark gold.

Day 12

Fresno → Home

Return car · Fresno FAT ✈ IAD

Return the car, fly home from FAT. Post-trip depression sets in somewhere on the Dulles Toll Road.

Logistics & Budget

Getting Around

Full rental car the entire 12 days. Budget ~$420–520 total (full-size SUV — mountain roads appreciate the ground clearance). Gas budget ~$160–200 for the full loop. Use GasBuddy to find the cheapest station before each fill-up.

The America the Beautiful Pass

Buy the Annual Interagency Pass ($80) at recreation.gov or the first park entrance. Covers Yosemite + Sequoia + Kings Canyon entry. Pays for itself on day one of Yosemite alone (entry is $35/vehicle without it).

Vegetarian Food Strategy

SF has outstanding Indian food — no compromise needed. Tahoe and Fresno require more planning: hit an Indian grocery store when you arrive and stock the cabin fridge. In Yosemite the Village Store has basics. For hiking days we pack entirely from the Airbnb — instant Indian meals, snacks, and the emergency Maggi. We also list the best non-veg spots along the route, and where veg options are solid for anyone travelling with family.

💳 Credit Card Play

Chase Sapphire Reserve for everything: 3x points on travel and dining, $300 travel credit offsets a chunk, Priority Pass for airport lounges at Dulles and FAT. Book hotels through Chase Travel portal for 10x points. All park fees count as travel purchases.

Permit Booking Timeline

  • Alcatraz ferry — book 3–4 weeks out at alcatrazcruises.com. Sells out, especially weekends.
  • Yosemite timed-entry permit — 8am PT exactly 2 days before, recreation.gov. Set an alarm.
  • Yosemite parking — Valley parking reservation also on recreation.gov. Book same time as entry permit.
  • Tahoe Airbnb — 2+ months out, May fills fast from both ski season carryover and early summer demand.
  • SF hotels — 6–8 weeks is fine for May.
  • America the Beautiful pass — buy at first park entrance or recreation.gov anytime before.
Delicate Arch Utah

Utah's Big Five +
Las Vegas

Six days through some of the most dramatic landscapes on earth — Arches, Canyonlands, Capitol Reef, Bryce Canyon — then a night in Las Vegas to decompress before flying home. We flew into Salt Lake City, picked up the rental, and drove the whole loop. This is one of those trips where every single day feels like a completely different planet.

🎟️ First Thing To Do

Buy the America the Beautiful Annual Pass ($80) at your first park entrance or at recreation.gov before you leave. It covers Arches, Canyonlands, and Capitol Reef entry — pays for itself within the first two parks alone.

Route Overview

The routing is a clean southwest loop: fly into SLC, drive down to Moab for the first three nights, then move west through Capitol Reef to Torrey for night four, up to Bryce Canyon for night five, and finally the long drive into Las Vegas before flying out. Every leg is a scenic drive worth doing slowly.

We mixed budget and mid-range — splurged on one or two nights (Capitol Reef Resort was worth it) and kept the Moab nights lean. Total trip cost for two came in around $1,400–1,600 depending on how much Vegas you do.

Day-by-Day

Day 1

Fly into SLC → Drive to Moab

SLC ✈→ I-70 E→ Moab (~3.5 hrs)

Fly into Salt Lake City, pick up the rental, and drive straight down to Moab. The drive itself is scenic — canyon walls start appearing well before you hit Moab. Check in, walk the small town, grab dinner and settle in. This is a recovery day after travel.

🏨 Where We Stayed in Moab

We did mid-range — Aarchway Inn (~$160–200/night). Good location, clean, solid base. If budget matters more, Moab Valley Inn works fine. Want something nicer, Hoodoo Moab is the move.

Food

Evening: Pasta Jay's for a casual dinner after the drive — solid portions, no fuss. If you want something livelier, the Quesadilla Mobilla food truck is a Moab classic.

Day 2

Arches National Park — Full Day

Balanced RockWindows SectionSand Dune ArchLandscape ArchDelicate Arch at Sunset

Start early — Arches requires a timed-entry permit from April through October (recreation.gov, drops at 6am MT about 3 months out). The park fills up fast and gets brutally hot by midday in summer. Get in by 7–8am, hit the main sections, then retreat midday and come back for Delicate Arch at sunset — the light on the arch is unlike anything else.

Don't miss: Double Arch is five minutes off the road and looks absolutely absurd in person. Balanced Rock is a quick stop but a great photo. Landscape Arch is the longest natural arch in the world and genuinely terrifying to stand under.

⏰ Timing is Everything

Delicate Arch hike is 3 miles round trip, moderate. Start it 1.5–2 hours before sunset. The hike itself is exposed and hot — go late afternoon only. Sunrise at the arch is also spectacular and much less crowded if you're willing to hike in the dark.

Food

Breakfast: Moab Coffee Roasters — good coffee, pastries, get there early before the park crowd hits. Lunch: pack food from the hotel or grab from the food truck park on the main street. Dinner: Desert Bistro if you want to eat well, or Antica Forma for wood-fired pizza.

Day 3

Potash Road + Canyonlands

Potash Road→ Island in the Sky→ Mesa Arch→ Grand View Point

Morning — Potash Road: Head out early on Potash Road (UT-279) along the Colorado River. Petroglyphs carved into the canyon wall, stunning river reflections, and almost nobody there. Free, no permit needed, completely underrated. Drive as far as the pavement takes you.

Afternoon — Canyonlands: Drive up to the Island in the Sky district. Mesa Arch at sunrise is one of the most photographed spots in Utah — if you missed it at sunrise, go anyway, still worth it. Grand View Point gives you a sweeping view of the entire canyon system. Green River Overlook is a 5-minute walk for a perspective that puts the scale of this place in context.

📷 Ketaki's Pick

Mesa Arch at sunrise is the single best photography moment of this entire trip. The arch frames the canyon perfectly as the light comes through. Get there 45 minutes before sunrise to get a good spot — it gets crowded fast.

Food

Lunch: Moab Diner — classic American diner, generous portions, good for a quick fuel stop. Dinner: Thai Bella for something different — surprisingly good Thai in the middle of the desert.

Day 4

Moab → Capitol Reef → Torrey

Moab→ UT-24 W→ Capitol Reef NP→ Torrey (~2.5 hrs)

Check out of Moab and drive west toward Capitol Reef. This is one of the least-visited major national parks in Utah — which means no timed-entry permit, smaller crowds, and a very different vibe. The Waterpocket Fold is a 100-mile wrinkle in the earth's crust that you drive right through.

Stops in Capitol Reef: Hickman Bridge trail (2 miles, easy-moderate, incredible natural bridge at the end), the Petroglyphs panel along UT-24 (pull over and look left), Panorama Point for the broad view, and Goosenecks Overlook for a quick leg stretch with a dramatic river bend below.

🍎 Fruit Stands

Capitol Reef has working orchards in the park — in season (summer/fall), you can pick your own fruit or buy from the stands. Genuinely one of the more surreal park experiences — picking apples inside a national park.

Food

Dinner: Café Diablo in Torrey — this is the best meal of the entire trip. Southwestern cuisine, creative menu, excellent execution. Book ahead if possible. If Café Diablo is full, Hunt & Gather is a solid backup.

🏨 Where We Stayed in Torrey

Capitol Reef Resort (~$200–280/night) — teepee-style units and Western-themed rooms, beautiful property, worth the splurge. Budget option: Red Sands Hotel (~$130–180). Torrey is tiny — book well ahead.

Day 5

Scenic UT-12 → Bryce Canyon

Torrey→ UT-12 Scenic Byway→ Bryce Canyon NP

The drive from Torrey to Bryce on UT-12 is considered one of the most scenic roads in the US — don't rush it. Stop at the Aquarius Plateau overlook, pull over at Calf Creek Recreation Area if you have time (the waterfall hike is worth it), and take in the red rock landscape changing into orange and pink as you approach Bryce.

Bryce Canyon: No permit needed, just your America the Beautiful pass. The hoodoos — those tall orange spire formations — are unlike anything else. Hit all the major viewpoints: Sunrise Point, Sunset Point, Inspiration Point, Bryce Point, Rainbow Point. If you want to hike into the canyon, the Navajo Loop (1.3 miles, moderate-strenuous) takes you right through the hoodoos — extraordinary from inside them.

📷 Ketaki's Pick

Bryce Point at sunset is the best viewpoint in the park — more dramatic angle than Sunset Point, and usually slightly less crowded. The hoodoos turn deep orange-red as the sun goes down. Give yourself an hour here minimum.

Food

Ebenezer's Barn & Grill — classic Western dinner with live music, fun experience. Or keep it simple at Bryce Canyon Pines Restaurant — homestyle diner food, generous portions.

🏨 Where We Stayed

Best Western Plus Bryce Canyon Grand (~$170–220/night) — comfortable, convenient. If you can get a reservation, Bryce Canyon Lodge inside the park (~$250–350) is a unique experience. Budget: Bryce View Lodge is fine and cheap.

Day 6

Bryce → Las Vegas

Bryce Canyon→ I-15 S→ Las Vegas (~4.5 hrs)

Last driving day — about 4.5 hours to Vegas. Optional stop worth making: Red Cliffs Dinosaur Tracksite near St. George — actual dinosaur footprints in sandstone, 10 minutes off the highway, free, genuinely cool. By the time you hit Vegas, the contrast from five days of pure nature is absolutely surreal.

Vegas is the decompression night. Walk the strip, eat well, see something. We did Secret Pizza (hidden on the 3rd floor of the Cosmopolitan — no sign, walk past the shops, look for the neon — best value meal on the strip) and caught a show at the Sphere if you can get tickets.

🎰 Vegas Tips

You don't need to gamble. Walk the Bellagio fountain show (free, runs every 15–30 min), walk through the Forum Shops at Caesars, eat at Eataly in Park MGM for a proper meal. Budget hotels like Excalibur or Luxor are fine since you're just sleeping there.

🏨 Vegas Stay

We did mid-range — Tuscany Suites (~$120–160) just off the strip, quieter, good value. On-strip budget: Excalibur or Luxor (~$70–120). If you want to splurge once: The Venetian is worth it for the rooms.

Logistics & Budget

Getting There

Fly into SLC (Salt Lake City) — more convenient for the Moab start and often cheaper than LAS. Fly out of LAS (Las Vegas) — one-way rental is a bit more expensive but worth it to avoid backtracking. Book the rental car early, ideally a full-size SUV or similar — some roads in the area prefer ground clearance.

Permits

  • Arches timed entry — required April–October, recreation.gov, drops at 6am MT ~3 months out
  • America the Beautiful pass ($80) — covers Arches, Canyonlands, Capitol Reef entry
  • Canyonlands, Capitol Reef, Bryce — no timed entry permit currently needed

Budget Breakdown

  • Flights (SLC in, LAS out): $250–500/person
  • Car rental (one-way, 6 days): $400–600 total
  • Hotels (5 nights, 2 people): $800–1,200 total
  • Food: $40–80/day for two → ~$250–500 total
  • Parks pass + activities: $80 pass + Vegas show $80–200
  • Gas: ~$100–150
💳 Credit Card Play

Chase Sapphire Reserve: 3x on travel and dining, $300 travel credit, Priority Pass for SLC and LAS airport lounges. One-way rental car coverage included. Book hotels through Chase Travel portal for maximum points return.

Glenwood Hot Springs

Glenwood Springs
Valentine's Trip

A Valentine's trip that accidentally became one of our favourite weekends. Hot springs, a scenic Amtrak ride through the Rockies, one ski day at a small resort, and a lot of just sitting in steaming water while it snows around you. If you want a chill romantic winter trip that isn't ski-resort-bro-energy, Glenwood Springs is it.

🚆 The Amtrak is the Trip

The California Zephyr from Denver to Glenwood Springs is one of the most scenic train rides in North America — canyon walls, frozen rivers, mountain tunnels. Book early, window seat on the right side heading west. This alone makes the trip worth it.

Trip Overview

Fly into Denver, spend the night, take the morning Amtrak through the Rockies to Glenwood Springs, three nights there, train back, one more night in Denver, fly home. Simple structure, zero stress. Glenwood Springs is small enough that you can walk everywhere — the hot springs are 10 minutes from the hotel on foot.

We stayed at Best Western Antlers in Glenwood — walkable to everything, solid value, not trying to be something it isn't. Budget for the whole trip came in around $1,600–1,800 for two.

Day-by-Day

Day 1

Fly into Denver

IAD ✈ DEN→ Denver overnight

Fly after work, land in Denver, check in and sleep. Nothing complicated — this is purely a transit night. Stay near Union Station so you can walk to the train the next morning without dealing with an Uber at 8am. Denver has excellent food if you land with time to eat — Tavernetta near Union Station is great for a proper dinner, or just grab something casual and rest up.

🏨 Denver Stay

Anywhere near Union Station works — The Crawford Hotel is actually inside the station (romantic, worth it if you want to splurge). Budget option: Drury Inn & Suites or Hampton Inn Downtown — both clean, good value, ~$120–160/night.

Day 2

Morning Amtrak → Glenwood Springs

Denver Union Station→ California Zephyr 8:46am→ Glenwood Springs (~3.5 hrs)

Walk to Union Station, board the California Zephyr. This is not just a way to get there — the ride through Glenwood Canyon is genuinely one of the most beautiful things you can do in Colorado. The train hugs the canyon walls, the Colorado River runs alongside you, there are tunnels and bridges and frozen waterfalls. Sit on the right side of the train heading west for the best canyon views.

Arrive around noon, check in, drop bags, walk the town. Evening: Glenwood Hot Springs Pool — the world's largest mineral hot springs pool. It's massive, it's steaming, it's surrounded by canyon walls and snow. Night swim is the move.

🎟️ Book the Train Early

The California Zephyr sells out, especially on winter weekends. Book 3–4 weeks out minimum on Amtrak.com. Window seats go first — select seats right after booking. Cost is ~$80–150 each way depending on how early you book.

Food

Lunch on the train or grab something in Glenwood after check-in. Dinner: Riviera Supper Club — classic steakhouse vibes, good for a first night. Or Smoke Modern BBQ for something more casual.

Day 3 — Valentine's Day

Hot Springs + Slow Day

Iron Mountain Hot Springs→ Town walk→ Dinner

Valentine's Day, no agenda. We went to Iron Mountain Hot Springs in the morning — completely different vibe from the big pool. Smaller, more intimate, 16 different pools at varying temperatures set into the rocks above the Colorado River. You hop between pools, the river is right below you, it's snowing lightly. Genuinely one of the most romantic mornings we've had on a trip.

Afternoon: walk Glenwood's main street, browse the shops, get coffee, be a tourist. The town is small and cute without being precious about it.

♨️ Hot Springs Comparison

Glenwood Hot Springs Pool = big, lively, fun, great for an evening. Iron Mountain Hot Springs = intimate, scenic, quieter, better for a romantic morning. Do both. Iron Mountain requires a reservation — book ahead online.

Food

Valentine's dinner: Florindo's Italian Cuisine — proper Italian, the best dinner spot in Glenwood, make a reservation. If they're full, The Pullman is excellent — farm-to-table, great cocktails, intimate atmosphere.

Day 4

Ski Day — Sunlight Mountain Resort

Hotel → shuttle/car→ Sunlight Mountain Resort (~30 min)

Sunlight Mountain is not Vail or Aspen — it's a small local resort, affordable, not crowded, and completely fine for a casual ski day. Lift tickets are a fraction of the big resorts (~$60–80), rentals are on-site, and the runs are perfectly good for a day of casual skiing. This is exactly what you want when skiing is one activity among several rather than the whole trip.

Rent equipment at the resort, buy lift tickets on arrival or online (book ahead in high season). The resort runs a shuttle from Glenwood — check their current schedule. If you'd rather have flexibility, rent a car for the day.

⛷️ First Time Skiing?

Sunlight is a great place to learn — less intimidating than the big resorts, the instructors are relaxed, and the runs are more forgiving. Group lessons are cheap (~$60–80) and worth it if either of you is new to it.

Food

Lunch at the resort — basic but fine for a ski day. Dinner back in Glenwood: Glenwood Canyon Brewpub — right on the river, good food, local beers, casual end to a physical day.

Day 5

Hanging Lake + Last Hot Springs

Hanging Lake Trail (permit required)→ Hot Springs one more time

Hanging Lake is one of the most beautiful hikes in Colorado — a turquoise lake suspended on a cliff ledge in Glenwood Canyon. Requires a permit ($12/person) booked at hanginglake.com — they're limited and go fast, so book as soon as you confirm the trip. The hike is 2.4 miles round trip, strenuous, gains 1,000 feet. Takes about 2 hours. Worth every bit of effort.

If permits are sold out, this becomes a full buffer/chill day — walk the canyon trail along the river, visit the Glenwood Caverns Adventure Park (gondola up the mountain for views), or just go back to the hot springs for a long soak before leaving tomorrow.

📷 Ketaki's Note

Hanging Lake is one of the most photographed spots in Colorado for good reason — the water is an impossible blue-green. Morning light is best. The trail itself is beautiful too — log bridges over rushing water, waterfalls, canyon walls. Give yourself time and don't rush it.

Food

Last dinner in Glenwood: back to The Pullman if you haven't been, or try Juicy Lucy's Steakhouse for a hearty send-off meal.

Day 6

Train back to Denver → Fly Home

Glenwood Springs 11:42am train→ Denver Union Station→ DEN ✈ IAD

Morning train back to Denver — same gorgeous canyon views in reverse. Arrive Denver mid-afternoon, grab a late lunch near Union Station, then head to DEN for the evening flight home. Snooze Eatery near Union Station is excellent for a late brunch/lunch. Mercantile Dining & Provision inside the station is also solid.

🚆 Return Train Timing

The 11:42am departure from Glenwood arrives Denver around 3:30pm. Gives you enough time for a meal before a 6–8pm flight. Don't book anything earlier than 7pm to be safe — Amtrak runs late sometimes.

Logistics & Budget

Getting There

Fly into DEN (Denver International). Fly out of DEN as well — this is a round trip, not a loop. The Amtrak handles the Denver↔Glenwood leg both ways. No car needed in Glenwood — the hotel, hot springs, restaurants, and train station are all walkable. Only rent a car if you're doing Sunlight Mountain independently (shuttle is the easier option).

Key Bookings — Do These Early

  • Amtrak California Zephyr — book 3–4 weeks out, hanginglake.com for window seats
  • Hanging Lake permit ($12/person) — hanginglake.com, limited slots, books out fast
  • Iron Mountain Hot Springs — reservation required, ironmountainhotsprings.com
  • Valentine's dinner reservation — Florindo's or The Pullman, book ahead

Budget Breakdown (2 people)

  • Flights (round trip, 2 people): $500–1,000
  • Amtrak (round trip, 2 people): $320–600
  • Hotels (5 nights): $700–1,100
  • Hot springs (2–3 visits): $100–180
  • Ski day (lift + rentals): $240–400
  • Food & drinks: $400–700
  • Transport (shuttle/car day): $50–150
💳 Credit Card Play

Chase Sapphire Reserve covers the flights (3x points), hotel stays (3x), and dining (3x). The Amtrak purchase also earns travel points. Priority Pass lounges at DEN are excellent — worth using both ways.

Niagara American Falls

Niagara Falls
USA Side Guide

We've done Niagara Falls more than once — with Ketaki, with family visiting from India, with friends doing a weekend road trip from the tri-state area. It's one of those places that works every time and for any group. This guide covers the USA side only — no passport needed, and honestly the up-close experiences are better on this side anyway.

🚗 Getting There from the East Coast

From Virginia (Herndon): ~7.5 hrs drive. From NJ/NYC: ~5–6 hrs. From upstate NY: 1–2 hrs. All are solid road trips — the drive through Pennsylvania is beautiful. No need to fly. Park in the state park lot (~$10–20/day) and walk everywhere from there.

Why USA Side Only

The Canada side has the wider panoramic view — but the USA side has Maid of the Mist, Cave of the Winds, and Goat Island — all of which get you far closer to the falls than anything on the Canadian side. If you don't have a passport or just don't want the border crossing hassle, you're not missing anything essential. We've crossed to Canada once and wouldn't bother again if the group includes anyone without a passport.

The other thing nobody talks about: the night illumination. Every evening the falls are lit up in rotating colors — blue, red, green, purple. Standing at Prospect Point watching the falls change color in the dark is genuinely one of the more surreal things you can do in the northeastern US. Non-negotiable, do not skip this.

The Plan

Day 1 — Core Experiences + Night Lights

Morning — Niagara Falls State Park

Arrive ~10amProspect Point→ Goat Island→ Maid of the Mist

Start at Niagara Falls State Park — the oldest state park in the US, free entry. Walk straight to Prospect Point for the first view of the American Falls. The sound alone stops you in your tracks. Then cross over to Goat Island — the island sits between the American Falls and the Horseshoe Falls, and the views from both sides are completely different.

Maid of the Mist (~$25–30) — do this first before the crowds build. You board a boat that goes right into the spray at the base of the Horseshoe Falls. You will get drenched. They give you a poncho but it doesn't fully help. Absolutely worth it — the scale of the falls from water level is incomprehensible.

⏰ Maid of the Mist Timing

Gets busy by 11am. Arrive at the state park by 9:30–10am, walk to the Maid of the Mist boarding area first. The ride itself is about 20 minutes. You'll want dry clothes or a change after — pack accordingly or wear something you don't mind getting soaked.

Early Afternoon — Cave of the Winds

Cave of the Winds (~$19)→ Bridal Veil Falls

Cave of the Winds is the other must-do. You walk on wooden boardwalks right next to the Bridal Veil Falls — the smallest of the three falls, but you're close enough to touch the rock face. The "Hurricane Deck" platform puts you in the full blast of the mist. They give you sandals and a poncho — you will be completely soaked, and it will be the most fun you've had in months. This is genuinely better with a group.

📷 Ketaki's Note

Cave of the Winds is where the best photos happen — the wooden walkways with the falls behind, the mist, the light. The poncho actually makes for a funny but iconic shot. Waterproof your phone before you go in. A dry bag for the camera is essential if you're shooting seriously.

Evening — Goat Island Sunset + Night Illumination

Terrapin Point (sunset)→ Luna Island→ Night illumination

Spend the late afternoon wandering Goat Island. Terrapin Point on the western tip of the island gives you the closest USA-side view of the Horseshoe Falls — this is where you realise how massive the Horseshoe is compared to the American Falls. Luna Island sits between the two US falls and is a 2-minute walk — the view from the tip is one of the best on the whole island.

After sunset: stay for the illumination. The falls light up every evening in rotating colors — the schedule is posted at the park. Best viewing spots are Prospect Point and the western tip of Goat Island. Sometimes there are fireworks on summer weekends. This is the moment of the trip.

🌈 Illumination Schedule

Illumination starts at dusk and runs for a few hours. Check the current schedule at niagarafallsstatepark.com — it varies by season. In summer it runs until midnight. Fireworks happen Friday and Sunday nights in summer — worth timing your visit around if possible.

Food — Day 1

Lunch: Top of the Falls Restaurant inside the state park — views of the falls while you eat, solid food, not cheap but the location justifies it. Or pack food and eat on Goat Island. Third Street Retreat nearby for good burgers in a chill setting.

Dinner: The Griffon Gastropub — solid American food, good drinks, reasonable prices. If you want something a step up, Wine on Third is the nicer option in the area. Budget $20–40/person for dinner.

Day 2 — Scenic + Easy Morning

Morning — Falls at Dawn + Gorge Walk

Falls at sunrise→ Niagara Gorge Walk→ Whirlpool State Park

The falls in the morning are a completely different experience — fewer people, different light, mist catching the early sun. Worth going back just for this even if you saw everything the day before. The crowds haven't arrived yet.

Niagara Gorge Trail — an underrated hike along the rim of the gorge with the river far below. Good views, easy walking, takes about an hour at a relaxed pace. Or drive 10 minutes to Whirlpool State Park for views of the natural whirlpool in the river — genuinely dramatic, rarely mentioned in tourist guides.

Brunch: Power City Eatery — popular local brunch spot, good food, reasonable prices. Or Marketside Restaurant for a classic American breakfast.

🚗 For the Drive-Through Crowd

If you're doing Niagara as a one-day stop on a longer road trip, the non-negotiables are: Maid of the Mist, Goat Island, and the night illumination. You can hit all three in one day if you arrive by 10am and stay until 9–10pm. Cave of the Winds if you have time.

Logistics & Budget

Getting There

Drive from anywhere in the northeast — this is a road trip destination, not a fly-to destination. From Herndon/Virginia it's about 7.5 hours, which makes it a Friday-after-work departure, two nights, Sunday drive back kind of trip. From NJ or NYC it's 5–6 hours. From upstate NY even less. No tolls on the way back via I-81 South.

Parking

Park in the Niagara Falls State Park lot (~$10–20/day depending on season). It puts you right at the entrance and you walk everywhere from there. Don't park in the private lots on the main strip — they charge more and are further away.

Budget Breakdown (per person)

  • Hotel (1 night): $80–180 — stay within walking distance of the park
  • Maid of the Mist: ~$28
  • Cave of the Winds: ~$19
  • Food (2 days): $60–120
  • Parking: $20–40
  • Gas (from VA): ~$60–80 split between people in car

Hotel Picks

  • Budget: Quality Hotel & Suites At The Falls, Red Coach Inn (~$80–120)
  • Mid-range: Sheraton Niagara Falls, Hyatt Place Niagara Falls (~$120–180)

Key rule: stay within walking distance of the state park. The convenience of being able to walk back to the hotel mid-day or after the night illumination is worth paying a bit more for.

Bison in Lamar Valley Wyoming

Wyoming to Minnesota —
The Relocation Road Trip

My brother was relocating from Cheyenne, WY to Minneapolis, MN — and instead of just driving straight through, we turned the move into a proper road trip. Cheyenne to Yellowstone, across the Beartooth Highway, Devils Tower, Mount Rushmore, then east into Minnesota. One of those trips that only happens because of life circumstances and ends up being one of the best things you've ever done.

This isn't a luxury trip — it's two brothers, a loaded car, big drives, and some of the most absurd landscapes in North America. No Ketaki on this one, so no food curation — we ate whatever was in front of us and it was fine.

🚗 The Route

Cheyenne, WY → Yellowstone NP → Lamar Valley → Beartooth Highway → Cody → Devils Tower → Mount Rushmore → Minneapolis, MN. About 1,800 miles total. One-way, no backtracking. Every mile is worth it.

Why This Route Works

The genius of this route — whether you're relocating or just road-tripping — is that it strings together four completely different landscapes back to back. Yellowstone's geothermal weirdness, Lamar Valley's wildlife and golden light, the Beartooth Highway's alpine insanity, Devils Tower's eerie silence, and then Mount Rushmore as the send-off before the landscape flattens out into the Midwest. Every single day feels like a different country.

The Beartooth Highway alone justifies the entire route. If you've never driven it, you don't understand yet. You will.

Day-by-Day

Day 1

Cheyenne → West Yellowstone

Cheyenne, WY→ US-287 N→ West Yellowstone (~5.5 hrs)

Long drive day but a good one — the Wyoming landscape opens up as you head north, the Tetons start appearing on the horizon a few hours in. Arrive West Yellowstone in the afternoon, check in, walk the tiny town. West Yellowstone is a proper gateway town — huckleberry everything, elk burgers, tourist shops that are actually fine.

🍦 Do This

Get huckleberry ice cream somewhere in West Yellowstone. It's a Montana/Wyoming thing, you can't get it elsewhere, and it's genuinely excellent. Every shop sells it, they're all good.

Food

The Buffalo Bar — elk burger, no question. This is the move. Wild West Pizzeria if you want something casual and easy after a long drive day.

Day 2

Yellowstone — Lower Loop

Enter before 8amOld Faithful→ Grand Prismatic→ Yellowstone Lake

Enter the park before 8am. This isn't optional — by 9am the main lots are full, the roads are slow, and the experience degrades significantly. Early means you get the geysers before the tour buses and the light is better anyway.

Old Faithful — yes it's the most famous, yes it's still worth it. Check the eruption prediction board when you arrive and time your visit. The geyser basin around it is worth walking for 30 minutes.

Grand Prismatic Spring — the iconic rainbow-colored hot spring. The overlook trail (15-minute walk uphill) gives you the aerial view you've seen in photos. Do the overlook, not just the boardwalk at the base — the colors are invisible from ground level.

Afternoon: Yellowstone Lake — just sit. It's the largest high-elevation lake in North America, you can see the steam from the hydrothermal features across the water, and sometimes you'll see bison on the shore. One of those rare places where doing nothing is the right move.

🔥 Firehole Lake Drive

On your way through the lower loop, don't miss Firehole Lake Drive — a 3-mile one-way road through geothermal features with almost no one on it. Great Fountain Geyser erupts here periodically. Take this instead of staying on the main road.

Day 3

Lamar Valley — The Best Day

Lamar Valley (dawn)→ Northeast Entrance→ Cooke City

This is the best day of the trip. Lamar Valley is the wildlife corridor of Yellowstone — bison herds so large they stop traffic, wolves if you're lucky and patient, eagles overhead, and light that turns golden in a way that makes every photo look like a painting. Drive slowly. Stop at every pullout. Bring coffee and just sit in the car with the window down.

We saw a bison herd crossing the road that stopped us for 25 minutes. It wasn't frustrating. It was one of the best 25 minutes of the trip.

🦬 Wildlife Tips

Dawn and dusk are when animals are active. Stay in your car — bison are unpredictable and far faster than they look. If you have binoculars, bring them. The wolves in Lamar Valley are often spotted by people with spotting scopes pulled over on the road — look for clusters of parked cars and join them.

End the day in Cooke City — a tiny mountain town at the northeast entrance of Yellowstone. Exactly one strip of buildings, excellent vibe. Miners Saloon for dinner — cold beer, solid food, everyone in the bar just came out of the wilderness.

Day 4

Beartooth Highway → Cody

Cooke City→ Beartooth Highway (US-212)→ Red Lodge→ Cody (~3.5 hrs)

The Beartooth Highway is frequently called the most scenic drive in the United States. We'd heard this and assumed it was marketing. It's not marketing. The road climbs from Cooke City to nearly 11,000 feet through tundra, past alpine lakes that sit at the edge of the road, through snowfields that exist even in July, and across a plateau where the world looks like it belongs on another planet.

Drive slowly. Stop constantly. Every pullout has a view worth getting out of the car for. The unnamed alpine lakes along the highway are completely accessible — park at any pullout, walk 30 seconds, and you're standing at a crystal clear mountain lake with zero other people. We stopped at four of them.

📷 The Summit

Beartooth Pass summit (~10,947 ft) has a pullout with 360-degree views of the surrounding mountains. Stop here regardless of how many times you've already stopped. In July there's still snow on the ground at the summit. The contrast of summer sun and snowfields is surreal.

Descend into Red Lodge, MT for a coffee break — cute mountain town, good cafes. Then continue to Cody, WY for the night. Cody is a proper Western town — rodeos, cowboy hats, not ironic about any of it.

Food in Cody

The Local — best food in Cody, farm-to-table, surprisingly good. Or lean into the cowboy theme at Cody Cattle Company — all-you-can-eat Western dinner with live entertainment, touristy but actually fun.

Day 5

Devils Tower

Cody→ US-14 E→ Devils Tower (~2.5 hrs)

Drive east through the Wyoming high plains — the landscape completely changes from mountain to grassland, wide open and quiet. Devils Tower appears in the distance long before you reach it — a 1,267-foot igneous rock column rising out of flat prairie. The approach is one of the best "wait, is that real?" moments in American travel.

Walk the Tower Trail — a 1.3-mile loop around the base. It's flat, takes about 45 minutes, and the scale of the thing above you only becomes clear when you're standing directly underneath it. Prairie dogs everywhere. Climbers on the rock face. Absolute eerie silence broken only by wind.

🌅 Stay for Sunset

Devils Tower at sunset is one of those things that you can't fully explain until you see it. The rock turns from grey to orange to deep red as the sun drops. The shadow it casts across the prairie is enormous. Stay until dark if you can — there's almost no light pollution here and the night sky is extraordinary.

Food

Slim options near Devils Tower — the Devils Tower Trading Post inside the monument has basic food. Stock up in Cody before you leave or bring your own.

Day 6

Mount Rushmore + Black Hills

Devils Tower→ Rapid City (~2 hrs)→ Mount Rushmore→ Needles Highway

Mount Rushmore — arrive early (open 24 hours but the crowds build fast). The monument is simultaneously smaller than you imagined and more impressive than you expected. The viewing terrace is free, parking is $10. Give it an hour, it's worth it.

After Rushmore: Needles Highway (SD-87) through Custer State Park. This road goes through tunnels carved through solid granite needle formations — you drive through a hole in a rock wall and emerge into a different landscape. The tunnels are tight, barely fits a car, and completely absurd. One of the most unique drives in the US.

🦌 Custer State Park Wildlife Loop

The Wildlife Loop Road in Custer State Park is a 18-mile drive where bison, donkeys, pronghorn, and elk just walk across the road. The donkeys are famous for sticking their heads in your car window looking for food. Don't feed them, but do stop and let it happen.

Food in Rapid City

Tally's Silver Spoon — best restaurant in Rapid City, proper meal, good cocktails. Solid send-off dinner before the final push to Minneapolis.

Day 7

Rapid City → Minneapolis

Rapid City, SD→ I-90 E→ Minneapolis, MN (~7 hrs)

The final drive — straight east on I-90 through South Dakota. This is a long flat drive and not the scenic highlight of the trip. Put on a good playlist, stop in Sioux Falls for lunch if you need a break (the Falls Park waterfall in the middle of the city is genuinely worth a 30-minute stop), and arrive in Minneapolis. My brother's stuff got unloaded. The car got emptied. The trip was done.

One of those road trips you'll talk about for years.

Logistics

The Route at a Glance

Cheyenne → West Yellowstone (5.5 hrs) → Cooke City (2 hrs inside park) → Cody via Beartooth (3.5 hrs) → Devils Tower (2.5 hrs) → Rapid City (2 hrs) → Minneapolis (7 hrs). Total ~1,800 miles over 7 days — completely manageable with the scenic drives breaking up the distance.

Key Tips

  • Enter Yellowstone before 8am — non-negotiable, crowds are brutal after 9am
  • Gas up whenever you see a station — stretches between towns are long, signal disappears
  • Download offline maps — cell service is genuinely gone for large stretches
  • Beartooth Highway can close — check conditions at beartoothhighway.com, it closes in bad weather and in winter
  • America the Beautiful Pass ($80) — covers Yellowstone, Devils Tower, and Mount Rushmore
  • Lamar Valley — best at dawn and dusk, bring binoculars

Budget (per person)

  • Car: your own or rental ~$60–90/day
  • Gas (~1,800 miles): $150–250 split
  • Hotels (6 nights): $120–220/night
  • Food: $40–70/day — gateway towns are cheap
  • Parks pass: $80 America the Beautiful
Chicago Skyline from Riverwalk

Chicago —
Thanksgiving Weekend

Thanksgiving weekend, my brother and I took the Greyhound from New York Port Authority straight into Chicago. Two days, zero agenda beyond eating well and seeing the city. Chicago absolutely delivered — it's one of those American cities that punches way above its weight. Architecture, food, lakefront, neighborhoods. Two days is not enough but it's enough to know you need to come back.

🚌 Greyhound from NYC

The Greyhound from Port Authority to Chicago takes about 17–18 hours overnight. Not glamorous, but it's cheap (~$40–80 depending on when you book) and you wake up in Chicago. Book early for the cheapest fares. Bring a neck pillow, download shows, and accept that this is just part of the adventure.

Why Chicago Works for a Short Trip

Chicago is one of the most walkable big American cities — everything in the Loop, River North, and the Riverwalk is within 10–15 minutes of each other on foot. Unlike New York where you're constantly in the subway, Chicago lets you walk between most things downtown. That's what makes a 2-day trip actually work here. You can hit the icons, eat extremely well, and feel like you've actually seen the city without burning yourself out.

Thanksgiving weekend specifically is good — the city isn't as packed as summer, the lakefront is cold but dramatic, and restaurants are open (unlike smaller cities where everything shuts down for the holiday).

Day-by-Day

Day 1

Downtown Icons + Riverwalk + Food

Millennium Park→ Riverwalk→ Navy Pier→ Skydeck

Morning

Start at Millennium Park — Cloud Gate (The Bean) first. Yes it's touristy, yes it's still worth it, and yes you will spend longer than expected taking photos from every possible angle. The Bean genuinely looks different depending on the light and time of day. Walk over to Crown Fountain after. The whole park takes 30–45 minutes at a relaxed pace.

Then walk to the Chicago Riverwalk — the city's best free attraction that most visitors ignore in favor of the Bean. The river with the skyscrapers above it on both sides is genuinely one of the better urban views in the US. Walk east toward the lake, grab a coffee from one of the kiosks, and just absorb the city for a bit.

🏛️ Hidden Gem — Chicago Cultural Center

On your way from the park to anywhere — stop inside the Chicago Cultural Center on Michigan Avenue. It's free, it takes 20 minutes, and it has two of the most insane Tiffany glass domes you will ever see. Almost nobody mentions this. It looks like something out of a European palace. Go.

Breakfast

Wildberry Pancakes and Cafe — massive portions, always a line but moves fast, worth it. If you want something quicker, Goddess and the Baker does good coffee and pastries and has no wait.

Afternoon

Navy Pier — ride the Centennial Wheel for the lakefront views, then walk out to the end of the pier and look back at the skyline. On a clear day this is one of the best skyline views in Chicago. In late November it'll be cold — bring a jacket. If the lake wind is brutal, swap this for Ohio Street Beach which is slightly more sheltered and has an equally good skyline angle.

Lunch

Deep dish is obligatory in Chicago — and there are two schools of thought. Lou Malnati's is the local favourite — butter crust, chunky tomato sauce on top (yes, on top), and the sausage patty is a whole layer not crumbled pieces. This is what Chicagoans actually eat. Giordano's is the other classic — stuffed deep dish, more cheese-heavy, equally good. Order ahead at either — it takes 45 minutes to bake. Share one between two people, it is genuinely too heavy for one person. We did both across the two days and have zero regrets. If you want the classic Chicago street food experience instead: Portillo's for a Chicago dog and Italian beef sandwich.

Lou Malnati's Deep Dish🍕

Evening

Sunset from Skydeck Chicago (~$30) — the glass balcony you stand on over the edge of the building is either terrifying or exhilarating depending on your relationship with heights. The views of the city grid stretching to the horizon are exceptional at sunset.

After the Skydeck, walk the Magnificent Mile (Michigan Avenue) at night — the lights, the architecture, the energy. Good way to wind down without committing to anything specific.

Dinner

The Purple Pig on Michigan Avenue — shared plates, Mediterranean influenced, incredible food, good wine, lively atmosphere. This was genuinely one of the best meals of the trip. Go hungry and order aggressively. If you want something more upscale, RPM Italian nearby is excellent.

After Dinner

Three Dots and a Dash — a tiki speakeasy down an alley, through a passage, underground. The entrance alone is worth the detour. Strong drinks, great vibe, exactly the kind of place you stumble onto and tell people about later.

Day 2

Neighborhoods + Hidden Gems + Architecture Cruise

Lincoln Park→ Wicker Park→ Architecture River Cruise→ Dinner

Morning

Head to Lincoln Park — short Uber or CTA ride from downtown. Lincoln Park Zoo is free (one of the last free major zoos in the US) and genuinely good. Walk through, see the animals, then walk east to North Avenue Beach for the skyline view from the lakefront looking south. In November it'll be cold and probably empty — which actually makes the photos better.

Breakfast

Cafe Ba-Ba-Reeba! in Lincoln Park — Spanish tapas brunch, great coffee, warm and lively even on a cold morning. One of those neighborhood spots that locals actually go to.

Afternoon — Wicker Park

Uber to Wicker Park — Chicago's artsy, indie neighborhood. Vintage shops, murals everywhere, coffee shops that take it seriously. La Colombe Coffee Roasters for the best coffee of the trip. Walk Milwaukee Avenue, browse the shops, absorb the neighborhood energy. This is the side of Chicago that feels nothing like the tourist downtown — and it's better for it.

🍔 Au Cheval

Au Cheval for lunch — frequently listed as one of the best burgers in the United States. The double cheeseburger with the egg on top. There will be a wait. It is worth the wait. Don't leave Chicago without eating here.

Evening — Architecture River Cruise

The Chicago Architecture River Cruise (~$45) is the single best thing you can do in Chicago. 90 minutes on the river with a guide explaining the buildings above you — when they were built, who designed them, what they were, what happened to them. Chicago invented the skyscraper and the river lets you see the full arc of that history. Do this at sunset if possible. The light on the buildings as you float under the bridges is extraordinary.

🎟️ Book Ahead

The Architecture Foundation river cruise sells out, especially on weekends. Book at least a few days ahead at architecture.org. In November the boats are heated — still go even if it's cold.

Final Dinner

Girl & the Goat — Stephanie Izard's famous restaurant, creative shared plates, the roasted pig face is the thing everyone orders and it sounds insane and tastes incredible. Book a reservation. If you can't get in, Cindy's Rooftop above the Chicago Athletic Association hotel overlooks Millennium Park and is one of the most dramatic restaurant views in the city.

Night

Green Mill Cocktail Lounge in Uptown — one of the oldest jazz clubs in Chicago, Al Capone's former favorite spot, live jazz every night. This is old Chicago in the best possible way. Cold beer, live music, wooden booths, zero pretension.

Logistics

Getting There

We took the Greyhound from New York Port Authority — overnight bus, ~17–18 hours, arrives at Chicago Union Station. Cheap ($40–80 if booked early), and the overnight timing means you don't waste daylight traveling. From Virginia, driving is about 11 hours or fly into O'Hare/Midway (Southwest is usually cheapest into Midway).

Getting Around

Walk downtown — everything in the Loop and River North is walkable. Use the CTA Red/Blue line for Lincoln Park and Wicker Park (~$2.50/ride, get a Ventra card). Uber for anything else. Chicago is flat and the grid system makes it impossible to get lost.

Where to Stay

Stay in River North or the Loop — puts you within walking distance of everything on Day 1 and easy Uber/CTA to neighborhoods on Day 2. Budget: $120–180/night. Mid-range: $180–250/night. For a 2-day trip, location matters more than the hotel itself.

Budget Breakdown (per person)

  • Transport (Greyhound from NYC): ~$50–80 each way
  • Hotel (1–2 nights): $120–250/night
  • Food (2 days): $60–120/day — Chicago is not cheap if you eat well
  • Skydeck: ~$30
  • Architecture cruise: ~$45
  • Transport in city: $20–40 (CTA + Uber mix)
Atlantic City Boardwalk

Atlantic City —
Low Effort, High Vibe

We drove down from Harrison, NJ — about 2 hours with no traffic, straightforward shot down the Garden State Parkway. Atlantic City was never on our "must-do" list but we needed a quick weekend escape and it was close. It delivered exactly what we needed: a boardwalk, decent food, casino energy without the gambling, and a Hard Rock hotel that felt way nicer than the price suggested.

Zero pressure trip. No permits, no planning spreadsheets, no 6am alarms. This is the antidote to the national park trips.

🚗 Drive from NJ

Harrison to Atlantic City is about 2 hours via Garden State Parkway South — take it all the way to Exit 38. Easy drive, mostly highway, no real traffic unless you're leaving on Sunday afternoon. Leave by 3pm Sunday or you'll hit the exodus. Parking at Hard Rock is free for hotel guests.

Why It Works for a Quick Escape

Atlantic City has a very specific energy — old-school boardwalk charm that's slightly worn at the edges, massive casinos that exist in their own universe, ocean views that are genuinely beautiful especially at sunrise and sunset, and food that ranges from legendary subs to proper sit-down dining. It's not trying to be Las Vegas and it's better for it.

We stayed at the Hard Rock Hotel & Casino — music memorabilia everywhere, a lively casino floor, and rooms that are comfortable and well-located right on the boardwalk. The casino energy is fun to walk through even if you're not gambling — the scale of the floor, the sounds, the light. We walked around, watched people, had drinks at the bar, and called it a night. Nobody pressures you to gamble.

Day-by-Day

Day 1

Boardwalk + Hard Rock + Sunset

Harrison, NJ → AC (~2 hrs)Boardwalk→ Hard Rock Casino→ Sunset

Morning — Boardwalk Walk

Start on the Atlantic City Boardwalk before it gets busy. Early morning is the best time here — ocean breeze, almost nobody around, the whole stretch to yourself. The boardwalk has this old-school American energy that's hard to describe — slightly faded, street performers setting up, the smell of the ocean mixing with funnel cake from stands that haven't opened yet. Walk toward the Steel Pier end and back.

🌅 Sunrise on the Boardwalk

If you're an early riser — the boardwalk at sunrise is extraordinary. The light on the ocean, no crowds, the casinos lit up in the background. Ketaki got some of her best shots of the trip here at 6:30am. Set an alarm.

Breakfast — Gilchrist Restaurant

Gilchrist Restaurant near the boardwalk — one of those unpretentious diner spots that just gets everything right. We had the blueberry pancakes and a veggie omelette. Hearty, fresh, no drama. Good flavors that work for Indian palates — nothing bland, nothing weird. Sitting near the water makes it better. This is the move for breakfast both days.

Afternoon — Hard Rock Casino

Check in at the Hard Rock Hotel & Casino, drop bags, and spend the afternoon on the casino floor. We're not gamblers — we walked around, took in the scale of the place, had a drink at the bar, looked at the music memorabilia (actually interesting if you like rock history), and watched the energy of the floor. It's a spectacle worth experiencing even without putting money down.

⏰ No Clocks, No Windows

Casinos are designed to make you lose track of time — no clocks anywhere, no natural light. Keep your phone out and check the time periodically. We lost two hours just wandering around and genuinely had no idea.

Lunch — White House Sub Shop

White House Sub Shop is genuinely legendary in Atlantic City — been open since 1946, celebrities have eaten here, the walls are covered in signed photos. We got the veggie sub, loaded with everything, huge portions, completely satisfying. Easy to customize, big bold flavors. Share one between two people.

If you're craving something closer to home mid-trip: Curry In Hurry nearby is no-frills desi food that hits the spot. Not fancy, just solid.

Evening — Boardwalk Sunset + Dinner

Sunset on the Atlantic City boardwalk is underrated. The light on the ocean turns everything golden, the crowds thin out slightly, and the whole place has a calmer energy than midday. Walk toward the Absecon Lighthouse end if you want a quieter stretch — the lighthouse itself closes early (go earlier in the day if you want to climb it for views).

Dinner: Dock's Oyster House — the nicer dinner option, been around since 1897, proper seafood restaurant. The garlic shrimp and seafood pasta were the standouts — rich, well executed, worth the price. It leans seafood-heavy so if that's not your thing, Punjab Kabab House is the comfort call — proper desi food, butter chicken and naan that actually taste right.

🍽️ Food Strategy

Atlantic City surprisingly works for Indian palates — between Gilchrist for breakfast, White House Sub for lunch, and Punjab Kabab House as a dinner backup, you're covered. Dock's is worth trying if you eat seafood — it's genuinely good, not just tourist food.

Day 2

Gardner's Basin + Shopping + Boardwalk Goodbye

Gardner's Basin→ Tanger Outlets→ Boardwalk→ Drive home

Morning — Gardner's Basin

Gardner's Basin is the side of Atlantic City most visitors skip — a small marina area that feels completely removed from the casino chaos. Quiet, scenic, the water right there. A good morning walk before the city wakes up. We went back to Gilchrist for breakfast again — which says everything you need to know about it.

Afternoon — Tanger Outlets or Relax

Tanger Outlets Atlantic City is right there if you want to shop — decent selection, good prices, easy to spend a couple of hours. The Hard Rock also has a spa if you'd rather slow down completely. The casino resorts are genuinely good at providing indoor spaces to just sit, drink coffee, and exist without any agenda. We did a mix of both.

Leaving — Boardwalk + Taffy

Last walk down the boardwalk before heading out. Stop at James Candy Company for their saltwater taffy — it's an Atlantic City institution, been making it the same way for over a century. Get a box to take home. Simple ending but it fits the trip perfectly.

🚗 Leave by 3pm Sunday

The Garden State Parkway heading north on Sunday afternoon is brutal from about 4pm onwards — everyone leaving the shore at the same time. Leave by 3pm and you'll have a clean drive back. Leave at 5pm and you'll regret it.

Logistics

Getting There

Drive from Harrison, NJ — 2 hours via Garden State Parkway South to Exit 38. Easy highway drive. Free parking at Hard Rock for hotel guests. If you're coming from New York City, NJ Transit runs a bus from Port Authority directly to Atlantic City (~2.5 hrs, ~$30 round trip) — convenient if you don't have a car.

Where to Stay

  • Hard Rock Hotel & Casino — best mix of vibe and location, right on the boardwalk. Our pick.
  • Ocean Casino Resort — modern, cleaner aesthetic, often has good deals
  • Borgata Hotel Casino & Spa — slightly more premium, worth it if you find a deal

Budget (per couple)

  • Hotel (1 night, 2 people): $120–250
  • Food (2 days): $60–120/day
  • Gas (from NJ): ~$20–30
  • Activities: $20–50 (lighthouse, outlets)
Lake Crescent Olympic National Park

Seattle + Olympic +
North Cascades

I was living in Seattle downtown at the time — right near Pike Place — so when Ketaki visited, this was the obvious trip. My own car, no rental cost, and a home base that meant Day 1 and Day 4 were completely zero-effort. Four days, two national parks, a ferry across Puget Sound, one seriously painful but spectacular hike, and noodles cooked on a camp stove by a turquoise lake in the Cascades. This one felt like a film.

🚗 Huge Advantage: Local Knowledge

Living in Seattle meant we knew where to park, which coffee shops opened early, and how to read the weather. The Pacific Northwest has a saying — "if you don't like the weather, wait five minutes." Layer up, keep rain gear in the car, and don't cancel plans because of clouds. The best moments on this trip happened in moody, overcast light.

Why This Route Works

Seattle sits at an unusual intersection — within a few hours you can be on a ferry crossing Puget Sound toward the Olympic Peninsula, or driving east into the dramatic alpine terrain of North Cascades. Two completely different national parks, two completely different ecosystems, all accessible from a downtown apartment without ever booking a flight.

The structure is simple: Day 1 is the transition (city → ferry → Olympic Peninsula base), Days 2-3 are the two park days, Day 4 is the city recovery day. No backtracking, everything flows forward.

Day-by-Day

Day 1

Seattle → Ferry → Port Angeles

Pike Place area→ Colman Dock ferry→ Puget Sound crossing→ Port Angeles

Started from downtown Seattle — grabbed coffee and breakfast near Pike Place (we were spoiled for choice living there, but Pike Place Chowder for a clam chowder bread bowl is always the right call). Drove to Colman Dock and loaded the car onto the ferry to Bainbridge Island, then drove the rest of the way up to Port Angeles.

The ferry crossing is the best part of Day 1. Standing on the deck as Seattle's skyline slowly shrinks behind you, the Olympic Mountains coming into view ahead — it's a proper cinematic transition from city to wilderness. The crossing takes about 35 minutes. Stay on deck the whole time.

⛴️ Ferry Logistics

Book the ferry in advance at wsdot.wa.gov/ferries — especially on weekends, car spaces fill up. The Bainbridge Island ferry from Colman Dock runs frequently. From Bainbridge, drive north through the Kitsap Peninsula and Hood Canal to Port Angeles — about 2 hours total from Seattle. It's a beautiful drive, not just a commute.

Checked into the Airbnb in Port Angeles by early afternoon. Kept the evening completely relaxed — walked the quiet waterfront, watched the Olympics across the water, and went all-in on seafood for dinner. Grilled salmon or fish tacos — Port Angeles is a fishing town, the seafood is fresh and simple and exactly right. Don't overthink dinner here.

Day 2

Olympic National Park — Lake Crescent + Storm King + Ruby Beach

Lake Crescent→ Mount Storm King hike→ Ruby Beach sunset

Early start. Drive from Port Angeles into Olympic — the park entrance is close, which is one of the reasons Port Angeles is the right base. Lake Crescent stops you immediately. The water is an electric blue that looks wrong — too vivid to be real, like someone turned up the saturation. It's surrounded by forest and mountains, and the reflection on a calm morning is extraordinary.

Mount Storm King — The Hike

This hike is not easy. The trail starts at Lake Crescent Lodge and climbs steeply — roots, rocks, sustained elevation gain. The final section near the summit has ropes fixed to the rock face for assisted scrambling. We did it, both of us, and Ketaki made it look significantly easier than I did.

At the top: panoramic views of Lake Crescent far below, the Olympic Peninsula stretching in every direction. One of those views that makes you understand why people become hikers. Worth every painful step. The descent is harder on the knees than the ascent — take it slow coming down.

📷 Ketaki's Pick

The view from the Storm King summit with Lake Crescent below is the single best photo opportunity of the entire trip. Late morning light is ideal — the lake turns from dark blue to bright turquoise as the sun hits it at the right angle. Give yourself time at the top, don't rush the descent.

🥪 Pack Lunch — Mandatory

There is nothing to eat near the Storm King trailhead. Pack lunch before you leave Port Angeles and eat by the lake after the hike. Sitting at the edge of Lake Crescent with a packed lunch after that climb is one of the better meals you'll have on the trip despite the food itself being unremarkable. Context matters.

Ruby Beach — Sunset

After the hike, drive west to the coast. Ruby Beach is about an hour from Lake Crescent — the Olympic Peninsula's Pacific coast is a completely different ecosystem from the mountain interior. Sea stacks rising from the surf, driftwood everywhere, crashing waves, that moody Pacific Northwest light turning everything grey-gold at sunset.

We grabbed takeaway food before driving out and ate on the beach watching the sunset. This is the move. There are no restaurants near Ruby Beach. Plan ahead, bring food, stay for the full sunset.

🌅 Ruby Beach Timing

Check the sunset time before you go and work backwards. Give yourself 30 minutes on the beach before sunset starts — the light changes fast. The sea stacks look best in the last 20 minutes of light. This was Ketaki's favourite photography moment of the whole trip.

Day 3

North Cascades — Diablo Lake + Camp Stove Noodles

Port Angeles → Seattle (~2.5 hrs)→ North Cascades Highway (SR-20)→ Diablo Lake

Longer drive day — back through Port Angeles, onto the ferry, through Seattle, and east on SR-20 into North Cascades. The drive on the North Cascades Highway is itself a destination — one of the most scenic roads in Washington, climbing through old growth forest into alpine terrain.

North Cascades feels completely different from Olympic — rawer, less polished, fewer visitors. The landscape is more dramatic and less accessible, which is exactly why it's worth it. Diablo Lake is the centrepiece: the water is an impossible turquoise-green caused by glacial flour suspended in the water. It looks like something from the Swiss Alps dropped into Washington State.

🍜 Camp Stove Moment

We carried a small camp stove. Found a quiet spot by Diablo Lake, boiled water, made instant noodles. Hot, spicy, absurd that this is what we were eating in front of that view. This is one of those "you had to be there" moments that becomes a core trip memory. Bring a stove, bring Maggi or whatever instant noodles you like, find a lake, cook lunch. Do this.

Spent the rest of the day at viewpoints along the highway — Washington Pass Overlook is a short walk from the car and gives you one of the best mountain panoramas in the state. Drive as far east as you want, then turn around and head back to Seattle.

Day 4

Back in Seattle — Ramen + Pike Place + Recovery

Seattle downtownPike Place Market→ Ramen→ Waterfront

No agenda. This is the reward day. After three days of hiking, ferry rides, and long drives, Seattle gets to be a city again.

Ramen — Seattle has excellent ramen and after days in the mountains it's exactly what your body wants. Ramen Danbo or Menya Musashi in Capitol Hill are both outstanding — rich broth, spicy options that have something of that Indian heat kick. This was lunch. We went twice.

Pike Place Market — living near it meant we knew the non-tourist parts. Walk past the fish throw (yes, watch it once), but then go down to the lower levels — that's where the actual market is, the flower stalls, the cheese shops, the craft vendors. Have coffee at the original Starbucks on Pike Place for the photo, then immediately go to Espresso Vivace on Broadway for coffee that's actually good.

Afternoon: waterfront walk, maybe the Great Wheel if you want the views, or just sit somewhere with a coffee and watch the ferries. Ketaki spent most of the afternoon photographing the market light. I ate another bowl of ramen. Perfect ending.

Logistics

The Unique Advantage of Living There

This trip worked partly because of local knowledge — knowing the ferry schedule, knowing where to park, knowing which coffee shop opens at 6am. If you're visiting Seattle rather than living there, all of this is still doable, but rent a car (add ~$60–80/day) and stay somewhere central. Capitol Hill or Belltown both work.

Key Bookings

  • Ferry reservation — wsdot.wa.gov/ferries, book car space in advance especially weekends
  • Port Angeles Airbnb — 2 nights, book 3–4 weeks out
  • America the Beautiful Pass ($80) — covers Olympic and North Cascades entry
  • Storm King hike — no permit needed, but start early (trail gets crowded by 10am)

Budget (per person)

  • Airbnb (2 nights Port Angeles, split): $80–150/night
  • Ferry (car + 2 passengers): ~$50–70 round trip
  • Gas (2–3 tank days of driving): $60–100
  • Food (4 days): $25–50/day
  • Parks pass: $80 America the Beautiful
Acadia Night Sky

Acadia National Park —
Tents, Stars & Lobster

We drove up from Harrison, NJ — about 6.5 hours to Acadia, Maine. Ketaki and a few friends, tents in the car, zero agenda beyond getting into the park and staying there. We camped at Blackwoods Campground inside the park — which turned out to be the single best decision of the trip. Being inside Acadia changes everything. No driving back to a hotel at night, no missing the early morning magic, no distance between you and the actual experience. You wake up inside a national park. That alone is worth the tent setup.

But the thing that made this trip unforgettable had nothing to do with hiking. It was the stargazing. Acadia is one of the best places on the East Coast for it — far enough from city lights that the sky actually opens up. Two nights under that sky is something none of us have forgotten.

🚗 Drive from Harrison, NJ

About 6.5 hours via I-95 North through Boston, then up Route 1 through coastal Maine into Bar Harbor. Leave early Friday morning to avoid Boston traffic — or leave Thursday evening. The coastal Maine stretch from Portland to Bar Harbor is beautiful and worth driving slowly if you have time.

Why Camp Inside the Park

Blackwoods Campground is inside Acadia, less than a mile from the ocean. Tent sites, fire rings, basic facilities — nothing fancy, everything you need. The campground is surrounded by forest and close to several trailheads. Being there means you're already at the park when everyone else is still driving in from Bar Harbor hotels.

Book at recreation.gov well in advance — Blackwoods fills up months ahead, especially in summer. If you can't get Blackwoods, Seawall Campground on the quieter southwest side of the island is the backup.

Day-by-Day

Day 1

Arrive → Set Up Camp → Sand Beach → Bar Harbor → Stars

Harrison NJ → Acadia (~6.5 hrs)Blackwoods Camp→ Sand Beach→ Bar Harbor→ Stargazing

Set Up Camp

First thing on arrival: set up tents before anything else. Don't make the mistake of rushing to the trails first — you'll be exhausted by evening and setting up camp in the dark is miserable. Get the site sorted, get familiar with where everything is, then head out.

Sand Beach

Sand Beach is the first stop — one of the only sandy beaches in Acadia on an otherwise rocky coastline. The combination of soft sand, Atlantic surf, and the pink granite cliffs surrounding it doesn't look real. The water is cold year-round — genuinely cold — but walking the shoreline in the afternoon light with travel fatigue slowly draining out is exactly the right way to ease into the park.

Bar Harbor Evening

Drive into Bar Harbor for dinner — about 5 minutes from Blackwoods. This is a proper Maine coastal town: lobster everywhere, ice cream shops, people in fleece jackets and hiking boots, the smell of the ocean mixing with whatever's being grilled.

🦞 The Lobster Roll — Do Not Skip

Bar Harbor has some of the best lobster rolls in Maine, which means some of the best in the world. Get a cold lobster roll — chunks of fresh lobster, light mayo, in a toasted split-top bun. Not the hot buttered version (that's Connecticut style). This is Maine, get it right. Thurston's Lobster Pound and Café This Way are both excellent. Budget ~$25–35 for the roll. Worth every dollar.

🍦 Ice Cream After — Non-Negotiable

Mount Desert Island Ice Cream in Bar Harbor is genuinely one of the best ice cream shops in New England. Unusual flavours, made in small batches, rotating menu. We got multiple scoops and walked around town. This became the evening ritual both nights we were in Bar Harbor. Go every time you're there.

Stargazing — Night 1

This is the part of the trip that nobody plans for and everybody remembers. Back from Bar Harbor, drive to a quiet spot near the water — Echo Lake or the area near Sand Beach after the day visitors leave. Away from any lights. Lie down. Let your eyes adjust for 10–15 minutes.

Acadia is a designated International Dark Sky Park — one of the few on the East Coast. The sky opens up in a way that's genuinely shocking if you've been living in cities. The Milky Way is visible on clear nights. Stars you didn't know existed appear. Everyone in the group went quiet at the same time without anyone deciding to.

🌌 Stargazing Tips

Check the weather forecast for cloud cover — clear nights are everything. Check the moon phase — a new moon means a darker sky. Go after 9:30pm when the sky is fully dark. Bring a blanket and warm layers — Maine nights are cold even in summer. Don't use your phone for 15 minutes after arriving — let your eyes adjust fully. The first 15 minutes you think it's fine. After 20 minutes the sky is completely different.

Day 2

Full Hiking Day + Stargazing Round 2

Early start→ Multiple trails→ Bar Harbor lunch→ Scenic drives→ Stars again

Morning Hikes

Start before 8am — the trails in Acadia are significantly better before the day visitors arrive from Bar Harbor hotels. The air is cooler, the light is better for photos, and you have the park to yourselves.

Acadia's genius is the variety — every trail gives you something completely different. The Beehive Trail has iron rungs bolted into cliff faces (proper scrambling, Ketaki loved it). Jordan Pond Path is a flat 3.3-mile loop around a stunning glacial lake with the Bubbles mountains reflected in the water. Gorham Mountain gives you panoramic ocean and island views for moderate effort. Do 2–3 shorter trails rather than one long one — you see more of the park that way.

📷 Ketaki's Pick

Jordan Pond on a calm morning — the reflection of the Bubbles mountains in the still water is the classic Acadia shot. Get there before 8am before any wind picks up and disturbs the surface. The light through the treeline on the eastern shore in early morning is extraordinary.

Midday — Bar Harbor Again

Back to Bar Harbor for food — this time we kept it simple, breakfast sandwiches from one of the small cafes in town. Warm, filling, unpretentious. The kind of meal that hits perfectly after a morning of hiking. Café This Way does excellent breakfast all day.

And yes — ice cream again. Mount Desert Island Ice Cream. Non-negotiable. Different flavours from yesterday.

Afternoon — Trails + Park Loop Road

The Park Loop Road is 27 miles around the eastern side of Mount Desert Island — drive it slowly with the windows down, stopping at every pullout. Thunder Hole (when the waves are right, the compressed air booms), Otter Cliffs (45-foot granite cliffs dropping into the Atlantic — the best cliff views in the park), and Cadillac Mountain if you have time — the highest point on the US East Coast, the first place in the continental US to see sunrise from October to March.

Stargazing — Night 2

The second night is better than the first. You know where to go, you know how long to wait for your eyes to adjust, and you're not tired from the drive anymore. We found a darker spot than Night 1, stayed longer, and it was completely silent except for the sound of the ocean somewhere below. Nobody wanted to go back to the tents.

This is the night that sticks. The one that comes up every time anyone from the group talks about this trip.

Day 3

Slow Morning → Last Hike → Bar Harbor Goodbye

Pack up camp→ Easy morning hike→ Bar Harbor→ Drive home

Pack up camp in the morning — slower pace, no rush. Everything feels familiar by now: the sounds of the park, the smell of the campfire from last night, the way the light comes through the trees in the morning.

One last easy walk — more of a stroll than a hike — just to be in the park one more time. By now the trails feel like yours. That's what camping inside the park does to you.

Final Bar Harbor stop. Last lobster roll if you can manage it. Definitely the ice cream. One last walk along the waterfront before getting in the car.

The drive back to Harrison is about 6.5 hours. Leave by noon to get back at a reasonable time. The coastal Maine stretch feels different on the way home — familiar but already missed.

🚗 Leave Early Sunday

The I-95 South through Boston on Sunday afternoon is brutal from about 3pm. Leave Acadia by noon to get through Boston before the traffic builds. If you can't leave by noon, wait until after 7pm and stop somewhere in coastal Maine for dinner — trying to fight Sunday highway traffic is not worth it.

Logistics

Camping at Blackwoods

Blackwoods Campground is the best base in Acadia. Book at recreation.gov — opens 6 months in advance, fills up extremely fast for summer. Tent sites are ~$30/night. You get a fire ring, picnic table, access to restrooms and potable water. Bring your own firewood (or buy at the entrance store). Quiet hours at 10pm — enforced and appreciated.

What to Bring for Camping

  • Tent + sleeping bag rated for 40°F — Maine nights are cold even in July
  • Headlamps — essential for stargazing and navigating camp at night
  • Warm layers — temperature drops fast after sunset
  • Camp stove + food — breakfast at camp saves Bar Harbor money for the lobster roll
  • Bear box or hang system — black bears in Acadia, store food properly
  • Rain gear — Maine weather changes fast

Budget (per person)

  • Camping (2 nights, split per tent): ~$30–40/night total, divided by 2
  • Park entry ($35/vehicle): split across group
  • Gas (from Harrison NJ, split): ~$40–60/person
  • Food (3 days): $40–70/day — camp breakfast cheap, Bar Harbor splurge on lobster
  • Lobster roll: budget $30 — this is the one thing worth paying for
Overseas Highway Florida Keys

Orlando → Miami →
Key West

September long weekend — my birthday trip. Flew into Orlando with Ketaki, my best friend, and his girlfriend. Seven days covering three completely different vibes: theme park chaos in Orlando, beach cool in Miami, and the slow island magic of Key West. We worked on weekdays (remote, 9–5 ET) and went hard on evenings and the full weekend. The contrast between "work laptop open, noise-cancelling on" and "Disney at sunset" is genuinely something.

🎂 Birthday Trip Context

September is actually a great time to do Florida — post-summer, crowds at the parks thin out a bit, temperatures are still warm, and flights from the northeast are cheaper than peak summer. Hurricane season technically runs through November but September is manageable — just watch the forecast.

The Three-City Structure

The routing is the genius of this trip: fly into Orlando for the parks, drive down to Miami for the beach, then continue down the Overseas Highway to Key West. One-way progression, no backtracking, each city completely different energy from the last. Rent the car in Orlando and drive it all the way through — dropping it in Key West adds a small one-way fee but is absolutely worth it over driving back.

Day-by-Day

Day 1

Arrive Orlando — Indian Food Reset

✈ Orlando MCO→ Airbnb near parks→ Indian dinner

Flew into Orlando MCO, picked up the rental, checked into the Airbnb near the parks. Kept Day 1 deliberately light — no parks, no agenda. Just settle in, decompress from travel, and eat well.

Orlando has a genuinely impressive Indian food scene — large Indian-American community, multiple solid options. We found a good curry spot near the Airbnb and had a proper meal: rich curries, the right spice levels, naan that actually tasted right. The perfect comfort reset before the chaos of the parks starts.

Day 2

Work Day → Disney World (Evening)

9–5 remote work→ Walt Disney World→ Disney after dark

Work until 5, then straight to Walt Disney World. Doing Disney after work sounds exhausting and somehow isn't. You arrive when the afternoon heat is breaking, the evening light makes everything look better, and the crowds are slightly thinner than peak midday.

The key insight: don't try to "do Disney" in one evening. Pick a section — we did Magic Kingdom — pick 3–4 rides, and just exist in the park. The atmosphere at Disney after dark is genuinely cinematic. The castle lights up, the parade moves through, people around you are having the time of their lives. You absorb it rather than chase it.

🎢 Disney Strategy

Get the Lightning Lane passes for the 2–3 rides you actually care about. Don't buy it for everything — just the rides with 60+ minute waits. Haunted Mansion, Space Mountain, and Tomorrowland are all worth the evening crowds. Arrive at 5pm, stay until 9–10pm, leave before the closing rush.

Day 3

Work Day → Universal Studios (Express Pass)

9–5 remote work→ Universal Orlando Resort→ Harry Potter World

Same pattern — work, then straight to Universal Orlando Resort. And this is where the smartest decision of the trip happened: Express Pass.

With Express Pass in the evening window, we were hopping from ride to ride with almost no waiting. In 4 hours we covered what would normally take a full day. The math on the Express Pass is brutal — it's expensive — but when you're working all day and only have the evening, it completely changes what's possible.

⚡ Harry Potter World

The Wizarding World of Harry Potter is genuinely the best themed area in any park we've been to. The details are insane — the stores, the food, the way Hogwarts castle is lit up at night. Butterbeer (the cold version, not the hot one), the Forbidden Journey ride inside the castle, and the interactive wand experiences in Diagon Alley. Do all of it. This alone justifies the Universal ticket.

Dinner after: Indian again on the way home — same spot as Day 1, same order. When you're running on park energy and work, knowing dinner is sorted is underrated.

Day 4

Work → Drive to Miami

Work until 5→ Florida Turnpike S→ Miami (~4 hrs)

Work, pack up the Airbnb, load the car, and drive south. Orlando to Miami is about 4 hours — mostly Florida Turnpike, which is flat and fast. Arrive in Miami around 9–10pm, check into the Airbnb near Miami Beach, drop bags, walk to the ocean.

The shift from Orlando to Miami is immediate. The energy is completely different — looser, louder, warmer in a different way. Miami Beach at night with four people on a birthday trip is exactly what it sounds like. We walked the strip, found somewhere to eat, and stayed out later than planned.

🏠 Miami Airbnb

Stay walkable to Miami Beach — within 10 minutes on foot. South Beach area for the full Miami experience. The walkability is the whole point; you don't want to be driving to the beach every time. Budget $120–200/night for a decent 2-bedroom split four ways.

Day 5

Work → Miami Beach Sunset

9–5 remote work→ Miami Beach→ Sunset + dinner

Work until 5, walk to the beach. This is the simple version of a perfect day. Miami Beach in the late afternoon — the light goes golden, the Atlantic turns dark blue, people are everywhere but the energy is good. Sat by the water, watched the sun go down, didn't move for a while.

Food in Miami: we mixed Indian with local. Versailles Restaurant on Calle Ocho for Cuban food is the move if you want something different — the Cuban sandwich and ropa vieja are both outstanding. Bold flavors, proper portions, nothing subtle. If you want Indian, Little Havana area has a few solid options too.

Day 6

Work → Overseas Highway → Key West

Work until 5→ US-1 S→ Overseas Highway→ Key West (~3.5 hrs)

Work, pack up Miami, start driving south. The Overseas Highway (US-1) from Miami to Key West is 113 miles of road built on a series of bridges connecting the Florida Keys — ocean on both sides, golden hour light hitting the water, no other landscape like it in the US. Start this drive by 5–5:30pm and you'll catch the sunset somewhere in the middle of the Keys. Pull over at any bridge.

🌅 The Drive Is the Attraction

The Seven Mile Bridge section is the one everyone knows — 7 miles of road with nothing but ocean on both sides. Going over it as the sun is dropping is one of the better driving experiences in the country. Don't rush this section. Pull over at the old bridge turnoff if you want to walk out over the water.

Checked into the Key West beach house Airbnb — the upgrade was worth it here. Key West is small enough that location doesn't matter much, but being close to Duval Street and the water sets the tone. Dinner at Caroline's Cafe — fresh seafood, simple execution, right on the island vibe. The fish tacos and the catch of the day are both good.

🛺 Golf Cart > Car in Key West

Park the rental car once you arrive in Key West and don't move it. Rent a golf cart instead (~$50–80 for the day) — Key West is tiny, golf carts get everywhere, parking is free everywhere for them, and it's just more fun. Every group of four should rent one. Non-negotiable.

Day 7

Key West Day — Golf Cart + Sunset

Golf cart all day→ Beaches→ Duval Street→ Mallory Square sunset

The only full free day of the trip — and Key West deserves it. Golf cart from morning, no agenda, no plan. You stop where you want, turn wherever looks interesting, find a beach, get back on. Key West is 4 miles by 2 miles. You can cover the whole island in an hour on a golf cart, which means you can cover it five times and still find something new.

Smathers Beach for a proper beach day — the longest beach in Key West, calm water, good for just sitting. Duval Street for the classic Key West walkabout — bars, shops, street performers, the energy is unlike anywhere else. Hemingway House if you want a quick cultural stop — the six-toed cats alone are worth it.

🌅 Mallory Square Sunset — The Birthday Closer

Mallory Square at sunset is a Key West institution — street performers, crowds, music, the whole island gathering to watch the sun drop into the Gulf of Mexico. We were there for my birthday sunset. Whatever you think it'll be like, it's better. Get there 30 minutes before sunset for a good spot. Buy something from a street vendor, stand at the water's edge, watch the whole thing go down.

Seafood all day in Key West — the fish is fresh, the preparations are simple and right, and after a week of Indian food in Orlando and Miami, leaning into the local flavour of Key West felt exactly correct.

Logistics

The Route

Fly into Orlando MCO, rent a car, drive south over 7 days. Drop the car in Key West (one-way fee, worth it). Fly home from EYW (Key West Airport) — small airport, flights to Miami/Fort Lauderdale then connect, or fly to Miami and get a direct from MIA. Alternatively: fly home from Miami, skip the Key West rental drop fee, and take a shared shuttle from Key West to MIA (~$50–70/person).

Working Remotely En Route

All three Airbnbs had reliable WiFi. Orlando and Miami are both major cities — no connectivity issues. Key West has slightly slower internet in some properties, worth checking reviews specifically for this. The pattern of working 9–5 then going out evenings actually worked well — you don't burn out because the days are structured, and the evenings feel earned.

Budget (per person, group of 4)

  • Flights (round trip): $150–400 depending on origin
  • Airbnb (7 nights, split 4 ways): ~$60–100/person per night
  • Car rental (7 days, one-way): ~$400–600 total split 4 ways
  • Disney (Lightning Lane): ~$120–180/person
  • Universal (Express Pass): ~$180–260/person
  • Food (7 days): $35–60/day
  • Golf cart Key West: ~$70–100 split 4 ways
Atlantis The Palm Dubai

Dubai — The Layover
That Became Everything

We were flying back from India to Dulles on Emirates. I booked us a 4-day stopover in Dubai — Ketaki had no idea until we landed. Emirates dropped us at Atlantis, The Palm directly from the airport since we were in business class. Three nights at Atlantis, one night in a desert camp after a full sand safari. The whole thing ran on points and it remains one of the most absurd, over-the-top, genuinely incredible trips we've taken.

This is not a budget trip guide. This is how to use credit card points and a long-haul layover to hack a luxury vacation you will talk about for years.

✈️ The Emirates Business Class Stopover Play

Emirates allows free stopovers in Dubai on award tickets. Book the India → DXB → IAD routing, add a 4-day stopover, and you've converted a transatlantic flight into a luxury vacation. The points strategy: Chase Sapphire Reserve → transfer to Emirates Skywards → book Emirates Business on the A380. The fully flat bed, the bar, the service — it's a different category of travel. Start accumulating points now if this is on your list.

The Surprise — Why It Landed

Ketaki knew we had a connection in Dubai. She didn't know the connection was 4 days long, that I'd booked Atlantis, or that a desert camp was part of the plan. By Day 3 when everything had fully registered, she said it was the most thought anyone had ever put into a trip for her. Set that bar. Then clear it.

Dubai is uniquely comfortable for Indians — large Indian diaspora, Indian food everywhere, familiar flavours in a completely different context, and Indian passport holders get visa on arrival free. The city is also genuinely extraordinary on its own terms: the scale, the ambition, the food, the desert right outside.

Day-by-Day

Day 1

Land → Emirates Chauffeur → Atlantis, The Palm

DXB terminal→ Emirates chauffeur (complimentary)→ Atlantis, The Palm

Emirates business class passengers get a complimentary chauffeur from the airport — we stepped off the plane, cleared immigration, and were driven directly to Atlantis on the Palm Jumeirah. No taxi queue, no confusion, no effort. The drive across the Palm — the curved trunk road, the fronds branching off on both sides, the hotel appearing at the end — is the first moment Dubai's scale becomes real.

Checking into Atlantis, The Palm is an experience in itself. The lobby has a floor-to-ceiling aquarium. The scale of the property is enormous — multiple towers, a waterpark, a private beach, 17 restaurants. We explored the property for the rest of the afternoon and evening. On Day 1 we didn't leave the hotel. We didn't need to.

🏨 Atlantis on Points

Atlantis is bookable on Marriott Bonvoy points — one of the better redemptions given the cash rate (which can be $500–1000+/night). Transfer Chase Ultimate Rewards to Marriott Bonvoy if you need to top up points. Book the Palm View room — the view of the Palm frond from the window is the postcard shot. The Aquaventure waterpark access is included with the room.

Day 2

Burj Khalifa + Dubai Mall + Museum of the Future + Kashkan

Burj Khalifa (morning)→ Dubai Mall→ Museum of the Future→ Kashkan dinner

We rented a car for the city days — Dubai is spread out and driving is the most efficient way to move around. Roads are excellent, GPS works perfectly, signage is in English. The only adjustment: they drive on the right, like the US.

Burj Khalifa

Standing underneath the Burj Khalifa, it doesn't look real. It's not just tall — it's impossibly, cartoonishly tall. The observation deck at the top gives you a 360° view: the downtown grid, the Palm stretching into the Gulf, the desert starting where the city ends. Book the morning slot for better visibility before the haze sets in, and book online in advance.

Dubai Mall

Dubai Mall is not a mall — it's a city district with retail in it. The indoor aquarium with sharks, an ice rink, a waterfall, the Dubai Fountain outside that runs every 30 minutes. We walked through, ate lunch inside, and moved on. You could spend a full day here but the goal was to see it, not conquer it.

Museum of the Future

The Museum of the Future is the most distinctive building in Dubai — a torus-shaped structure covered in Arabic calligraphy, floating above the ground. The outside alone justifies the visit. Inside is an immersive experience about possible futures: space, technology, climate. Thought-provoking in a way that most museums aren't. Give it 2–3 hours.

📷 Museum of the Future at Dusk

The building at dusk when the LED calligraphy lights up and the sky goes orange behind it — this is the shot. Come for the exterior first around sunset, then go inside. Ketaki's favourite photograph from the entire Dubai trip.

Dinner — Kashkan by Ranveer Brar

Kashkan in the Four Seasons DIFC — non-negotiable for me. I've followed Ranveer Brar's work for years and when I found out he had a restaurant in Dubai, it went on the list the day the trip was planned. The food is Levantine and Middle Eastern with his signature touch of elevating familiar flavours.

The hummus is the best I've ever had — silky, warm, with something underneath it I still can't fully identify. The kebabs are smoky and precisely seasoned. For Indian palates this is immediately comfortable but elevated — the flavour profile rhymes with Indian food but is distinctly its own thing. We ordered too much and finished everything. Book in advance.

Day 3

Palm Jumeirah + Mall of the Emirates + Atlantis Day

Palm Jumeirah walk→ Mall of the Emirates→ Atlantis beach + waterpark

Palm Jumeirah Walk

Morning walk along the Palm boardwalk — the outer crescent has views back toward the Dubai skyline across the water. Cool before 9am, genuinely beautiful. The scale of the Palm only makes sense when you're inside it looking out at the city you just came from.

Mall of the Emirates + Ski Dubai

Mall of the Emirates has an indoor ski slope — Ski Dubai — in the middle of the desert. You look through the glass at people skiing while it's 40°C outside. We didn't ski (we have an Austrian Alps trip planned, so this felt redundant) but watching it through the glass is surreal enough to justify the visit. The mall is more manageable than Dubai Mall — good for lunch and a relaxed browse.

Atlantis Afternoon

Back to Atlantis for the afternoon — the Aquaventure waterpark, the private beach, the pool. This is the day to actually use what you're staying at. The waterpark is legitimately excellent. By late afternoon we were on the beach watching the Dubai skyline across the water. This is the moment the trip fully landed for Ketaki — sitting there watching the city, realising it had all been a surprise, and that there was still a desert camp to come.

Day 4

Desert Safari + Overnight Camp

Check out Atlantis→ Dubai Desert Conservation Reserve (~45 min)→ Dune bashing→ Overnight Bedouin camp

Check out of Atlantis and drive toward the desert. The transition from glass towers to rolling sand dunes takes about 45 minutes and happens faster than you expect. The Dubai Desert Conservation Reserve is the right area — more authentic, actual conservation land, not a tourist circus.

Dune Bashing

The 4WD convoy deflates the tires and goes up and down the dunes at speed. It's chaotic, hilarious, and genuinely exhilarating — the car slides sideways on the sand, crests dunes at full tilt, drops into valleys. Ketaki held on for dear life and loved every second of it. The guide knows exactly what he's doing; it's safer than it feels. About 45 minutes of pure absurdity in the best way.

Sunset + Overnight Camp

The dune bashing ends in time to watch the sunset from the top of a dune. The light on the sand turns from gold to deep orange to red. Complete silence except for the wind. Ketaki got her best photos of the entire trip here.

The overnight camp is a Bedouin-style setup: low tents, floor seating, lanterns, a fire in the centre. Dinner is a spread of Middle Eastern food — mezze, grilled meats, bread, desserts. Traditional entertainment: fire performance, henna. Sleep in the tent listening to desert silence. Morning in the desert at dawn is cool and completely still — the dunes casting long shadows in the early light.

🏕️ Desert Camp — Book Premium

The difference between budget and premium camps is significant — food quality, tent comfort, group size, overall atmosphere. Book through a reputable operator specifically in the Dubai Desert Conservation Reserve (not just "Dubai Desert Safari" which can be anywhere). Bring a light jacket — desert nights are cold regardless of the season. Emirates picked us up from the camp for the onward flight to Dulles. Dunes to Dulles in one day.

The Points Strategy

  • Emirates flights: Chase Sapphire Reserve → transfer to Emirates Skywards → book Business class. India → DXB → IAD with stopover is the routing.
  • Emirates chauffeur: Complimentary with Business/First — confirm in the Emirates app before landing
  • Atlantis hotel: Marriott Bonvoy points — transfer from Chase UR or earn via Marriott Bonvoy Brilliant card
  • Car rental: Book at DXB through Hertz/Avis. International licence accepted, roads excellent, GPS works perfectly
  • Indian passport visa: UAE visa on arrival, free, 30 days — no pre-application needed
Chateau Frontenac Quebec City

Quebec City + Montreal —
Europe Without the Flight

Another September birthday long weekend — same crew as Florida, different continent energy entirely. Drove up from Harrison, NJ with Ketaki, my best friend, and his girlfriend. Quebec City first, then Montreal on the way back. Five days, two of the most European cities in North America, and a border crossing that reminded all four of us that we were technically leaving the country.

This trip punches way above its effort level. The drive is manageable, the cities are walkable, everything is beautiful, and the food is excellent. It felt like a European city break without the jet lag or the visa anxiety.

🛂 Border Crossing — Documents

Valid passport required for all four — US-Canada border at Champlain, NY on I-87. If anyone is on a US visa, make sure it has a valid re-entry stamp or is a multiple-entry visa. The crossing heading north on a Thursday evening is usually fast. Sunday afternoon heading south can be slow — leave Montreal by noon to avoid the backlog. Re-entry into the US going south is where the visa check happens.

Quebec City First — Then Montreal

The order matters. Quebec City is smaller, slower, and more concentrated — it eases you into Canada gently. Montreal is bigger, louder, and more cosmopolitan — it's the right note to end on before driving home. Doing it the other way feels like going downhill.

Quebec City's Old Town is a UNESCO World Heritage Site — the only walled city north of Mexico in North America. You walk through an actual city gate in the city walls. It doesn't feel real. Montreal's Old Montreal is equally beautiful but less enclosed — more of a neighbourhood than a fortified city. Both are extraordinary, both are different.

Day-by-Day

Day 1

Drive from Harrison → Quebec City

Harrison NJ → I-87 N→ Border at Champlain→ Quebec City (~7 hrs)

About 7 hours from Harrison to Quebec City — longer than Montreal but manageable if you leave early. Drive north on I-87, cross at Champlain, then continue on Route 15 and Route 20 into Quebec City. The drive through upstate New York is beautiful, especially in late September when the leaves start turning.

Arrive, check into the Airbnb (we stayed inside the Old City walls — worth paying slightly more for this), and walk out immediately. Don't unpack first. The Old City needs to be seen in the evening light.

🏰 Château Frontenac — First Sight

Your first view of the Château Frontenac stops you cold. It's a massive copper-roofed castle hotel sitting on a cliff above the St. Lawrence River, and it looks like something from a fairy tale dropped into the middle of a real city. We saw it coming around a corner at dusk and everyone in the group stopped talking simultaneously. Even if you're not staying there, go inside the lobby — the scale and grandeur are worth five minutes of your time.

Dinner in the Old City — the restaurants are clustered along Rue Saint-Louis and the streets around Place d'Armes. French-Canadian cuisine: tourtière (meat pie, rich and hearty), poutine (the real thing, not imitation), and maple everything. This is the region where maple syrup comes from and they use it properly — in sauces, glazes, desserts. Try it all.

Day 2

Quebec City — Old City Walls + Plains of Abraham

Old City walls walk→ Château Frontenac→ Plains of Abraham→ Lower Town

Full day in Quebec City. Start by walking the city walls — 4.6km of fortification walls you can walk on top of, with views of the city inside and the river outside. Nothing else in North America feels like this. Take your time, it's not a race.

The Plains of Abraham is the park on the western edge of Old Quebec where one of the most important battles in North American history was fought in 1759 — a 15-minute engagement that determined whether this continent would be British or French. It's now a massive, beautiful urban park. Walk it slowly, read the plaques, understand what happened here. Ketaki photographed the river views from the cliff edge — some of the best shots of the trip.

🚡 Funicular to Lower Town

Take the funicular (cable car) from the Dufferin Terrace down to Lower Town — it costs about $4 and saves you a steep staircase. Petit-Champlain in Lower Town is the oldest commercial street in North America — narrow, colourful, independent shops and restaurants. Genuinely charming and less tourist-heavy than the Upper Town main streets.

Evening: one more walk along the terrace above the river. Quebec City at night is lit up beautifully and the Château Frontenac illuminated against the sky is genuinely one of the best visual moments of the whole trip.

Day 3

Quebec City → Montreal (Drive + Arrive)

Quebec City → Route 20 W→ Montreal (~2.5 hrs)→ Old Montreal

Short drive — Quebec City to Montreal is only 2.5 hours on Route 20 West. Leave mid-morning, arrive by noon, check into the Old Montreal Airbnb (stay in Old Montreal, the walkability is everything), and immediately step outside.

Old Montreal hits differently after Quebec City — it's bigger, more urban, more mixed. The cobblestone streets are there but the energy is louder. French café culture is everywhere — the correct thing to do on arrival is find a café on one of the narrow streets, sit for an hour, and let the city come to you.

Afternoon: walk to the Old Port of Montreal — the waterfront along the St. Lawrence, lively with street performers, cyclists, people sitting on the grass watching the river. The view of the city from the port is excellent. In late September the light turns golden early and everything looks better than it has any right to.

Food

Fairmount Bagel on Avenue Fairmount — Montreal bagels are a different thing from New York bagels: thinner, denser, slightly sweet, baked in a wood-fired oven. The line is always there. It moves fast. Get a half-dozen, eat them warm on the walk back. This is non-negotiable.

Day 4

Montreal — Mount Royal + Notre-Dame + Café Day

Mount Royal hike→ Notre-Dame Basilica→ Café hopping→ Old Port evening

Mount Royal

Early start for Mount Royal — the hill that gives Montreal its name, a forested park right in the middle of the city. The main trail from the Peel Street entrance takes about 35–40 minutes of steady walking through the forest. September morning, leaves starting to turn, crisp air, no crowds yet.

The Kondiaronk Belvedere at the top gives you the full Montreal skyline — downtown towers, the St. Lawrence in the distance, and the sense of the whole city laid out below you. One of those views that reframes everything you've been walking through at street level.

📷 Ketaki's Pick

The Kondiaronk Belvedere at sunrise or early morning has the best light — the city is still quiet, the light comes from the east, and the whole skyline is in shadow against a bright sky. Get there before 8am if you can. The autumn colours from the trail itself are also excellent in late September.

Notre-Dame Basilica

Back down into Old Montreal for Notre-Dame Basilica. This is not like other churches. The interior is deep navy blue and gold covering every surface — the ceiling, the walls, the altar. The stained glass depicts scenes from Montreal's history rather than the usual biblical scenes. The wood carvings throughout are extraordinarily detailed. Everyone in the group went quiet the moment we stepped inside, without anyone deciding to.

It costs about $10 to enter (there's also an Aura light show in the evenings — we didn't do it but it's meant to be spectacular). Give it 30–45 minutes inside. Don't rush through.

Café Afternoon

The rest of Day 4 is for cafés. Montreal has one of the best café cultures in North America — properly French in approach. Olive + Gourmando in Old Montreal for the best sandwich lunch. Crew Café for the best coffee. Find a table outside on one of the narrow lanes, order a croissant and a strong coffee, and sit for as long as you want. This is the activity.

Day 5

Slow Morning → Drive Home

Final café stop→ Fairmount Bagels (again)→ Montreal → Harrison NJ (~6 hrs)

Last morning — slow, no agenda. One final walk through Old Montreal, one final café, and a second visit to Fairmount Bagel for the road. Get two dozen this time. They travel well and everyone you know will want them.

Leave Montreal by 10–11am to get through the border and back to Harrison at a reasonable time. The border crossing heading south can queue on weekends — have all documents ready, be straightforward with the US customs officer about where you've been. It's always smooth for us but the line can take 30–45 minutes.

🥯 Pack Fairmount Bagels for the Drive

Seriously — get two dozen for the road. They're vacuum-sealed or go in a paper bag, they keep for 2–3 days, and they are significantly better than anything you'll find back in New Jersey. Buy cream cheese at a nearby dépanneur (corner store) and you have lunch sorted for the drive home.

Logistics

The Drive

Harrison NJ → Quebec City: ~7 hours via I-87 North, border at Champlain, NY, then Route 15/20 north. Quebec City → Montreal: 2.5 hours on Route 20 West. Montreal → Harrison NJ: ~6 hours via Route 15 South, border at Champlain, I-87 South. Total driving: about 15.5 hours across 5 days — very manageable split over the trip.

Where to Stay

  • Quebec City: Airbnb inside the Old City walls — worth the premium, you walk out the door into the historic centre
  • Montreal: Airbnb in Old Montreal — same logic, walkability to Notre-Dame, Old Port, everything

Budget (per person, group of 4)

  • Gas (round trip from NJ, split 4 ways): ~$50–80/person
  • Airbnb (4 nights, split 4 ways): ~$60–100/person per night
  • Food (5 days): $30–60/day — significantly cheaper than US cities
  • Notre-Dame Basilica: ~$10/person
  • Funicular Quebec City: ~$4/person
  • CAD exchange rate: USD goes further in Canada — budget in CAD is very reasonable
🚀
NASA Space Center Houston

Houston — NASA,
Brisket & Galveston

Visited my brother in Dallas and we took his car down to Houston for the weekend. About 4 hours each way — classic Texas highway driving, flat and fast. Two days, two completely different experiences: Day 1 was NASA Johnson Space Center (8+ hours, no apologies), Day 2 was Galveston beach followed by what turned out to be one of the best meals of the entire trip. Texas BBQ is not a genre — it's a separate category of food.

🚗 Dallas → Houston

About 4 hours on I-45 South — straight shot, mostly flat, easy drive. Leave Dallas by 7–8am to arrive with a full day ahead. Houston has notoriously brutal traffic inside the city — avoid the I-610 loop during rush hour (7–9am, 4–7pm). For NASA, you're heading southeast of downtown which is usually fine. GPS is your friend; Houston's road system requires it.

Why This Trip Works

Houston gets overlooked as a travel destination because it's not a pretty city in the traditional sense — it's sprawling, car-dependent, and doesn't have a neat walkable centre. But what it has is substance. The NASA Space Center is one of the best science and history attractions in the US, full stop. And Texas BBQ in Houston specifically is a serious thing — the city sits at the intersection of Texas smokehouse culture and a genuinely diverse food scene.

The Galveston day trip is the right way to break it up — one day of deep intellectual immersion, one day of coastal air and indulgence. It works because the pacing is completely opposite.

Day-by-Day

Day 1

NASA Johnson Space Center — Full Day

Dallas → Houston (~4 hrs)→ Check in→ NASA Space Center Houston

Drive down from Dallas in the morning, check into the Airbnb, and head straight to NASA Space Center Houston. Don't plan anything else for this day. Eight hours sounds excessive until you're there and realize you could have used ten.

This is not a museum in the conventional sense — it's the visitor centre for the actual Johnson Space Center, the real nerve centre of US human spaceflight. The exhibits cover the entire arc of NASA's history: Mercury, Gemini, Apollo, the Space Shuttle, ISS, Artemis. You walk through actual spacecraft, stand under actual Saturn V rocket hardware (the largest rocket ever flown), and read the stories of the people who built and flew these things. The scale is incomprehensible until you're inside it.

🌕 Don't Miss

Saturn V rocket hall — a complete Saturn V laid horizontally in a dedicated building. It's 363 feet long and seeing it at full scale is genuinely one of the more impressive things you can stand next to in the United States. The Apollo 17 command module is here too — the last crewed lunar mission, returned from the Moon in 1972. The heat shield burn marks are still on it. Give this building alone 45 minutes.

The tram tour takes you through the actual JSC campus — Mission Control (the historic Apollo-era room is preserved exactly as it was on July 20, 1969, the day of the Moon landing), the astronaut training facility, and the International Space Station mock-up where crews train. The tram tour adds 90 minutes and is worth every second.

🎟️ Practical Notes

Admission is ~$35/person. The park opens at 10am — arrive at opening on weekdays to avoid school groups. Buy tickets online to skip the queue. Don't eat a heavy lunch here — grab something light on-site and save your appetite. The food at the Space Center is mediocre and expensive; it exists to keep you going, nothing more.

Food — Save It for Dinner

Quick lunch on-site at the Space Center, then dinner is the main event. Houston has a genuinely excellent BBQ scene — Killen's BBQ in Pearland is the name that comes up consistently, or Gatlin's BBQ closer to central Houston. Either way: order the brisket. Thick-cut, smoke ring intact, so tender it barely needs a knife. This is not like anything you get outside Texas.

🍖 Texas Brisket — What to Order

Order the fatty brisket, not the lean cut. The fat cap is where the flavour lives. Get a pound, add a side of jalapeño cheddar sausage if they have it, and get the white bread — it's there to mop up the juice. Don't ask for sauce first. Taste it plain. If it needs sauce, the BBQ is average. Good Texas brisket needs nothing.

Day 2

Galveston + Texas BBQ Send-Off

Houston → Galveston (~1 hr)→ Beach + waterfront→ Drive back to Dallas

Galveston

About an hour south of Houston on I-45, Galveston sits on a barrier island in the Gulf of Mexico. Spring is the right time to be here — warm but not the brutal summer heat, and the beaches are occupied but not overrun. Walk the Seawall Boulevard, which stretches 10 miles along the Gulf, go down to the beach, and decompress after the intensity of NASA.

Galveston works as a palate cleanser rather than a destination in itself — the salt air, the sound of the Gulf, the slower pace. The Strand Historic District is worth 30–45 minutes of walking — cast iron Victorian architecture, shops, restaurants, the kind of preserved 19th century streetscape that's genuinely charming. Moody Gardens is there if you want structured attractions but honestly the beach and the Strand are enough.

🌊 Galveston Honest Notes

The Gulf water is brown — this is normal, it's sediment from the Mississippi River system, not pollution. The beaches are cleaner than the water colour suggests. Don't go expecting Caribbean-blue water; go expecting a pleasant, atmospheric Gulf Coast experience. It delivers on those terms.

BBQ on the Way Back

If you didn't hit BBQ on Day 1, here's your second chance before the drive back to Dallas. The drive back through Houston on I-45 North takes you past several good options. Or stop in Huntsville, TX about halfway up I-45 — there are a few solid BBQ spots there that work perfectly as a road trip lunch stop.

Then 4 hours back to Dallas. Put on something good to listen to and let Texas stretch out around you.

Logistics

Getting There

Drive from Dallas — 4 hours on I-45 South. No need to fly. Car is essential for this trip — NASA is southeast of downtown, Galveston is an hour further south, and Houston has no useful public transit for these destinations. If you're not visiting from Dallas specifically, fly into Houston Hobby (HOU) — it's closer to NASA and Galveston than IAH. IAH (George Bush Intercontinental) is on the north side of the city and adds significant drive time to both destinations.

Where to Stay

Airbnb in the Montrose or Museum District area — central Houston, walkable neighbourhoods for the evening, reasonably priced. You don't need to stay near NASA (it's a day trip from wherever you are in Houston). 2 nights, comfortable and clean is all you need — the days are spent out.

Budget (per person)

  • Gas (Dallas round trip, split 2): ~$40–60
  • Airbnb (2 nights, split 2): ~$75–125/night each
  • NASA admission: ~$35
  • Food (2 days): $30–60/day — save budget for the BBQ dinner
  • Galveston: mostly free
🌊
Blackwater Falls Winter

Blackwater Falls —
West Virginia's Best Kept Secret

We've done Blackwater Falls twice — once in winter with Ketaki, once in spring with friends. Both trips from Herndon, both about 3.5 hours of driving through increasingly beautiful mountain terrain. It's one of the easiest weekend escapes from the DC/Virginia area that nobody talks about enough. The falls are genuinely spectacular in both seasons but they're completely different experiences — winter gives you ice formations and a snow-covered landscape with zero other visitors, spring gives you full water flow and green trails that are easy and beautiful. Both are worth doing.

🚗 Drive from Herndon

About 3.5 hours via I-66 W → I-81 S → US-33 W into the mountains. The last hour on US-33 through the Allegheny Mountains is genuinely beautiful — winding mountain road, elevation gain, the landscape completely changing around you. Cell signal gets unreliable after Harrisonburg — download offline maps before you leave. Roads into Davis are plowed in winter but carry chains or all-season tires as backup.

Winter vs Spring — Which to Choose

Winter (Nov–Mar) is the photography trip. Eight inches of snow on everything, ice formations framing the falls, mist rising off the water in the cold air. The park is essentially empty — you'll have the trails to yourself, the light is soft and diffused, and the contrast between the dark water and white surroundings is extraordinary. It's cold (bring proper layers, not just a jacket), but the payoff is a landscape that looks like nowhere else on the East Coast. Ketaki got some of her best shots of any trip here in winter.

Spring (Apr–May) is the easier, more social trip. Full water flow from snowmelt makes the falls louder and more dramatic. The trails are mud-free by late April, the forest is greening up, and the weather is genuinely pleasant. Better for groups who aren't photographers — it's just a straightforwardly beautiful hike with a spectacular waterfall at the end.

📷 Ketaki's Note

Winter is the photography season at Blackwater — the snow creates natural composition and the empty trails mean you can take your time with every shot. The ice formations around the falls change daily. Morning light through the snow-covered trees is extraordinary. If you're going primarily to photograph, go in January or February on a clear day after fresh snowfall.

The Plan

Day 1

Drive In → Davis → Settle + Dinner

Herndon VA → US-33 W→ Davis, WV (~3.5 hrs)→ Dinner

Leave Herndon in the morning — no need to rush, you have the whole afternoon. The drive through the Shenandoah Valley and up into the Alleghenies is the start of the experience, not just the commute. By the time you arrive in Davis the elevation change is real and the air is noticeably colder and cleaner.

Davis, WV is a small mountain town that doesn't try to be anything other than what it is. A main street, a few restaurants, an Airbnb scene that's grown up around the park. In winter, half the businesses are closed and the quiet is striking — not desolate, just properly still. In spring it's slightly livelier but still far from touristy.

🌯 The Burrito — This is Important

There is a burrito place in Davis that is significantly better than it has any right to be in a small mountain town. Meat-based burrito, perfectly seasoned, dense and well-wrapped by someone who clearly knows what they're doing. We went twice in one trip and it was equally good both times. Find it, order the meat burrito, eat it after a day outdoors. This is not optional.

Day 1 evening is simple — check in, walk around Davis briefly, eat well, sleep early. The falls are tomorrow.

Day 2

Blackwater Falls State Park — Full Day

Davis → Park entrance (~5 min)→ Main falls overlook→ Hiking trails→ Back to Davis

The park entrance is literally 5 minutes from Davis — one of the great advantages of staying in town. Leave early, especially in winter when the morning light on snow is the shot.

The Falls

Blackwater Falls — the main attraction — is a 57-foot amber-colored waterfall (the dark color comes from tannic acid from fallen spruce and hemlock needles upstream). The boardwalk from the visitor center takes you down to the main overlook in about 10 minutes. In winter: ice formations on the rocks, snow on every surface, mist rising off the water in the cold. In spring: full flow from snowmelt, the sound is louder, the surrounding forest is beginning to green. Either version is worth the drive.

Trails

The trail network in the park is well-maintained and not technically demanding — this is not a strenuous hiking destination, which makes it accessible for any group. The Balanced Rock Trail, the Lindy Point overlook (spectacular view of the canyon and river below — do not skip this), and the Elakala Falls trail (a series of smaller falls accessible via a short hike through the forest) are the three worth doing.

🏞️ Lindy Point — Don't Skip

Lindy Point is a short 1.4-mile round trip hike that ends at a cliff overlook above the Blackwater River canyon. The view of the river bend far below with forested canyon walls on both sides is the best landscape shot in the park — better even than the main falls for a wide vista. In winter the frozen river in the canyon is extraordinary. In spring the gorge is lush green. Go in either season.

Spend most of the day in the park — there's enough trail variety that you won't run out of things to see. Head back to Davis by late afternoon, get the burrito again if it's still your last night, and drive home the next morning.

Logistics

When to Go

Winter (Jan–Feb): best for photography, empty trails, ice formations. Go on a clear day after fresh snowfall. Bring proper cold-weather gear — base layer, mid layer, waterproof outer, good boots. Spring (late Apr–May): best for groups, easier hiking, full water flow. Either works; they're just different trips.

Where to Stay

Airbnb in Davis — the only sensible option. Look for something with good heating (non-negotiable in winter), a kitchen for coffee and breakfast, and ideally a fireplace or wood stove for the winter version. Book 3–4 weeks ahead; there aren't that many options and the good ones go fast on weekends.

Budget (per person)

  • Gas (from Herndon round trip, split): ~$25–40
  • Airbnb (2 nights, split): ~$60–100/night each
  • Park entry: ~$5–10/vehicle (or free with WV state parks pass)
  • Food (2 days): $25–50/day — Davis is cheap
🏕️
Lehigh River Rafting Poconos

Poconos — Rafting,
Campfire & July 4th

July 4th weekend, Ketaki and I drove up from Herndon to Hickory Run State Park in the Poconos — about 4.5 hours. Our best friends came separately and set up their own campsite nearby. Three days: one day of settling in and campfire cooking, one day of whitewater rafting on the Lehigh River, one day of trails and the slow pack-up. The food was genuinely exceptional for camping. The rafting was the best kind of adventure — challenging enough to be real, not dangerous enough to be stressful. And watching July 4th fireworks from a campsite around a fire is significantly better than any crowded public viewing spot.

🚗 Drive from Herndon

About 4.5 hours via I-270 N → I-70 E → PA-turnpike → PA-534 into the park. The Pennsylvania stretch through the Poconos is beautiful — forested hills, small towns, the landscape opening up as you gain elevation. Leave Herndon by 9am on the Thursday before July 4th to beat traffic. Friday departure adds 1.5–2 hours in holiday traffic. Book the campsite months ahead — July 4th weekend at Hickory Run fills up fast.

Why This Works for July 4th

The instinct for July 4th is to go somewhere with a big fireworks show — cities, waterfronts, organized events. The problem is everyone else has the same instinct and those places are brutal on a holiday weekend. The Poconos camping approach flips it completely: you're outside, you're moving, you're eating well, and you watch the fireworks from a campsite with people you actually want to be around. Nobody is fighting for a patch of grass or stuck in post-show traffic.

Two couples with separate campsites is the ideal social structure for a trip like this — you can merge around a shared fire for meals and evening hangouts, and retreat to your own space when you want. It worked perfectly.

Day-by-Day

Day 1

Arrive → Set Up Camp → Campfire Cooking

Herndon VA → PA-534→ Hickory Run State Park (~4.5 hrs)→ Camp setup→ Campfire dinner

Arrive mid-afternoon with enough time to set up properly before dark. Don't rush the setup — a well-organised campsite makes the next two days significantly better. Tents up, fire ring located, firewood acquired, coolers positioned. This is the logistics day and it earns its keep.

Hickory Run State Park is proper camping — established sites with fire rings and picnic tables, surrounded by dense Pennsylvania forest. In the lead-up to July 4th the park is lively but not overwhelming; everyone around you is there for the same reason, which creates a good energy.

🔥 The Campfire Dinner — This is the Trip

This is not camping food in the dehydrated-packet sense. We brought lamb chops, baked potatoes, and ingredients for a cast iron stew. Lamb chops grilled directly over the fire — the fat renders into the flames, the char forms exactly right, and they taste better than any restaurant lamb we've had. Potatoes wrapped in foil buried in the coals. The stew simmering in the cast iron from early evening. The whole setup smells extraordinary and tastes even better. This meal specifically is worth planning the whole trip around.

Evening around the fire, the first distant fireworks from nearby towns starting well before July 4th itself. Sitting in camp chairs, lamb chops in hand, the fire going — this is already the best version of the holiday weekend.

🛒 Grocery Strategy

Buy all groceries before you enter the park — the nearest store is a drive away and you don't want to be making supply runs. Pack the cooler methodically: ice on the bottom, meat in the middle, everything else on top. For three days: lamb chops (Day 1 and backup), corn (Days 2 and 3), potatoes (all three days), stew ingredients (enough for two nights — the stew gets better overnight). Don't forget cast iron cookware, tongs, foil, and a grill grate that fits over your fire ring.

Day 2 — July 4th

Lehigh River Rafting + July 4th Fireworks from Camp

Camp → Lehigh River (~30 min)→ Class II-III rapids (~3 hrs)→ Back to camp→ Fireworks from campsite

Whitewater Rafting — Lehigh River

Whitewater Rafting Adventures on the Lehigh River — Class II-III rapids, about 3 hours on the water. This is beginner-accessible but genuinely engaging. The river doesn't let you zone out — the current grabs the raft at the rapids and you're actively paddling, reading the water, leaning together as a group. There are moments of real exhilaration and moments of controlled chaos. Nobody in our group had significant rafting experience and we handled everything the river threw at us.

The morning sun off the water is intense — bring sunscreen, sunglasses that strap on, and clothes you're willing to get completely soaked. The spray is cold even in July. By the end of three hours you're tired in the best possible way — the kind of physical tiredness that comes from being completely present and engaged for an extended period.

🚣 Rafting Logistics

Book Whitewater Rafting Adventures well in advance for July 4th weekend — they fill up. ~$50–60/person. They provide helmets, life jackets, and paddles. Wear a swimsuit or quick-dry shorts, water shoes or old trainers (no sandals), and apply sunscreen before you get in the water. Bring a dry bag for your phone and keys — everything else gets wet.

July 4th Evening — Fireworks from Camp

Back at camp by early afternoon, restock any supplies, and set up for the evening. Grilled corn over the fire — charred, seasoned with just salt, genuinely addictive. The stew from Day 1 reheated over the coals (it's better the second night, the flavours more unified). And July 4th fireworks visible from the campsite as the sky goes fully dark.

No driving to a viewpoint, no crowds, no traffic. Just the four of us, two campsites merged around one fire, watching fireworks in the sky above the treeline. This is the July 4th experience.

Day 3

Trails + Last Meal + Pack Out

Morning trails→ Final campfire lunch→ Pack out→ Drive back to Herndon

The last day has its own pace — unhurried, slightly nostalgic, everything slightly more deliberate because you know it's ending. Morning walk through Hickory Run's trails, none of them strenuous, all of them beautiful. Dense Pennsylvania forest, rocky paths, the kind of walking that doesn't require attention and lets your mind do what it wants.

Boulder Field in Hickory Run is worth the short detour — a National Natural Landmark, a half-mile field of boulders deposited by glaciers 20,000 years ago, completely flat and open in the middle of dense forest. It looks genuinely alien. Ten minutes off the main trail.

Last meal: grilled corn and whatever's left in the cooler. Baked potatoes if there are any remaining. Simple, no ceremony. Break down tents, pack the car, and drive back to Herndon. The 4.5-hour drive home feels both longer and shorter than the drive out.

Logistics

Booking

  • Hickory Run State Park camping: reserveworld.com — book months ahead for July 4th weekend, sites disappear fast. Two separate campsites if you're going as two couples.
  • Whitewater Rafting Adventures: book online well in advance for July 4th. They run multiple departures — the 9–10am slot is best before the heat peaks.

What to Pack

  • Camping gear: tents, sleeping bags (summer weight fine in July), camp chairs, headlamps, fire starters
  • Cooking: cast iron pot, grill grate, tongs, foil, camp stove as backup
  • Rafting: swimsuit, quick-dry clothes, water shoes, dry bag, sunscreen
  • Food: lamb chops, corn (more than you think), potatoes, stew ingredients, cooking oil, salt — buy before entering the park

Budget (per person)

  • Gas (Herndon round trip, split 2): ~$35–50
  • Campsite (3 nights, split 2): ~$25–40
  • Rafting: ~$50–60/person
  • Groceries (3 days, split 2 couples): ~$40–60/person
  • Firewood + misc: ~$15–20
🌿
Devils Bathtub Natural Pool Virginia

Devil's Bathtub —
Southwest Virginia's Hidden Pool

We drove down from Herndon to Duffield, Virginia — about 5 hours into southwest Virginia, deep into Appalachian country. The Airbnb was a treehouse. Ketaki and I stayed three nights, did the Devil's Fork Loop hike to Devils Bathtub, swam in it, and spent the rest of the time eating well in Bristol and sitting on the treehouse deck watching the forest. It's one of those trips where the destination is a genuinely hidden natural wonder — not famous, not crowded, completely worth the drive.

🚗 Drive from Herndon

About 5 hours via I-81 S through the Shenandoah Valley, then southwest on US-58/US-421 into Scott County. The last hour through the southwest Virginia mountains is beautiful and twisty — full phone signal disappears in stretches, download offline maps. The drive itself is scenic enough that it doesn't feel like 5 hours. Leave Herndon by 8am to arrive with afternoon light for exploring.

Why This Trip Is Worth It

Devils Bathtub is one of those places that feels like a discovery even though a trail leads right to it. A natural pool carved into rock by centuries of water, deep and cold and perfectly framed by stone walls. In summer it's a swimming hole. In any season it's a photography destination. The fact that it requires a proper hike to reach — creek crossings, elevation change, rough terrain — means it never gets overrun with casual visitors. You earn it.

The treehouse Airbnb in Bristol is the other half of what makes this trip work. It's not a gimmick — it's genuinely elevated in the trees, the forest sounds are real, and waking up there sets a tone for the day that a hotel room never could. Bristol itself is a proper small Appalachian town, not a tourist town, which means the food is honest and unpretentious and good.

Day-by-Day

Day 1

Drive In → Treehouse → Bristol Evening

Herndon VA → I-81 S→ US-58 W→ Bristol / Duffield (~5 hrs)→ Treehouse check-in

Drive down, check into the treehouse, and spend the first afternoon doing nothing in particular. The treehouse is the experience — elevated above the ground, surrounded by forest, with the kind of natural quiet you don't get anywhere near DC. Sit on the deck. Let the drive decompress out of you.

Evening in Bristol — a small Appalachian town straddling the Virginia-Tennessee border (the state line literally runs down the middle of State Street, the main drag). Walk the main street, find somewhere to eat. Bristol's food is unpretentious and good — local spots where the staff know the regulars and the food tastes like someone actually cooked it. Don't overthink dinner here. Walk in somewhere busy and order something hearty.

🏠 The Treehouse Airbnb

This specific Airbnb is the reason the trip has this particular feel — being in the trees genuinely changes the experience. Book well in advance, especially for weekends. It sleeps two comfortably. There's a kitchen for morning coffee, which matters. The deck is where you'll spend most of your non-hiking time. Worth every dollar, especially split as a couple.

Day 2

Devil's Fork Loop → Devils Bathtub → Swim

Treehouse → trailhead (~20 min)→ Devil's Fork Loop (5–7 miles)→ Devils Bathtub→ Swim→ Bristol dinner

The Hike

Start early — the trailhead is about 20 minutes from Bristol, and you want time at the pool without rushing back. The Devil's Fork Loop Trail is 5–7 miles depending on how much you explore — not brutally difficult, but real terrain. Creek crossings, root-covered paths, elevation change through forest that gets progressively more beautiful as you go deeper. Bring proper trail shoes, not trainers. The creek crossings can be slippery.

The trail winds alongside Devil's Fork Creek, which you'll be crossing multiple times. In summer the water is low and manageable. In spring snowmelt the crossings are more challenging — check conditions before you go. The sounds of the creek alongside the trail the whole way in makes the hike meditative in a way that dry trails don't.

⚠️ Trail Notes

The trail is not marked with the precision of a national park — you're following a worn path through forest. Download a trail map offline before you go (AllTrails has the Devil's Fork Loop). Cell signal is unreliable at the trailhead. The creek crossings on the approach to Devils Bathtub get more frequent in the second half of the hike — plan for wet feet. Trekking poles are useful but not essential.

Devils Bathtub

The pool appears around a bend and stops you cold. It's a natural pothole carved into the bedrock by centuries of water flow — roughly circular, deep blue-green, walls of smooth stone on three sides. Cold even in summer. We swam in it — the cold is real, the kind that makes you gasp when you first go under, but the clarity of the water and the absurdity of swimming in a natural rock pool in the middle of Virginia makes it completely worth it.

📷 Ketaki's Note

Devils Bathtub is one of the best natural photography subjects we've found on the East Coast. The blue-green water against the grey rock, the forest framing it on all sides, the light filtering through the tree canopy. Morning light is best — come early and you'll have the pool to yourselves. The wide angle on the iPhone ultra-wide captures the full enclosure of the rock walls. Swim first, shoot after — the water is cold and you'll want to be done before you're shivering.

Spend as long as you want here — there's no rush. Float on your back and look at the sky through the tree canopy. Sit on the warm rocks and dry off. Eat whatever you packed for lunch. This is the destination and it earns the drive.

Evening

Back to Bristol for dinner — after a full day of hiking and swimming, the meal will taste significantly better than it has any right to. Try somewhere different from Day 1. Bristol rewards repeat visits with different spots on State Street.

Day 3

Slow Morning → Bristol → Drive Home

Treehouse deck morning→ Bristol explore→ Late breakfast→ Drive back to Herndon (~5 hrs)

No alarm. Coffee on the treehouse deck, watching the forest wake up. This morning has no agenda and that's the point — the hike is done, the main event happened yesterday. Day 3 is about being in the place rather than doing anything in it.

Bristol in the morning is a different town than Bristol at dinner — quieter, the light different, the shops opening slowly. Walk around parts of State Street you missed. The state line runs down the middle of the street — you can literally stand in Virginia and Tennessee at the same time. Grab a late breakfast somewhere local, the kind of place with good coffee and eggs and no rush.

Pack up the treehouse by noon, take one last look at the forest from the deck, and drive back to Herndon. The Shenandoah Valley on I-81 North in the afternoon is one of the better drives in Virginia — mountains on both sides, farmland in the valley, the kind of landscape that makes you understand why people live here.

Logistics

Getting There

Drive from Herndon — 5 hours via I-81 South. No need to fly. The drive through the Shenandoah Valley and into southwest Virginia is part of the experience. Download offline maps for the final stretch — signal gets unreliable in Scott County.

Booking

  • Treehouse Airbnb, Bristol VA — book well in advance, especially for spring/summer weekends. It's a unique property and fills up. Search Airbnb in Bristol VA for "treehouse" or use the link from the itinerary doc.
  • Devil's Fork Loop trailhead — no reservation needed, free parking. Arrive early on weekends to get a parking spot.

Budget (per person, couple)

  • Gas (Herndon round trip, split 2): ~$40–60
  • Treehouse Airbnb (3 nights, split 2): ~$75–125/night each
  • Food (3 days in Bristol): $40–70/day split — Bristol is cheap
  • Trail parking: free
🏜️
Breaks Interstate Park Canyon

Breaks Interstate Park —
Grand Canyon of the East

Ketaki and I drove down from Herndon for July 4th weekend — about 5.5 hours southwest into the Virginia-Kentucky border country. Breaks Interstate Park is called the "Grand Canyon of the East" and people who say that aren't exaggerating. The gorge is genuinely dramatic — sheer rock walls, deep canyon views, the Russell Fork River winding far below. We tent-camped inside the park, did the zipline through the canyon, hiked the rock formation trails, and cooked every meal over the camp stove. Three days, one of the best camping trips we've done, and almost nobody knows this place exists.

🚗 Drive from Herndon

About 5.5 hours via I-81 S → US-19 S into southwest Virginia and across into Kentucky. The last hour through the mountains of Buchanan and Dickenson County is winding and beautiful — full cell signal disappears, download offline maps before you leave. Leave Herndon by 7am to arrive with a full afternoon. The park straddles the Virginia-Kentucky border; the main visitor facilities are on the Virginia side.

Why Almost Nobody Talks About This Place

Breaks Interstate Park sits at the Virginia-Kentucky border, 5.5 hours from DC, and gets a fraction of the visitors that comparable parks attract. The gorge is 1,600 feet deep — the deepest gorge east of the Mississippi. The rock formations are extraordinary. The zipline runs through the canyon. And you can get a campsite with canyon views for $20–35/night.

The reason it's not famous is the same reason it's so good: it's not easy to get to, it's not on the way to anything, and it doesn't advertise. You have to want to find it. July 4th weekend here meant quiet campsites and trails to ourselves while every national park in the country was gridlocked.

Day-by-Day

Day 1

Arrive → Camp Setup → Zipline → Campfire

Herndon VA → I-81 S → US-19 S→ Breaks Interstate Park (~5.5 hrs)→ Camp setup→ Zipline

Arrive early afternoon and set up camp first — tents positioned with the canyon visible from the site. This is not a minor detail. Waking up with that view starts the day completely differently than waking up facing a parking lot. Get the site organized, get the coolers positioned, then head to the zipline.

The Zipline

The zipline at Breaks is genuinely good — multiple lines that move you through the canyon suspended above hundreds of feet of open air and rock. This isn't a tourist-trap single-zip. You're actually traversing the canyon, and the guides running it are excellent: knowledgeable about the park, genuinely enthusiastic, and make everyone feel safe and excited at the same time.

🪂 What the Zipline Actually Feels Like

The first line — the moment your body registers the height and the speed simultaneously — is a full system shock. By the second line you're grinning. By the third you're looking down at the rock formations and trying to memorise the view because you know you'll be talking about it later. The canyon from above is a completely different experience from the canyon from the rim. Do this on Day 1 while you're fresh and the adrenaline compounds the arrival high.

Back at camp by late afternoon — adrenaline still running — for the first campfire dinner. Grilled meats over the camp stove with the canyon laid out in front of you. Simple, direct, and better than it has any right to be. Eat standing up looking at the view. This is what camping is for.

🥩 Campfire Cooking at Breaks

Bring quality meat — the cooking method is simple (camp stove or fire grate) and the surroundings do the rest. We did different cuts each night: heavier on Day 1 while energy is high, something simpler on Day 3 when you're conserving effort before packing out. Bring more than you think you need. Cooking at altitude with a canyon view makes you hungry in a way a kitchen never does.

Day 2 — July 4th

Trails + Rock Formations + Campfire July 4th

Bacon + eggs at camp→ Canyon trails→ Rock formation hikes→ Campfire July 4th

Breakfast First

Bacon and eggs over the camp stove with the canyon misty in the morning light. This breakfast specifically — the smell of bacon cooking over a camp stove, coffee in your hands, the gorge stretching out ahead — is the sensory memory that will stick longest from this trip. Do it slowly. Don't rush it.

Trails

The trail network at Breaks gets you into the landscape rather than just observing it from the rim. The paths wind past rock faces that rise dramatically on both sides — layers of geology compressed into visible colour bands, striations that are millions of years old. The Overlook Trail and the Grassy Creek Trail are the primary ones worth doing — they cover different terrain and give you different perspectives on the gorge.

The trails aren't brutal but they're real hiking — uneven, rocky, requiring proper boots and attention. The canyon walls close in at certain points and you're genuinely inside the landscape rather than standing at its edge. Bring water and a packed lunch; there's nothing to buy once you're on trail.

📷 Ketaki's Pick

The Overlook Trail viewpoints at different times of day change the canyon completely — morning mist, midday clarity, late afternoon shadows. The rock formation colour deepens toward golden hour. The best shots from this trip were taken at the rim overlooks in the late afternoon light when the canyon walls turn deep orange-red. Don't put the camera away after the zipline — the trail photography is equally good.

July 4th from Camp

No fireworks show to chase. No crowds. No traffic. We cooked dinner at the campsite and watched the sky go dark over the canyon. Some distant fireworks visible on the horizon from towns further away. Sitting in camp chairs at the rim of a 1,600-foot gorge on July 4th, eating grilled meat and watching occasional distant flashes in the sky — significantly better than any organized fireworks viewing we've done.

Day 3

Final Breakfast → Pack Out

Last bacon + eggs→ Pack out→ Drive back to Herndon (~5.5 hrs)

Final bacon and eggs — this has become a ritual by Day 3. Break down the camp methodically, pack the car, and take one last look at the gorge before driving out. The canyon looks different on the last morning: same geology, same scale, but with the particular weight of knowing you're leaving it.

Leave by mid-morning to get back to Herndon at a reasonable hour. The drive back on US-19 through the mountains is beautiful going the other direction too. Stop in Grundy or Lebanon for gas and food — there aren't many options once you're deep in the mountains.

⛽ Fuel Up Before You Leave

Fill the tank before entering the park area. Gas stations are sparse in Dickenson County and the ones that exist charge premium prices. Grundy, VA on US-460 is the last reliable fuel stop heading in from Herndon. Same on the way back — don't leave the park area on empty.

Logistics

Booking

  • Camping: Reserve at breaksparkresort.com — book well ahead for July 4th weekend. Sites fill up but not as fast as more famous parks. Request a site with canyon views — worth specifying.
  • Zipline: Book through the park's activity desk or at breaksparkresort.com — runs seasonally, check availability. ~$40–60/person.

What to Pack

  • Hiking boots — the trails are rocky and uneven, not optional
  • Camp stove + grill grate — fire rings at each site
  • Quality meat, bacon, eggs — buy before you enter the park area, no grocery stores nearby
  • Full water bottles — water at the campground, not on the trails
  • Offline maps downloaded — AllTrails has the Breaks trails, signal is unreliable

Budget (per person)

  • Gas (Herndon round trip, split 2): ~$45–65
  • Camping (2 nights, split 2): ~$20–35 total each
  • Zipline: ~$50/person
  • Groceries (3 days, split 2): ~$40–60/person
🌉
Golden Gate Bridge San Francisco

California with Family —
SF, PCH, LA & Grand Canyon

My Bua ji and her family were visiting us in Virginia, along with my mother — seven people total, flying out of IAD to SFO. Nine days, roughly 1,500 miles of driving through California and into Arizona: San Francisco, Lake Tahoe, the Pacific Coast Highway, Los Angeles, and the Grand Canyon. This is the California trip you do when family visits from India — the full circuit, the icons, the everything. It's a different pace from a couple trip, and the shared moments — standing at the Grand Canyon rim together, watching July 4th fireworks at Venice Beach, those roadside strawberries on the PCH — land differently when you're experiencing them with people you love.

🚗 Logistics for 7 People

Seven people means two rental cars minimum — plan for it from the start. Book both from SFO in the same class (large SUVs or minivans) so luggage loads evenly. Coordinate gas stops together to avoid one car waiting 45 minutes for the other. For accommodation, Airbnbs work far better than hotels at this group size — kitchen access, shared living space, and significantly cheaper per person. LA specifically: book an Airbnb near Santa Monica or Venice Beach, not downtown.

The Route

IAD → SFO → San Francisco (2 nights) → Lake Tahoe (1 night) → Pacific Coast Highway → Los Angeles (3 nights) → Grand Canyon (1 night) → Phoenix → IAD. About 1,500 miles of driving split across 9 days. Every section is a different landscape, a different pace, a different California. The PCH day is the centrepiece — plan it as the main event and let everything else build toward and down from it.

Day-by-Day

Day 1

Fly IAD → SFO → Arrive San Francisco

IAD ✈ SFO→ Two rental cars→ Hotel near airport

Evening flight from Dulles, arrive at SFO, pick up both rental cars, check in near the airport. Day 1 is pure logistics — after a 6-hour flight with a group of seven, nobody needs an agenda. Get everyone fed and rested. The city starts tomorrow.

Day 2

San Francisco — Golden Gate, Alcatraz, Ghirardelli

Golden Gate Bridge→ Alcatraz ferry→ Lombard Street→ Ghirardelli Square

Golden Gate Bridge first — the Crissy Field viewpoint gives you the full bridge with the bay behind it. This is the photo everyone in the group needs. Morning is best before the fog burns off or after it clears; the bridge emerging from fog is its own kind of spectacular.

Alcatraz — book the ferry well in advance, it sells out weeks ahead. The audio tour is genuinely excellent; 2–3 hours on the island. Standing in the cells where Al Capone and Robert Stroud were held, looking back at San Francisco across the water — it's one of those experiences that lands harder in person than any photo suggests.

🎟️ Alcatraz — Book Early

Book at alcatrazcruises.com — sells out 3–4 weeks ahead in summer. For a group of 7, book all tickets in one transaction to get seats on the same ferry. The evening tour (if available) is particularly atmospheric but the daytime tour is perfectly good. Factor 3 hours minimum including ferry time.

Lombard Street in the afternoon — the famously crooked one-block section winds down the hill through flower beds. Touristy, absolutely, but genuinely charming and worth 20 minutes. Then Ghirardelli Square for the evening — San Francisco's famous chocolate company, ice cream, the bay view at sunset. The group ice cream moment at Ghirardelli became one of the trip's best photos.

Day 3

SF → Lake Tahoe

Depart 7am→ I-80 E→ Lake Tahoe (~3.5 hrs)→ Carson City overnight

Leave San Francisco early and drive east into the Sierra Nevada. The landscape transforms as you climb — city giving way to suburbs, suburbs to forest, forest to mountain. Lake Tahoe is an alpine lake at 6,200 feet elevation, 22 miles long, so clear you can see 70 feet down. The blue is impossible to believe until you're standing at the shore.

South Lake Tahoe for the afternoon — walk the waterfront, rent bikes on the easier trails, let the family absorb the scale of the place. Overnight in Carson City (Gold Dust West or similar) — functional base, cheap, and you're back on the road early tomorrow for the PCH.

🚵 Family Activity at Tahoe

Bike rentals along the lake shore are the right call for a mixed-age group — easy, scenic, everyone moves at their own pace. The Pope Beach area has good access and relatively flat paths. Don't attempt the full 72-mile lake loop; just cruise the accessible sections and stop wherever looks good.

Day 4 — July 4th

Pacific Coast Highway — The Best Day

Depart 7am→ Emerald Bay→ Stinson Beach lunch→ Muir Woods→ Big Sur→ LA ~9pm

The PCH day. Leave Carson City at 7am and drive west to pick up the coast. This is the day you plan the entire trip around — give it the full day it deserves.

Emerald Bay State Park — Tahoe's most photogenic corner, a small island in a turquoise bay surrounded by granite cliffs. Stop here for 30–45 minutes on the way down. Stinson Beach for lunch — a small coastal town with a beachfront feel, fish tacos and fresh food, exactly right for a midday break.

🍓 The Roadside Fruit Stand — Don't Skip

Somewhere on the PCH between towns you'll pass a roadside fruit stand — simple, no-frills, fresh fruit piled up. Stop. The strawberries are picked the same morning, sweet in a way supermarket strawberries have never been, and absurdly cheap. We bought bags of them and ate fruit for the next two hours of driving. Seven people unanimously agreed these were the best strawberries any of us had ever eaten. This is one of those PCH things that isn't on any official itinerary but becomes a trip memory.

Muir Woods — old-growth redwood forest, trails under trees that are 1,000 years old and 250 feet tall. The scale of the trees versus a group of seven people is humbling in a way that photographs never capture adequately. The forest is cool, quiet, and completely unlike anything else on the route. Book the parking/entry reservation in advance at recreation.gov — it fills up.

Big Sur in the late afternoon — the stretch of PCH where the Santa Lucia mountains meet the Pacific Ocean. The Bixby Bridge over a dramatic gorge, Pfeiffer Big Sur State Park, the coastal cliffs dropping hundreds of feet to the water. The golden hour light on this section of coastline is extraordinary. Drive slowly, stop at every overlook that calls to you.

Arrive in Los Angeles around 9pm, check into the Airbnb. Exhausted and exhilarated.

Day 5

Hollywood — Warner Bros + Griffith + Walk of Fame

Warner Bros Studio Tour→ Griffith Observatory→ Walk of Fame→ Pink's Hot Dogs

Warner Bros Studio Tour — actual soundstages, actual props from films and shows, the behind-the-scenes reality of how movies get made. For a family visiting from India, this is genuinely captivating — Bollywood parallels make the studio culture immediately relatable. The tour guide quality varies; get there at opening (9am) for the best guide assignment and shortest wait.

Griffith Observatory in the afternoon — perched above Los Angeles with a view of the Hollywood sign, the city spreading toward the ocean. Free entry, excellent exhibits, the kind of place where you can sit on the grass with a picnic for an hour and just watch LA exist below you. The Hollywood sign is visible from the parking area — classic group photo moment.

Evening: Walk of Fame and the Hollywood district — find the stars of everyone's favourite actors, the crowds, the energy of the place. Dinner at Pink's Hot Dogs on Hollywood Boulevard — been there since 1939, loaded hot dogs, completely unpretentious, exactly the right energy for the evening.

Day 6

Santa Monica + Venice Beach + July 4th Fireworks

Santa Monica Pier→ Venice Beach boardwalk→ Rodeo Drive→ Venice fireworks

Santa Monica Pier in the morning — the Ferris wheel, the boardwalk, the ocean. For family members seeing the Pacific for the first time, this moment lands hard. Venice Beach boardwalk in the afternoon — rent bikes and cruise the bike path with the ocean on one side. The boardwalk spectacle (street performers, artists, the sheer variety of people) is the most distinctly LA experience of the whole trip.

Quick drive through Rodeo Drive in Beverly Hills for the spectacle — you're not there to buy, you're there to see it. The Beverly Hills Hotel sign photo is obligatory.

🎆 July 4th Fireworks at Venice Beach Pier

Stay for the fireworks. Venice Beach pier on July 4th with seven family members — the fireworks reflected in the ocean, the crowd, the sound bouncing off buildings, everyone grinning like children by the finale. This is the kind of shared moment that becomes a family story. Get there an hour before sunset to find a good spot on the beach. The finale is a rapid succession that lights up the entire sky.

Day 7

LA → Grand Canyon (Long Drive Day)

Depart LA 8am→ I-40 E through Arizona→ Grand Canyon (~8 hrs)→ Red Feather Lodge

Long drive day — 8–9 hours from LA to the Grand Canyon. Leave early and coordinate both cars. The critical logistics note: the stretch through Arizona on I-40 and through the national forest has long sections with no gas stations and no cell service. Fill both tanks full in Flagstaff before turning north on US-180 toward the Canyon. Don't assume you'll find a station.

Arrive at Tusayan (the small town just outside the Canyon's south entrance) around 9–10pm. Check into Red Feather Lodge. Go outside immediately and look up — the night sky here, away from all city light, is a completely different sky from anything you've seen in the previous week. The Milky Way is visible to the naked eye. Seven people standing in a parking lot in Arizona looking up at stars they didn't know existed is one of the quieter but stronger memories of the trip.

Day 8

Grand Canyon → Phoenix

Grand Canyon South Rim→ Rim Trail viewpoints→ Depart evening→ Phoenix (~3.5 hrs)

Leisurely morning — breakfast in Tusayan, then into the Canyon. The Grand Canyon requires no description. You drive up, you step out of the car, and everyone in the group goes silent. A mile deep, thirteen miles wide, two billion years of geological history visible in the rock walls. Walk the Rim Trail west from Mather Point to Yavapai Point — the views change completely every quarter mile.

👨‍👩‍👧‍👦 The Family Moment

Standing at the Grand Canyon rim with family visiting from India — people who have seen remarkable things in their lives but haven't seen this — is a specific kind of joy. The collective awe, the photos that don't capture it, the attempts to explain the scale to each other. This is why you do the 8-hour drive. Give the Canyon the full morning. Don't rush it.

Depart the Canyon around 6–7pm as the light turns golden (the Canyon walls go deep orange-red in the last hour of sunlight). Drive to Phoenix — 3.5 hours, arriving after midnight. Last hotel night before the flight home.

Day 9

Phoenix → IAD

Leisurely morning in Phoenix, drop the rental cars, fly back to Dulles. The flight from Phoenix to IAD is about 4 hours. Everyone sleeps.

Logistics for a Group of 7

Key Bookings — Do These Early

  • Flights IAD → SFO — book as one group to sit together
  • Two rental cars at SFO — large SUVs or 7-passenger minivans
  • Alcatraz ferry — alcatrazcruises.com, 3–4 weeks ahead minimum
  • Muir Woods parking — recreation.gov, required in summer
  • LA Airbnb (3 nights) — needs to sleep 7 comfortably, near Santa Monica
  • Grand Canyon entry — $35/vehicle, no advance booking needed
  • Warner Bros Studio Tour — wbstudiotour.com, book ahead for summer

Indian Food on This Route

For a family group visiting from India, food planning matters. The good news: San Francisco, Los Angeles, and the Bay Area all have excellent Indian restaurants. Udupi Palace in the Richmond District (SF) for South Indian. Artesia, the LA suburb nicknamed "Little India," for North Indian — an entire street of Indian restaurants, sweet shops, and grocery stores. Stock the Airbnb kitchen with basics from an Indian grocery on Day 4 arrival so breakfast and snacks are sorted for the LA days.

Budget (per person, 7 people sharing)

  • Flights (IAD→SFO, PHX→IAD round trip): $400–600/person
  • Rental cars (2 cars, 8 days, split 7): ~$115–170/person
  • Gas (~1,500 miles, split 7): ~$45–60/person
  • Hotels + Airbnb (8 nights, split 7): ~$350–550/person
  • Food (9 days): $50–80/day/person
  • Activities (Alcatraz, WB Tour, Grand Canyon etc.): ~$200–300/person
🌌
Northern Lights Alaska

Alaska — Ice, Aurora
& Sled Dog Puppies

September birthday trip — Ketaki, my brother, my best friend and his girlfriend. Five of us flew from Dulles to Anchorage for four days. September is the sweet spot for Alaska: the Northern Lights start appearing, the weather is cold but manageable (not brutal winter), and the landscape is extraordinary in its autumn colours. No snow on the ground yet, which meant the dog sledding wasn't running — but we visited the kennel at Paws for Adventure, spent time with the race dogs and the puppies, and honestly it was one of the best parts of the trip. Landing a small plane on a glacier and watching the aurora dance across the sky for hours are the other two. This trip reorganises how you think about what's possible.

✈️ September is the Right Call

September hits the sweet spot: aurora season begins (solar activity picks up in fall), temperatures are cold but not extreme (-5 to +10°C in Fairbanks), and the landscape goes golden and red. No crowds, no mosquitoes (they're brutal in summer), and the days are still long enough to do daytime activities. The only trade-off: no dog sledding — the trails need snow. The kennel visit more than compensates.

Four Days, Three Things That Change You

The structure is simple: fly into Anchorage, drive north to Denali for the glacier landing, continue to Fairbanks for the aurora and kennel visit, Chena Hot Springs as the send-off, fly home. About 500 miles of driving across the most dramatic landscape in the United States.

The three experiences that define this trip — landing on a glacier, watching the Northern Lights, standing in an outdoor hot spring while everything around you is frozen — are each threshold experiences in different ways. You arrive in Alaska as one version of yourself and leave slightly altered. That's not an exaggeration.

Day-by-Day

Day 1

Fly IAD → Anchorage → Drive to Denali

IAD ✈ ANC→ Two rental cars→ Denali (~4 hrs north)→ Denali Perch Resort

The flight from Dulles to Anchorage is about 8–9 hours — plan to sleep on the plane. Land, pick up two rental cars (five people need the space), and drive north on the Parks Highway toward Denali. The drive itself is the introduction: Alaska's scale reveals itself gradually as you leave Anchorage behind — mountains emerging on both sides, the highway becoming the only mark humans have made on this landscape.

Denali Perch Resort sits on elevated ground with views of the Alaska Range. Check in, have dinner at the lodge (hearty food, exactly what you need), and go outside after dark. September in Denali means the aurora can appear any clear night — the first night we had a faint but real display that set the tone for the whole trip.

🏔️ Denali — What You're Looking At

Denali (formerly Mt. McKinley) is 20,310 feet — the highest peak in North America. In September, when the air is clear and the tundra has gone golden, the mountain appears and disappears in cloud. The scale is incomprehensible. Standing at the Perch looking north, the mountain fills the horizon in a way that feels wrong — too big, too present. Give yourself time to just look at it.

Day 2

Glacier Landing → Drive to Fairbanks

Denali Perch → glacier flight operator→ Glacier landing→ Drive to Fairbanks (~2.5 hrs)

The Glacier Landing

This is the centrepiece activity. A small ski-plane takes you up from a gravel airstrip, climbs toward the Alaska Range, and lands on a glacier. The approach is what stays with you first — the landscape from the air is incomprehensible in scale, glaciers visible as rivers of blue-white ice flowing between mountain walls. Then the plane lines up, the skis come down, and you land on ice that is thousands of feet thick and thousands of years old.

Getting out of the plane and standing on the glacier is its own experience. The ice is ancient — compressed snow from centuries of accumulation. You can see crevasses, deep blue slots dropping into the glacier's interior. The silence is absolute; no wind, no human sound, just the creak of the ice and your own breathing. We spent 30–40 minutes walking carefully on the surface. The pilot pointed out features, explained the glacier's history, showed us where the ice had retreated in recent decades.

📷 Ketaki's Note

The glacier is one of the most challenging subjects to photograph — everything is white, the scale defeats a single frame, and the light is flat. The trick is putting people in frame to give scale, shooting toward the crevasses for colour contrast (the deep blue ice inside is extraordinary), and using the mountain walls in the background as anchors. The group shot on the glacier became one of the best photos from the entire year.

🎟️ Book the Glacier Flight Early

Book 2–3 months ahead — these flights are weather dependent and have limited capacity. The operator will give you a weather window and may reschedule if conditions aren't safe. Build flexibility into Day 2 for weather delays. Cost is ~$400–600/person and worth every dollar — this is the experience most people never have.

After the flight, drive north to Fairbanks (~2.5 hours). Arrive in the evening, check into the Airbnb, and get an early night — Day 3 is going to end at 4am.

Day 3

Sled Dog Kennel + Aurora Chasing

Paws for Adventure kennel→ Fairbanks lunch→ Rest→ Aurora Chasers (evening → 4am)

Paws for Adventure — The Kennel

No snow in September means no dog sledding — the trails need cover. But visiting Paws for Adventure is genuinely worth doing regardless. This is a working sled dog kennel with race-calibre dogs — the Iditarod and Yukon Quest aren't abstract here, they're the actual goal of these animals' training. The handlers walked us through the kennel, introduced us to the dogs, explained the racing culture and the bond between musher and team.

The puppies are the part nobody expects to be the highlight and absolutely is. Sled dog puppies are being trained and socialised from birth — they're confident, curious, and completely fearless with people. Sitting on the ground while a group of future Iditarod competitors climbs on you is not something you can adequately prepare for emotionally. Ketaki had to be physically separated from the puppies after 45 minutes. The rest of us had the same problem.

🐕 The Dogs

These aren't pets in the conventional sense — they're athletes. Lean, muscular, intensely focused when they hear "sled." But they're also deeply social animals who love human contact. The handlers let us spend real time with the dogs, not just a quick pat-on-the-head tourist experience. If you're going in September and the sledding isn't running, the kennel visit is still 100% worth booking.

The Aurora

Rest in the afternoon — you're going to be out until 4am. Dinner early, layers on, meet The Aurora Chasers in the evening. The guide service drives you away from Fairbanks to darker skies, monitors the KP index (the aurora activity forecast), and positions you for the best possible viewing.

We saw the aurora properly — not a faint shimmer but the full display. Green first, the most common colour, moving in waves across the sky. Then purple appearing at the edges. Then white. The lights don't stay still — they flow and pulse and occasionally explode in brightness. There's a moment watching the aurora where your brain simply runs out of the category "beautiful" and has to invent new ones.

We stayed out for three hours, the aurora fading and returning twice. Back to the Airbnb at 4am. Nobody was tired.

🌌 Aurora Tips

Download the SpaceWeather or My Aurora Forecast app — they show the KP index in real time. KP3+ is visible from Fairbanks, KP5+ is dramatic. September is good aurora season but not guaranteed — the guide service helps significantly by positioning you away from clouds and light pollution. Bring hand warmers; you'll be standing still outside for hours and the cold is real even in September. Camera settings: ISO 1600–3200, f/2.8, 10–15 second exposure.

Day 4

Chena Hot Springs → Fairbanks → Fly Home

Late start (4am night)→ Chena Hot Springs (~1 hr)→ Soak→ Fairbanks airport→ IAD

Late start after the 4am return. Chena Hot Springs is about an hour east of Fairbanks — geothermally heated water at around 106°F, outdoor pools surrounded by the Alaskan forest. You ease into water that's being heated by the earth itself, and the contrast — warm water, cold air, steam rising around you — is one of the more restorative physical experiences possible.

This is the right ending for the trip. After four days of glacier ice and northern lights and sled dog puppies and cold, cold air, sitting in hot water doing nothing is both physically necessary and emotionally correct. The trip slows itself down and lets you absorb what you've experienced before the flight home.

♨️ Chena Tips

The outdoor rock lake is the main experience — the indoor pool is fine but the outdoor one in the cold air is why you came. Bring a waterproof bag for your phone. The hot springs are at a resort so there's food, changing facilities, and proper amenities. Book ahead — it's popular and fills up on weekends. ~$30–50/person entry.

Back to Fairbanks for the evening flight. The flight from Fairbanks connects through Seattle or Anchorage back to Dulles — arrive home the next morning. Everyone on the flight slept immediately.

Logistics

Flights

IAD → ANC (Anchorage) with most major carriers connecting through Seattle or Chicago. Fairbanks has its own airport (FAI) — fly home from FAI rather than driving back to Anchorage, which saves 4 hours of driving. Alaska Airlines, United, and Delta all serve Anchorage from Dulles area.

Key Bookings — All Require Advance Planning

  • Glacier landing flight — book 2–3 months ahead, weather dependent, build flexibility into the schedule
  • Paws for Adventure kennel visit — pawsforadventure.com, book ahead especially for groups
  • The Aurora Chasers — theaurorachasers.com, essential for maximising aurora viewing
  • Chena Hot Springs — chenahotsprings.com, book the resort entry ahead
  • Denali Perch Resort — 1 night, comfortable lodge near the park entrance

Budget (per person, group of 5)

  • Flights (IAD → ANC, FAI → IAD): $400–700/person
  • Rental cars (2 cars, 4 days, split 5): ~$120–200/person
  • Gas (Anchorage → Denali → Fairbanks): ~$40–60/person split
  • Accommodation (Denali Perch + 3 nights Fairbanks Airbnb, split 5): ~$180–350/person
  • Glacier flight: $400–600/person
  • Aurora Chasers: $100–150/person
  • Dog kennel visit: ~$50–80/person
  • Chena Hot Springs: ~$40–50/person
  • Food (4 days): $50–80/day/person
🏔️
Going to the Sun Road Glacier NP

Glacier National Park —
The Crown of the Continent

Flew into Kalispell with Ketaki, my brother, and his parents — five people, four days. Rented a car through Turo rather than the usual airport counters, which saved meaningful money. Entered the park via West Glacier. Four full days covering the west side, the Going-to-the-Sun Road corridor, the St. Mary valley, Many Glacier, and Two Medicine. This is one of the most spectacular national parks in the US — the kind of place where every single day offers something completely different and every hike delivers views that make the effort feel like it was designed specifically to reward you.

🚗 Rent Through Turo

Skip the airport rental counters — Turo (peer-to-peer car rental) is significantly cheaper in Kalispell, especially for larger vehicles. You'll need a bigger car for 5 people plus gear. Book well ahead in summer; availability tightens fast. The Kalispell airport (FCA) is small and the drive to West Glacier entrance is about 35 minutes.

🎟️ Permits — Read This First

Glacier has a vehicle reservation system for Going-to-the-Sun Road (May–September) — you need a timed-entry permit to drive to Logan Pass. Book at recreation.gov starting in March. They also release day-before and day-of permits at 8am MT — set an alarm. Without a permit you park at Apgar or Avalanche and take the free park shuttle. The shuttle system actually works well and removes parking stress entirely.

How to Structure 4 Days

Glacier divides naturally into three distinct areas, each worth a full day: the west side (Apgar, Lake McDonald, Trail of Cedars, Avalanche Lake), the Going-to-the-Sun Road corridor + east side (Logan Pass, Hidden Lake, Highline Trail, St. Mary valley falls), and Many Glacier (the most dramatic section, deserves its own full day). With 4 days you can do all three properly plus Two Medicine as a half-day. This is the ideal length — enough to cover the park's major sections without rushing any of them.

Day-by-Day

Day 1

West Side — Apgar, Lake McDonald, Trail of Cedars, Avalanche Lake

West Glacier entrance→ Apgar Village→ Lake McDonald→ Trail of Cedars→ Avalanche Lake

Enter via West Glacier and head straight to Apgar Village on the south shore of Lake McDonald. Lake McDonald is 10 miles long and the most vivid teal-green you've ever seen a lake — the colour comes from glacially ground rock flour suspended in the water. Walk the shore, take the obligatory photos of the coloured pebbles through the clear water. The village has a small visitor centre, boat tours, and kayak rentals — good for an easy first morning before the hiking starts.

🚣 Lake McDonald

Rent a kayak or take the boat tour on Lake McDonald — floating on that teal water with the mountains rising on all sides is one of the quieter but more beautiful experiences in the park. The morning light reflects off the water before the afternoon wind picks up. Worth an hour before heading to the trailheads.

Afternoon: Trail of Cedars then Avalanche Lake. The Trail of Cedars is a flat boardwalk through old-growth cedar and hemlock forest — enormous trees, moss everywhere, Avalanche Creek running through a slot canyon alongside the path. Takes 20 minutes and is extraordinary. It connects directly to the Avalanche Lake trailhead.

Avalanche Lake hike (4.6 miles round trip, moderate) climbs through old-growth forest to a cirque lake surrounded by waterfalls pouring off the cliffs above. In summer the falls are full and the lake is impossibly clear. This is the best moderate hike on the west side — do it in the afternoon when the morning crowds have thinned. The trail gains 500 feet gradually and is well-maintained throughout.

🍣 Dinner Recommendation

Indah Sushi in Whitefish (20 minutes from West Glacier) — this sounds like an unlikely recommendation in rural Montana but it's genuinely excellent. Fresh fish, proper sushi, a completely different flavour profile from what you've been eating all day in the park. Worth the drive for a group dinner on Day 1.

Day 2

Going-to-the-Sun Road — Logan Pass, Hidden Lake, Highline Trail

Logan Pass (permit/shuttle)→ Hidden Lake Overlook→ Highline Trail→ Shuttle back

This is the big day. Going-to-the-Sun Road is one of the great drives in North America — 50 miles crossing the Continental Divide at Logan Pass (6,646 feet), hugging cliff faces, passing waterfalls, with views that are genuinely hard to process. If you have the vehicle permit, drive it slowly and stop at every pullout. If not, take the park shuttle from Apgar — it stops at all the major viewpoints and removes the parking nightmare at Logan Pass.

Logan Pass itself takes 1.5–2 hours to explore properly — the visitor centre, the wildflower meadows, and the mountain goats that wander through the parking area with complete indifference to humans. The views from the pass across the Garden Wall are the iconic Glacier shot.

Hidden Lake Overlook

From Logan Pass, the Hidden Lake Overlook Trail (2.7 miles round trip, easy-moderate) climbs through alpine meadows to a ridge above Hidden Lake. The boardwalk section goes through prime mountain goat and bighorn sheep territory — we saw both on this trail. The lake comes into view at the overlook and it's genuinely hidden until the last moment, framed by mountain walls on three sides. This is the right choice for a group with mixed hiking abilities — the reward-to-effort ratio is exceptional.

Highline Trail

The Highline Trail starts at Logan Pass and traverses the Garden Wall — a sheer cliff face with a cable assist section at the start (it's not as scary as it sounds, but it is exposed). The trail runs mostly downhill or flat for 11.8 miles to the Loop trailhead. Take the shuttle back up Going-to-the-Sun Road from the Loop to Logan Pass — this is the standard way to do it and works seamlessly. The views from the Highline are the best sustained views of any trail in the park — glaciers, peaks, valleys, the whole panorama for hours.

📷 Ketaki's Pick

The Highline Trail cable section at the very start — the narrow ledge traverse with the cliff dropping away below — looks terrifying in photos and is actually manageable with the cable. But it's the photography moment: the trail carved into the cliff face with the valley floor 1,500 feet below is the shot. Morning light hits this section perfectly. Don't rush through it.

🚌 Shuttle Strategy

Park at Apgar or St. Mary early (both have large lots). Take the free park shuttle to Logan Pass. Do Hidden Lake Overlook, then Highline Trail downhill to the Loop. Shuttle back to Logan Pass. This eliminates all parking stress and actually makes the day more efficient. The shuttles run every 15–30 minutes and are free with park entry.

Day 3

Many Glacier — Full Day

Many Glacier entrance→ Swiftcurrent Lake→ Grinnell Lake→ Grinnell Glacier Overlook→ Many Glacier Hotel

Many Glacier is the crown jewel of the park and deserves its own full day. Drive around to the northeast side — about 1.5 hours from West Glacier through St. Mary. The Many Glacier valley is where the park looks most like the Swiss Alps: multiple glaciers visible from the valley floor, the historic Many Glacier Hotel on the lake shore, waterfalls visible on every cliff face.

Many Glacier Hotel

The Many Glacier Hotel (1915) sits on the shore of Swiftcurrent Lake — stop inside regardless of whether you're staying there. The lobby has floor-to-ceiling windows looking directly at the Grinnell Glacier across the lake. The red buses (the historic touring vehicles) are based here — we saw them but didn't ride. They're the classic way to tour the park and worth booking if you're less interested in hiking.

Grinnell Lake

Grinnell Lake Trail (7.6 miles round trip, moderate) is the most popular hike in Many Glacier and deservedly so. The trail follows Swiftcurrent Lake and Lake Josephine before climbing to turquoise Grinnell Lake at the base of the glacier. The lake colour — fed by glacial meltwater — is an impossible blue-green that doesn't look real. You're looking directly at the Grinnell Glacier from the lake shore.

Grinnell Glacier Overlook

Continue above Grinnell Lake on the trail to the Grinnell Glacier Overlook (11.2 miles round trip total, strenuous) for the full glacier view. This is worth the extra miles if your group has the legs for it — standing at the overlook looking down at one of the last remaining glaciers in the park, knowing it will be gone within decades, is one of those moments that doesn't leave you. The scale of what's been lost is visible in the rock left exposed where the ice used to be.

🥾 Many Glacier Hiking Notes

Start early — Many Glacier is the most popular section and the parking lot fills by 8am in summer. Arrive before 7:30am or take the park shuttle from St. Mary. Bears are active in Many Glacier — carry bear spray (rentable at the visitor centre) and make noise on trail. We had a grizzly sighting from a distance on the Grinnell Lake trail. Keep the group together.

Day 4

St. Mary Valley Falls + Two Medicine

Virginia Falls + St. Mary Falls→ Two Medicine area→ Drive to Kalispell

Virginia Falls + St. Mary Falls

The St. Mary Falls / Virginia Falls Trail (3.6 miles round trip, easy-moderate) is one of the most rewarding short hikes in the park. St. Mary Falls is a multi-tiered cascade through a narrow gorge — the turquoise water against the orange rock is the postcard shot. Virginia Falls, a short distance further, drops into a wider bowl and is even more dramatic. The trail is accessible and the payoff per mile is higher than almost any other hike in Glacier. Good final morning hike for a group with varying energy levels after three days.

Two Medicine

Two Medicine is the least-visited major area in Glacier and completely worth the detour. The valley is quieter, the crowds are minimal, and the scenery is just as spectacular. Two Medicine Lake at the base of the mountains, the historic Two Medicine Camp Store (1913), and trails that feel genuinely remote compared to the busier sections. The Running Eagle Falls (Trick Falls) is a 0.6-mile flat walk to a waterfall that flows through a hole in the rock — unique geological feature, almost nobody in the park knows about it.

⏰ Day 4 Timing

Do St. Mary Falls early (trailhead opens at dawn), Two Medicine midday, and start the drive back to Kalispell by 3pm for a comfortable airport arrival. The Kalispell airport is small so 90 minutes before departure is enough — but FCA has limited evening flights so check your departure time carefully.

Logistics

Getting There

Fly into Kalispell (FCA) — the closest airport to the west entrance. United, Delta, and Alaska Airlines all serve FCA, usually connecting through Seattle, Denver, or Salt Lake. Rental from Turo rather than the airport counters — meaningfully cheaper, especially for a larger vehicle for 5 people. Book the Turo well ahead; summer availability is tight.

Where to Stay

Two options: stay near West Glacier (Airbnb, lodges, or campground) for easy west-side access, or split nights between west and east sides. For a group of 5 staying 4 nights, an Airbnb house in Whitefish or West Glacier is the most practical — kitchen, shared space, cheaper per person than the park lodges. Book 3–4 months ahead for summer.

Budget (per person, group of 5)

  • Flights (round trip to Kalispell): $350–600/person
  • Turo rental (4 days, large SUV, split 5): ~$80–120/person
  • Airbnb (4 nights, split 5): ~$100–160/person
  • Park entry ($35/vehicle): ~$7/person
  • Food (4 days): $40–70/day/person
  • Gas + misc: ~$30–50/person
⛷️
Dog Sledding Breckenridge Colorado

Colorado Winter —
Dogs, Hot Springs & Slopes

Valentine's trip 2025 — flew into Denver and based ourselves at Comfort Suites Golden West in Evergreen rather than staying in the city. Evergreen is a small mountain town 45 minutes from DEN that gives you easy access to everything in the Rockies without the Denver hotel prices or the ski resort premium. Six days: dog sledding in Breckenridge, hot springs at Hot Sulphur Springs, night skiing at Echo Mountain, Red Rocks at dusk, and a proper Breckenridge day before flying home. A winter Colorado trip done right.

🏨 Why Evergreen as Base

Comfort Suites Golden West on Evergreen Parkway — the right call for this trip. Evergreen puts you 45 minutes from Denver airport, 1.5 hours from Breckenridge, close to Echo Mountain, and in a proper mountain town rather than a ski resort. Cheaper than ski town accommodation, free breakfast, and the commute to each day's destination is part of the experience rather than a cost. Book well ahead for Valentine's weekend.

The Logic of This Trip

Colorado winter trips usually default to one ski resort for the whole trip — expensive, one-note, and you miss everything else the Rockies offer. This structure deliberately mixes it up: one day of dog sledding, one day of hot springs, one day of skiing, one day of town exploration. You get a full range of what a Colorado winter actually is, rather than just the ski-resort version of it. Evergreen as the base makes all of it accessible without paying resort-town prices for accommodation.

Day-by-Day

Day 1 — Feb 12

Arrive Denver → Evergreen → Red Rocks

DEN ✈→ Rent car→ Evergreen (~45 min)→ Red Rocks at dusk

Land at DEN, pick up the rental, and drive west toward Evergreen on I-70. Check into the hotel, drop bags, and head immediately to Red Rocks Park & Amphitheatre before it gets fully dark. Red Rocks at dusk in winter is one of those unexpected Colorado moments — the massive sandstone formations lit in orange and red by the setting sun, dusted with snow, completely empty of the summer concert crowds. Walk the trails around the amphitheatre. The silence and the scale are extraordinary.

🪨 Red Rocks in Winter

Most people know Red Rocks as a concert venue. In winter with snow on the rocks and nobody there, it's a completely different place. The Trading Post Trail (1.4 miles) loops around the formation and gives you the best views. Go in the last hour of daylight — the light on the red sandstone is the shot. Free entry, always open.

Dinner at The Fort Restaurant in Morrison if you want something special — historic mountain lodge, bison steaks, genuinely excellent food in a dramatic setting. Or keep it simple in Evergreen and save energy for the early start tomorrow.

Day 2 — Feb 13

Dog Sledding at Good Times Adventures, Breckenridge

Evergreen → I-70 W→ Breckenridge (~1.5 hrs)→ Good Times Adventures→ Town explore

Drive to Breckenridge early — the 11:30am reservation at Good Times Adventures means leaving Evergreen by 9:30am. The drive on I-70 through the Eisenhower Tunnel and into Summit County in winter is spectacular — mountains rising on both sides, ski runs visible on every peak, the highway climbing through the Rockies.

Good Times Adventures dog sledding: a 1-hour guided tour through the Colorado Rockies pulled by a team of Alaskan huskies. February means snow on the ground and the full experience. The dogs know what's coming the moment you arrive — pure focused energy, howling, pulling at the harnesses before you even get in the sled. The moment the team starts running and you're moving through a snowy forest track with the mountains above you, everything else disappears. Book the 11:30am slot to leave afternoon free for Breckenridge.

🐕 Good Times Adventures Tips

Book 4–6 weeks ahead for Valentine's weekend — it sells out completely. Dress warmer than you think you need to; you're sitting still on a sled while the wind hits you. The guides let you meet and interact with the dogs after the run — the huskies are incredibly social and this part is genuinely wonderful. goodtimesadventures.com.

Breckenridge Afternoon

After the dog sledding, spend the afternoon in Breckenridge town. The main street (Main Street, appropriately) is a well-preserved Victorian mining town turned ski resort — good food, independent shops, the mountain as a backdrop. The Crown Café for hot chocolate after the sled run. Walk around, browse the shops, have lunch somewhere on Main Street. Breckenridge in February is ski-town energy at its peak but the town itself is genuinely charming.

🍫 Crown Café

The Crown is a local Breckenridge institution — excellent coffee, exceptional hot chocolate, cozy interior. After an hour in the cold on a sled, this is exactly what you need. Get there before the afternoon ski crowd hits.

Day 3 — Feb 14 (Valentine's Day)

Hot Sulphur Springs

Evergreen → US-40 W→ Hot Sulphur Springs (~2 hrs)→ Soak→ Evergreen Lake ice skating→ Valentine's dinner

Valentine's Day, no alarm. Drive west on US-40 through the mountains to Hot Sulphur Springs Resort & Spa in Grand County — about 2 hours from Evergreen, passing through gorgeous mountain terrain. The springs have multiple pools at varying temperatures (96–112°F) fed by natural geothermal water, set against the Colorado River canyon.

This is a genuinely romantic way to spend Valentine's Day — outdoor pools with mountain views, the contrast of hot water and cold February air, steam rising off the pools in the winter light. The resort is not fancy (that's the point — it's rustic and real) but the experience is exactly right. Spend 2–3 hours, work through the different temperature pools, sit and exist for a while.

♨️ Hot Sulphur Springs Tips

Book ahead at hotsulphursprings.com — the resort fills up on weekends and especially on Valentine's Day. ~$30–40/person entry. Bring cash as backup. Towel rental available. The outdoor canyon pools are the ones to seek out — the views up the river valley are the best. Weekday rates are cheaper if you can be flexible.

Evergreen Lake Ice Skating

Back from Hot Sulphur Springs with time before dinner — Evergreen Lake is a naturally frozen lake right in town that becomes an ice skating rink in winter. This was one of the genuinely magical moments of the trip. Skating on a real frozen lake, snow falling, the mountain town around you, Christmas-light-style illumination after dark — it's the kind of experience that doesn't feel real while it's happening. Skate rentals available at the lake house. Free or minimal entry. Completely different energy from an indoor rink — this is the real thing.

⛸️ Evergreen Lake — Don't Skip This

This ended up being one of the best moments of the entire trip. A naturally frozen mountain lake, snow coming down, skating with the mountains in the background. It's five minutes from the hotel. There's no reason not to do this on any evening you're based in Evergreen. Check conditions at evergreenrecreation.com — they post daily ice status updates.

Valentine's Dinner

Drive back to Evergreen for dinner. The Bistro at Marshdale — intimate setting, seasonal menu, genuinely good food in a cozy mountain atmosphere. Make a reservation well in advance for Valentine's Day. Or Willow Creek Restaurant overlooking Evergreen Lake if you want the view with your dinner. Both are significantly less hectic than any restaurant in Denver on February 14th.

Day 4 — Feb 15

Echo Mountain — Skiing

Evergreen → Echo Mountain (~30 min)→ Afternoon + night skiing

Echo Mountain is 30 minutes from Evergreen — the closest ski resort to Denver and deliberately not trying to compete with Vail or Breckenridge. It's small, affordable, and beginner-friendly, with night skiing until 9pm Wednesday through Saturday. The lift ticket is a fraction of the big resorts, the runs are well-groomed, and the crowds are nothing like the I-70 corridor mountains.

For Ketaki as a beginner skier, this is the right call — the terrain is forgiving, the ski school is good, and the relaxed atmosphere removes the intimidation of learning at a big resort. Take the morning easy (no need to rush, Echo is close), arrive for the afternoon session, and stay for night skiing. The mountain under lights with the Denver city glow in the distance is a good Valentine's weekend send-off.

⛷️ Echo Mountain for Beginners

Echo is genuinely one of the best places in Colorado to learn to ski — small enough to not be overwhelming, close enough to not require a full day of driving, and affordable enough that if you hate it you haven't blown $200 on a lift ticket. The beginner terrain is well-separated from the more advanced runs. Rent equipment at the mountain — nothing special needed for a first day.

Day 5 — Feb 16

Breckenridge — Full Town Day

Evergreen → I-70 W→ Breckenridge (~1.5 hrs)→ Full day in town + mountain

Back to Breckenridge for a full day without the dog sledding schedule — more time to actually live in the town. Walk Main Street properly, check out the independent shops and galleries, grab a proper sit-down lunch. If you want to ski or snowboard the actual Breckenridge resort, this is the day — the mountain is world-class and now that you've had a day at Echo, the step up feels more manageable.

Or skip the skiing and just do the town — the gondola at Breckenridge runs for sightseeing in winter and gives you mountain views without the ski commitment. The Peak 8 gondola takes you up with views of the Ten Mile Range. Walk the Victorian-era town centre, find somewhere to have mulled wine or hot cider, and absorb the mountain town energy properly.

🍕 Dinner in Breckenridge

Beau Jo's in Idaho Springs (on the drive back toward Evergreen) is the Colorado institution worth stopping for — their mountain pies (pizza) are a Colorado-specific thing, honey on the table for the crust, hearty portions. Good halfway-home dinner that avoids the Breckenridge premium pricing.

Day 6 — Feb 17

Brunch → Denver Airport → Fly Home

Evergreen → Denver→ Brunch→ DEN ✈

Relaxed morning — no need to rush until about noon. Drive into Denver for brunch before the airport: Snooze AM Eatery is the reliable choice — creative pancakes, proper eggs benedict, good coffee, multiple Denver locations. Or Denver Biscuit Co. for something more casual. Be at DEN by 2pm for a 4pm departure — Denver airport is large and security lines are real, especially on holiday weekends.

Logistics

Flights + Car

Fly into DEN (Denver International) — well-served from IAD/DCA on United and Southwest. Rent a car at the airport — you need it for every day of this trip. AWD or 4WD strongly recommended for February mountain driving; the rental counters in Denver usually have good availability but book ahead for holiday weekends.

🌨️ Colorado Winter Driving — Read This

It snowed every single day of our trip. Colorado doesn't stop for snow — CDOT (Colorado Department of Transportation) ploughs the mountain highways fast and well, and I-70 stays open through almost anything. But conditions can change quickly, especially on the passes. Before any mountain drive: check cotrip.org for live CDOT road cameras — you can see actual current conditions on every major pass before you leave. If you're unsure whether to go, check the cameras first. AWD + snow tires (or carry chains as backup) is non-negotiable in February. Drive slower than you think you need to on mountain roads and give extra stopping distance. That said — don't be scared off by snow forecasts. Colorado handles it.

Key Bookings

  • Good Times Adventures dog sledding — goodtimesadventures.com, book 4–6 weeks ahead for Valentine's weekend
  • Hot Sulphur Springs — hotsulphursprings.com, book ahead for Feb 14th
  • Valentine's dinner (Bistro at Marshdale or Willow Creek) — reserve at least 2 weeks ahead
  • Echo Mountain lift tickets — echomountainresort.com, buy online for discount
  • Hotel (Comfort Suites Golden West, Evergreen) — book 4–6 weeks ahead for Valentine's weekend

Budget (per couple)

  • Flights (IAD round trip, 2 people): $400–700
  • Hotel (5 nights, Comfort Suites): $700–1,000
  • Rental car (5 days, AWD): $300–500
  • Dog sledding (2 people): ~$300–400
  • Hot Sulphur Springs (2 people): ~$60–80
  • Echo Mountain lift tickets (2 people): ~$80–140
  • Food (6 days): $60–120/day
For Indian travellers

Tips &
Guides

The practical stuff no generic travel blog covers.

01
🛂
Visa Strategy for Indians

Visa-free countries, Schengen stacking, how to apply for B1/B2, and exactly what the US consulate wants from an Indian passport holder.

Read full guide →
02
🍽️
Food for Indian Palates Abroad

We eat everything and we find the best local food wherever we go. We also document veg-friendly spots because we know not everyone travels like us. Indian taste buds, covered either way.

Read full guide →
03
✈️
Visa & International Travel

What documents to carry, visa stamp situations, automatic revalidation for Canada/Mexico, and how to plan international trips without the anxiety.

Read full guide →
04
💳
Credit Cards & Budget Strategy

Chase Sapphire vs Amex Platinum for Indians in the US, the $300 travel credit, points strategy, and how we cover $6,000+ of travel per year largely on rewards.

Read full guide →
05
📋
The Master Packing List

Honed across 15+ international trips. Carry-on strategy, checked bag breakdown, road trip car kit, and the things everyone always forgets.

Read full guide →
06
🗺️
How We Plan Every Trip

The full planning workflow: Google Flights matrix, hotel booking windows, saved Maps lists, day-by-day spreadsheets, and the itinerary template we use every single time.

Read full guide →
07
🏕️
US National Parks 101

The America the Beautiful pass, recreation.gov timed-entry permits, lottery vs first-come systems, campground booking, and which parks need how much advance planning.

Read full guide →
08
📸
Travel Photography

Ketaki shoots on Sony A7 III + iPhone 15 Pro. Composition tips for landscapes, golden hour schedule by season, the editing workflow, and what gear actually makes the bag.

Read full guide →
09
🛡️
Travel Insurance Guide

What coverage you actually need, what your credit card already covers, and what to buy separately. The claim process, documented from our own experience.

Read full guide →
US
Tushar and Ketaki 👫
Ketaki with camera 📷
Since2022
The team behind The Safar Blueprint

Tushar
& Ketaki.

"He builds the plan. She captures the moment."

We're Tushar and Ketaki — a software engineer and a security engineer from India, now based in Virginia. Married in 2025 across three ceremonies (US, Chandigarh, Pune — we don't do anything halfway), we travel the way we do everything else: with a system.

Tushar engineers every detail. Permits booked the moment they drop, spreadsheets 8 tabs deep, restaurant lists sorted by proximity and dietary filter, backup plans for the backup plan. Ketaki shows up, finds the frame nobody else notices, and turns every ordinary moment into something worth keeping.

The Safar Blueprint exists because we couldn't find travel content that was genuinely practical — the visa logistics, finding food that actually tastes like something when you're abroad, the permit systems nobody explains clearly, the credit card strategy that saves thousands. So Tushar built the system. That's The Safar Blueprint.

0+Countries
0+Trips Logged
Where we've been

Our World Map

Saffron = visited  ·  Gold = upcoming  ·  Click a country to explore its itinerary.

Visited
Upcoming
Not yet
Quick access

Resources &
Visa Guide

Practical tools for Indian travellers — updated regularly.

Updated 2026
🌍
Visa-Free Countries for Indians

60+ destinations your Indian passport opens without pre-approval — includes visa-on-arrival and e-visa options.

High Priority
🏕️
National Park Permits Guide

Recreation.gov timed-entry system, lottery permits, the America the Beautiful pass, and park-specific booking windows.

Visa Travel
✈️
Visa Travel Checklist

Documents to carry, automatic revalidation for Canada/Mexico, and re-entry prep for various visa situations.

Save Money
💳
Credit Card Comparison

Chase Sapphire Reserve vs Preferred vs Amex Platinum for Indians in the US — points, travel credits, and lounge access compared.

Printable
📋
Master Packing List

Carry-on, checked bag, road trip kit, and electronics list. Customizable by trip type.

Apps
📱
Travel Apps We Use

Maps.me, Roadtrippers, Hopper, Splitwise, Google Translate offline, GasBuddy — the full stack.

Indian passport

Visa-Free & Visa-on-Arrival

Note: applies to Indian passport holders. Additional destinations may be accessible with a valid US visa/status.

CountryRegionTypeStay Limit
ThailandSoutheast AsiaVisa on Arrival30 days
Indonesia (Bali)Southeast AsiaVisa Free30 days
MalaysiaSoutheast AsiaVisa Free30 days
Sri LankaSouth Asiae-Visa30 days
NepalSouth AsiaVisa FreeUnlimited
BhutanSouth Asiae-VisaVaries
MaldivesSouth AsiaVisa on Arrival30 days
MauritiusAfricaVisa Free60 days
KenyaAfricae-Visa30 days
FijiPacificVisa Free4 months
JamaicaCaribbeanVisa Free30 days
QatarMiddle EastVisa on Arrival30 days
CambodiaSoutheast AsiaVisa on Arrival30 days
JordanMiddle EastVisa on Arrival30 days

Visa rules change frequently. Verify at the official embassy or IATA Travel Centre before booking.